Arc XP Subscriptions Theme Blocks configuration & Customization Deep Dive
Subscriptions blocks are Arc Blocks that can be used together to create a front-end Sales experience powered by Arc Subscriptions on the back-end. The Subscriptions Theme blocks that can be used together or independently to create your desired checkout flow and subscription management experiences. You can use them as-is or as a starting point to customize by Forking A Theme Block.
How do I use the Subscriptions blocks?
Sales blocks can be added to your site using PageBuilder. They can be used in conjunction with Paywall or Identity blocks, or independently. Subscription blocks allow you to quickly implement functionality provided by Arc XP Sales, such as purchasing and managing subscriptions that grant users access to your website and its content.
Do I have to use Arc XP Sales? Can I bring my own?
The Subscriptions blocks are designed to work with Arc XP Sales ans Arc XP Retail. In turn, Arc XP Sales works hand in hand with Arc XP Identity.
What are the limitations of the Subscriptions blocks?
While the Subscription blocks cover many use cases related to purchasing and managing subscription experiences, there are some front-end aspects they do not cover, including:
- Managing subscription details – The Subscriptions Profile Management – Arc Block provides a list of subscription details such as the subscription state (e.g., active, terminated, cancelled), subscription ID, billing address, term dates, and options to cancel or re-subscribe. This flow is optional and can be enabled or disabled based on your business needs. However, it does not include managing flows like downgrading or upgrading subscriptions, sharing subscriptions, managing email group subscriptions, among others.
- Supported payment gateways – The Subscriptions Checkout – Arc Block supports Stripe Intents as an example payment gateway. If Apple Pay and/or Google Pay are enabled as wallets on your Stripe account, those options will also be available. Any payment gateway other than these must be implemented on your own.
Configuration required to use Arc XP Subscriptions blocks
Before we start learning how to use Subscription blocks, some housekeeping is required. First, ensure that the correct configurations for the Sales blocks are in place. You will need to create a new build with the desired version under Theme Settings. Once the build is created, you can edit the theme settings to configure the Subscription blocks.
Before we start learning how we can use Subscriptions blocks we need to do some house keeping. The first thing we need to do is make sure we have the correct configurations for the Sales blocks. You will have to create a new build with the version you would like to use under Theme Settings. Once you have created the build you can edit the theme settings for the Subscriptions blocks.
After saving these settings, you can complete the build. At this point, you’re ready to begin adding your Subscription blocks.
Subscriptions Blocks
The Subscription block package consists of five blocks that can be used to configure the checkout and subscription management experiences. These blocks guide the end user through the purchase flow and support basic management actions such as:
- View offer details
- Canceling or re-subscribing
- Updating the payment method
- Viewing basic subscription details (e.g., billing address, billing period, subscription ID, and subscription status, among others)
Using the blocks included in the Subscription block package, it’s easy to create these experiences in a modular and configurable way.
| Arc Block(s) in PageBuilder | Experience/Functionality |
|---|---|
| Subscriptions Offer - Arc Block | Products and prices available in an offer. |
| Subscriptions Checkout - Arc Block | Guide the user through the checkout process and provide a summary of the purchase. |
| Subscriptions Update payment method - Arc Block | Provides a view that allows the end user to update the payment method for an active subscription. |
| Subscriptions Profile Management - Arc Block | Lists subscription details for the current user, and certain flows (e.g., cancel and re-subscribe) can be enabled for each active subscription. |
| Subscriptions Paywall - Arc Block | Displays a modal that prevents the end user from reading the content when the regwall or paywall is triggered. |
By typing ‘Subscriptions’ in the search bar for blocks, you will be able to see all the available Subscriptions blocks
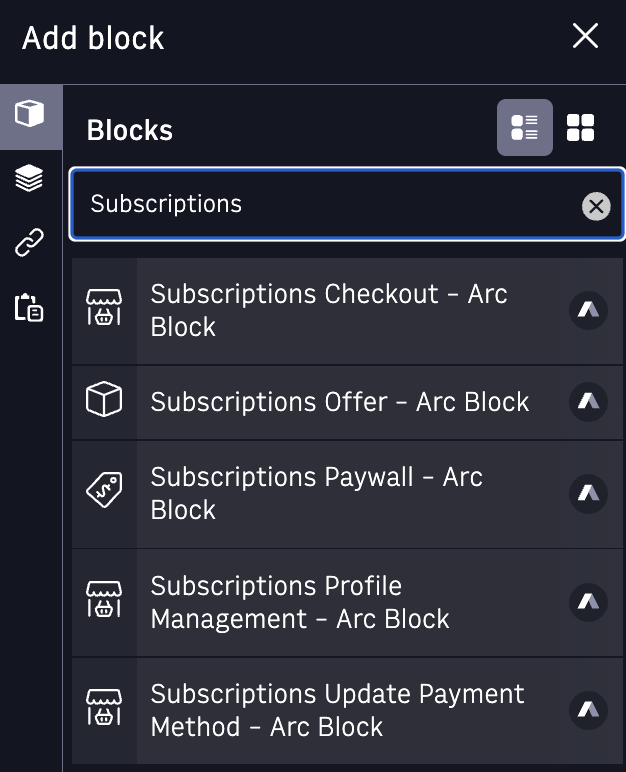
The Subscriptions Arc Blocks are used to create several new pages (Offer, Checkout, Subscription profile Management).
Subscriptions Offer - Arc Block
The Subscriptions Offer – Arc Block is placed on a page where the available offers are displayed to the end user.
When the user lands on this page, the offer details based on the campaignCode are retrieved internally, and various details about the products and prices included in the offer created in the Arc XP Admin are displayed. This is the starting point of the checkout flow, as this is the point where an item is added to the cart.
If you are using the Arc Blocks, only a single item can be in the cart at a time. If a different product and price is selected, the cart is emptied internally and the new item is added.
To get started, first set up an Offer Page using the ‘Subscriptions Offer - Arc Block’
- In PageBuilder, click Create Page.
- Set Page Name. e.g.
Offer - Set Page URI. e.g.
/offer/ - In the Setup tab, under Layout, select either
Single Column - Arc Layoutor another layout of your preference. - In the Curate tab, add the
Subscriptions Offer - Arc Blockto the main section
After publishing the Offer page, a user will be able to see the offer details and, by selecting one of the products/prices, add an item to the cart. An offer can contain multiple products and prices, all of which should be displayed as part of the offer.
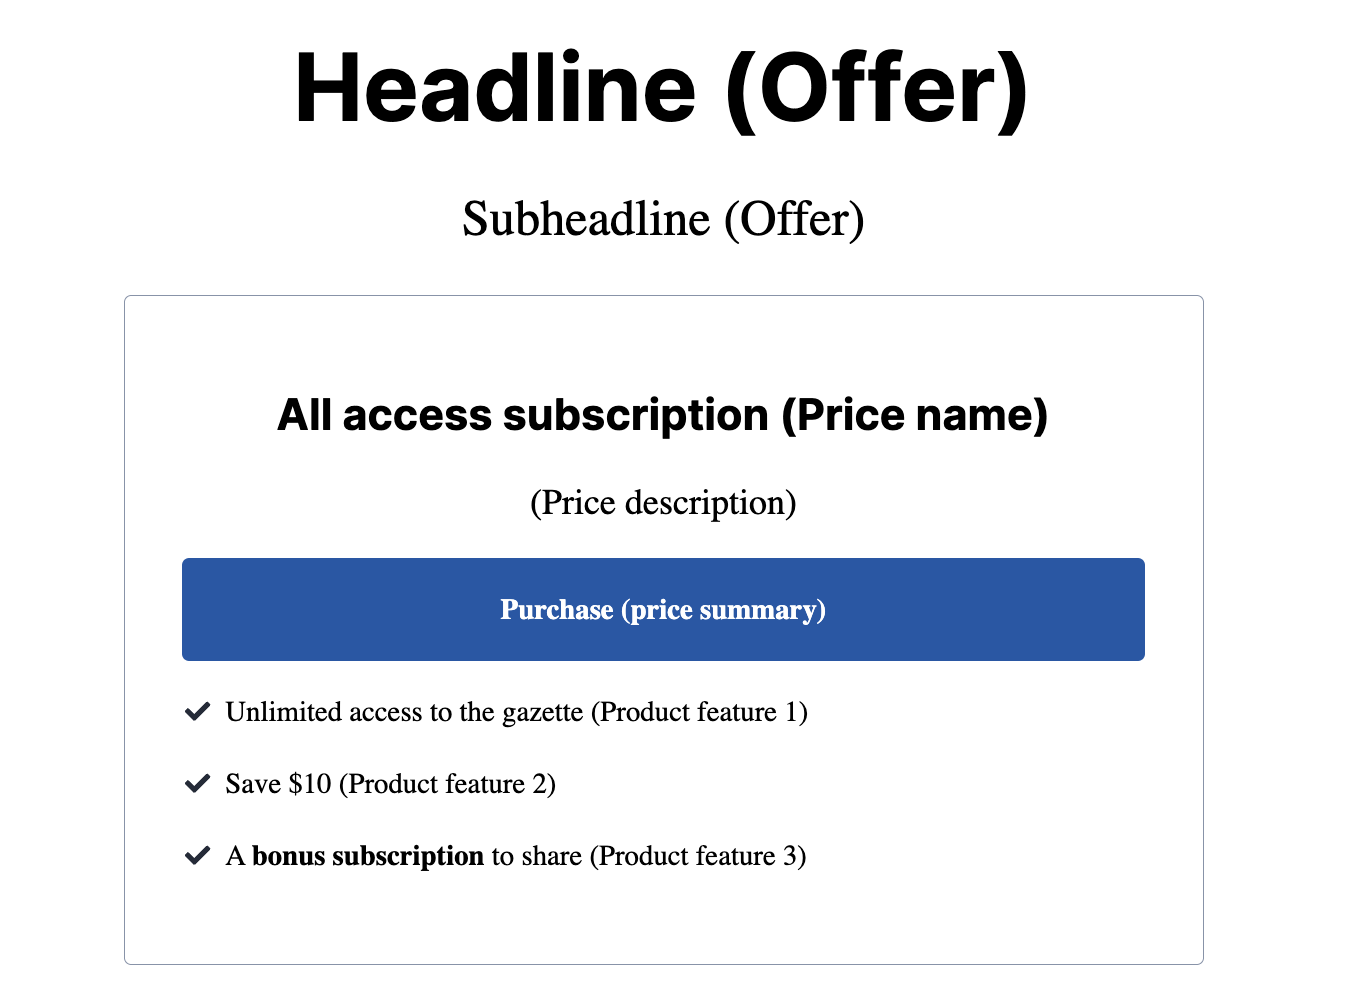
To make this block work, you need to have at least one offer published by default. Some of the information configured for the offer, product, and prices will be displayed in the block. For example, the block will display the offer headline and subheadline. For each product/price included in the offer, it will show the price name and description. The button will render the text entered for the price summary, and all product features will be displayed as a list.
The Subscriptions Offer - Arc Block includes the following custom fields that an admin can configure:
| Custom field | Description |
|---|---|
| campaignCode | This is set to ‘default’ by default, but you can specify any campaignCode for a published offer. The details for that offer will then be rendered accordingly. |
| loginURL | With our blocks, the checkout flow can only be completed by a logged-in user. Therefore, you need to set the login URL here. If the user is not logged in, clicking on a product/price will redirect them to the login page. Otherwise, they will be taken to the checkout page. |
| checkoutURL | The checkout page to which the user will be redirected after selecting a product/price, if they are already logged in. |
Subscriptions Checkout - Arc Block
The Subscriptions Checkout – Arc Block is placed on a page where the end user is guided through the checkout flow. When the user lands on the checkout page, one of three scenarios may have occurred:
- The user selected a product/price and added an item to the cart while logged in.
- The user selected a product/price while not logged in, creating an anonymous cart.
- The user previously reached the checkout page and left with pending orders.
Our block performs internal validations to ensure a seamless checkout experience.
When the user lands on the checkout page, the system first checks whether there is a cart associated with the current user:
- If a cart exists, the user is taken to Step 2: Billing Address.
- If no cart exists, and the user was previously anonymous, there is no way to transfer the
anonymous cartto the logged-in session. To address this, we store the product/price details selected (along with the timestamp of the action) in local storage.
Upon loading the checkout page, we check both local storage and any pending orders. If data exists in both sources, we compare the timestamps and select the most recent, only if the date is no more than 2 days old.
- If the most recent entry is the item stored in local storage, a new cart is created using that product/price, and the user is taken to Step 2: Billing Address.
- If the most recent entry is a pending order, the system retrieves the order information (e.g., order number), and the user is taken to Step 3: Payment.
On this page, the user will go through five different sections:

-
Account: Provides information about the user if they are already logged in.
-
Billing address: The user must enter their billing address information, and by clicking
Continue, an order is created. reCAPTCHA is required during the call toSales.createOrder()if it is enabled for checkout. In this case, we render reCAPTCHA v2 or v3, depending on the configuration settings. -
Payment: In this step, the end user has the option to select a payment method: a) Enter credit or debit card information. b) Select Google Pay or Apple Pay. c) Select PayPal.
These options will appear based on the payment gateways configured for the tenant (Organization + Site) in the Admin tool. The
Subscriptions Checkout – Arc Blocksupports Stripe Intents (and their integrations with Apple Pay and Google Pay).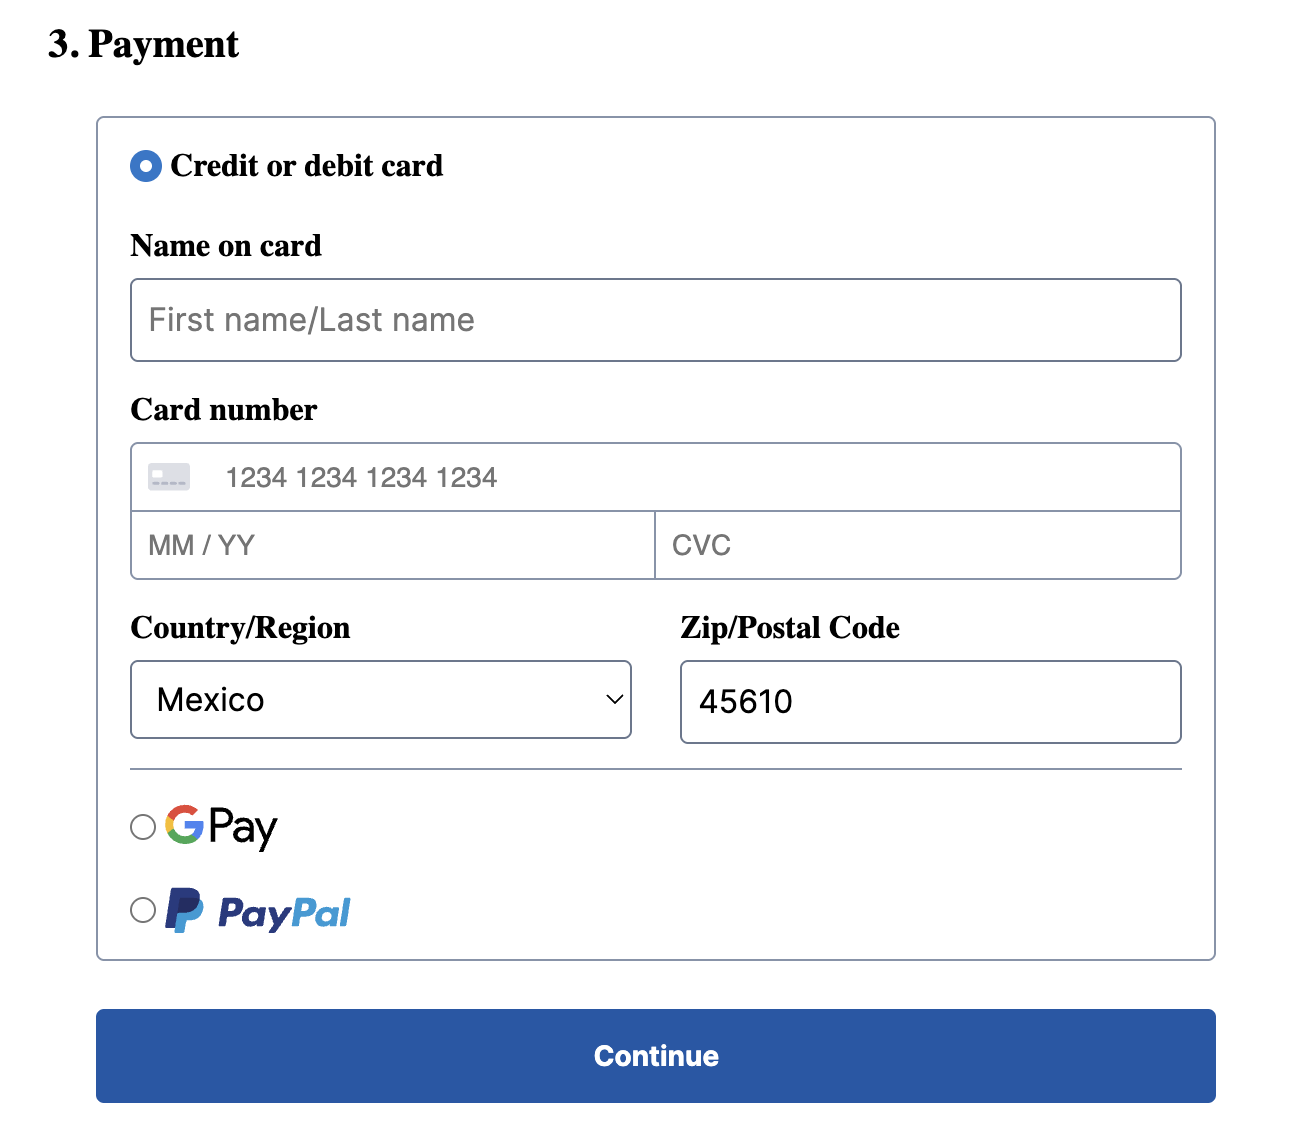
If the end user selects option a), they will need to enter their credit or debit card information. If option b) is selected, the user must consent to the payment. If option c) is selected, clicking the payment button will redirect the user to an external page (e.g., PayPal), where they must approve the payment from their PayPal account.
Internally, on this step, a call to
Sales.initializePayment()is done. -
Review: In this step, the end user will see information about the current order, and the system will display details about the automatic renewal terms. If the user agrees to the payment by clicking
Pay, a call toSales.finalizePayment()is made internally. If it is successful, the payment is completed, a subscription is started, and the user is redirected to a success page based on the defined custom attribute.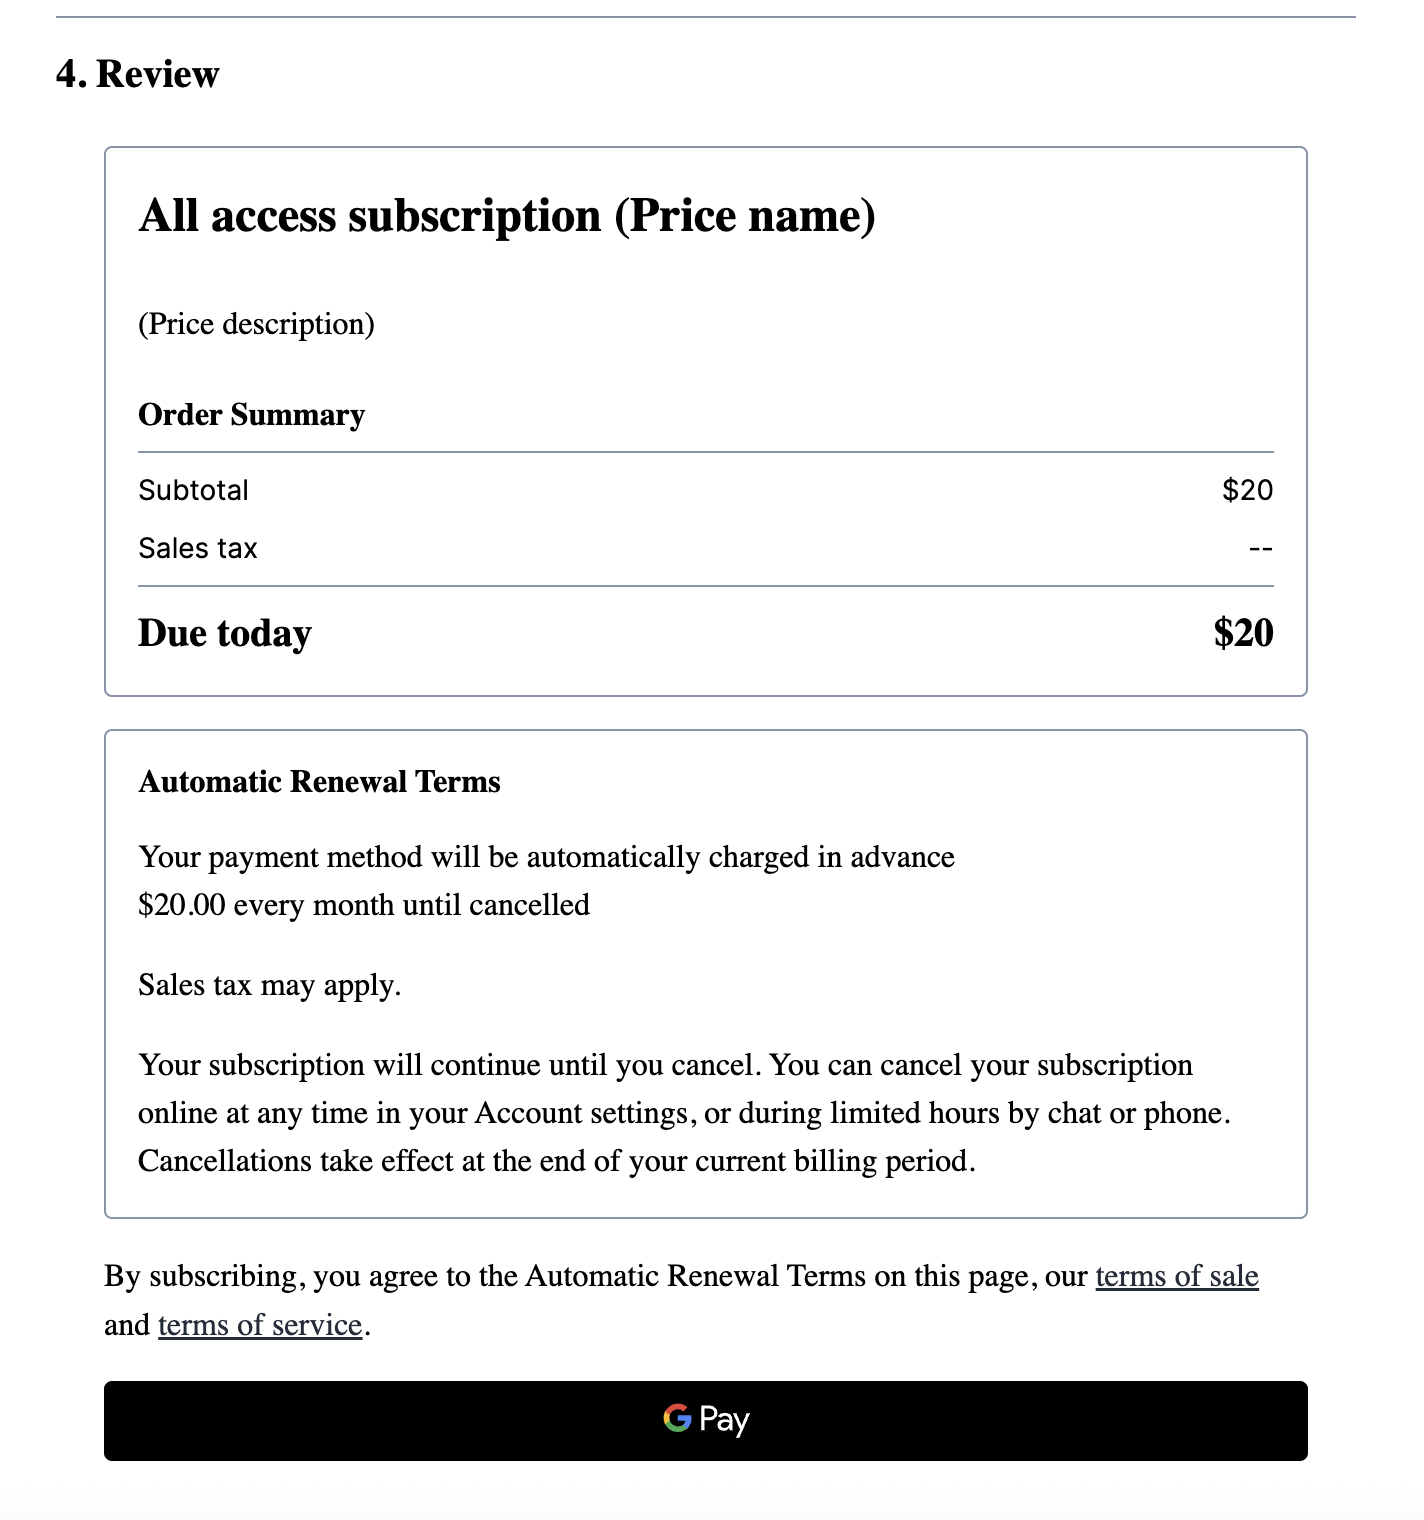
-
Cart/Order detail: In the vertical panel on the right side, the end user will see details about the item added to the cart from the offer page. Once the billing address is entered, the cart item becomes a pending order. The details shown include the price name, product features, subtotal, taxes, and total. There is also a link that allows the end user to return to the offer page in case they want to select a different product or price.
The Subscriptions Checkout – Arc Block includes the following custom fields that an admin can configure:
| Custom field | Description |
|---|---|
| login URL | With our blocks, the checkout flow can only be completed by a logged-in user. Therefore, you need to set the login URL here. If the user is not logged in, they will be redirected to the login page. |
| Offer URL | The offer page to which the user will be redirected if there is no item in the cart and no recent pending order exists. |
| Success URL | The page to which the user will be redirected after the payment is completed. |
| Stripe Intents - Provider ID | As a customer, you may have multiple Stripe Intents payment gateways configured in the Admin tool. If that is the case, define the provider ID to be used on this page. |
| Terms of Sale URL | Set up a Sales URL if you have a page where the terms of sale are described in detail. |
| Terms of Service URL | Set up a Service URL if you have a page where the terms of service are described in detail. |
| Title Apple Pay - Google Pay | You can set up a custom title to be shown on the modals for Apple Pay and Google Pay wallets. This is a required field. |
Subscriptions Update payment method - Arc Block
The Subscriptions Update payment method - Arc Block is placed on a page where the user can update their payment method.
Sometimes, payment methods need to be updated due to renewal failures — for example, if the payment method has expired, the user wants to switch to a different one, or for other reasons.
To see this block in action, the paymentMethodID search parameter must be present in the URL. This block works similarly to the Subscriptions Checkout – Arc Block. The user will be required to enter their new card details.
Subscriptions Profile Management - Arc Block
The Subscriptions Profile Management - Arc Block is placed on a page where the user can view details about their subscriptions. This block will only render details for paid subscriptions.
The subscription details are displayed as a list, with each subscription presented in its own card.
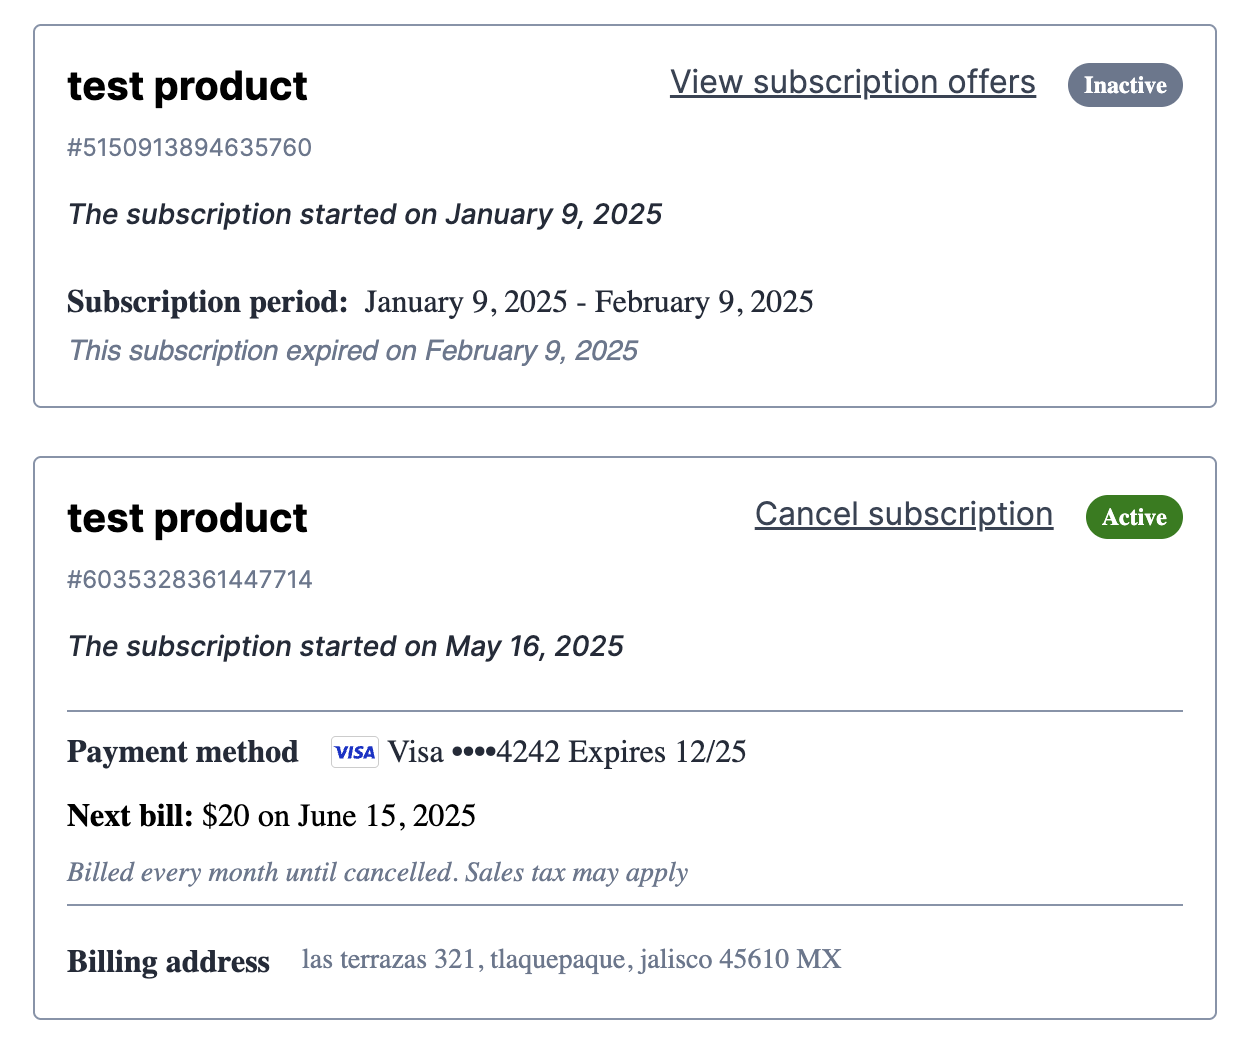
For each subscription, the product name, subscription ID, and the start date are displayed
- If the subscription is terminated:
- A link to
View subscription offeris displayed. - An
Inactivebadge is shown.
- A link to
- If the subscription is active:
- A link to
Cancel subscriptionmay be displayed, depending on whether theShow cancel linkcustom attribute is enabled. - An
Activebadge is shown.
- A link to
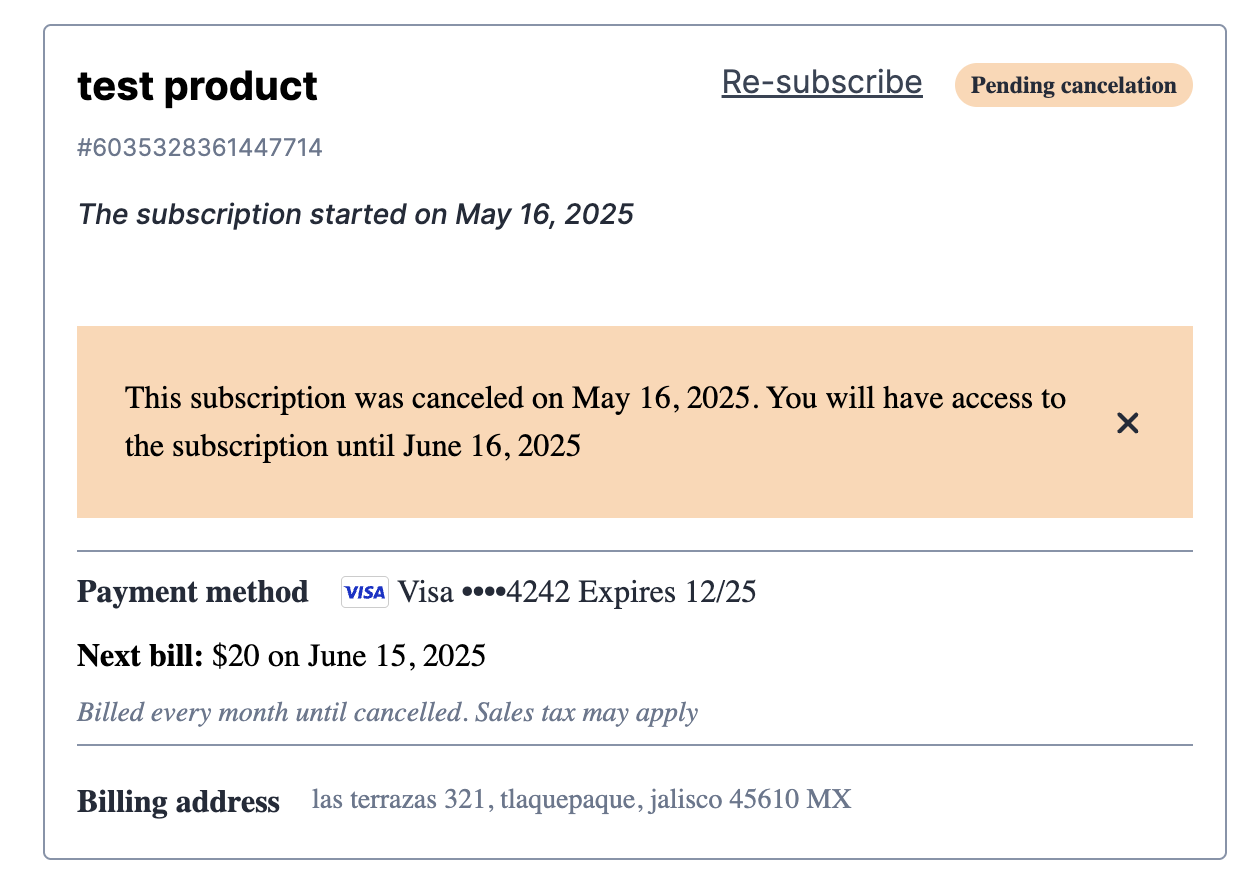
- If the subscription is in cancelled status:
- A link to
Re-subscribemay be displayed, depending on whether theShow resubscribe linkcustom attribute is enabled. - A
Pending cancellationbadge is shown. - Additional information about when the subscription will be terminated is also displayed.
- A link to
- If the subscription is in
ActiveorCancelledstatus:- Basic information about the payment method, next billing date, and billing address is provided.
The Subscriptions Profile Management - Arc Block includes the following custom fields that an admin can configure:
| Custom field | Description |
|---|---|
| Offer URL | The offer page to which the user will be redirected if there is no item in the cart and no recent pending order exists. |
| Show cancel link | If turned on, a link to Cancel subscription is displayed. |
| Show resubscribe link | If enabled, a link to Re-subscribe is displayed. |
Subscriptions Paywall - Arc Block
The Subscriptions Paywall - Arc Block runs on different articles, so a specific page is not created for it. Instead, we need to append this block to a template.
The following steps may vary depending on the resolvers you intend to use to read the articles. However, this guide is based on the default settings provided by Composer and Page Builder.
Prerequisites
- Have a paywall deployed. Go to the Subscriptions Admin tool and check under the Paywall tab to verify that an active paywall is deployed.
- Ensure the Retail Script is set up. Confirm that the
Retail Scriptis properly configured. (Review Themes settings) - Have articles created in Composer. For each article, review the
Website URLunder theMetadatatab. TheWebsite URLdetermines which resolvers you need to use in Page Builder. For example, in our testing environment, an article might have a Website URL like/2022/03/10/what-a-day/. In general, theWebsite URLsfollow the format/YYYY/MM/DD/article-name/
Loading and executing the p.js in articles
Follow the next steps to have the paywall running on your articles:
-
Set up an output type. This output type will have the code needeed to load the
p.jsscript every time an article is read. The output type needs to be set up under thecomponents/output-types/folder in the repo.import React from 'react'...const PwsOutputType = (props) => {const scriptSrc = useScriptSrc()return (<html><head><title>{props.metaValue('title')}</title><props.MetaTags /><props.Libs /><script src={scriptSrc} async id="p-tag"></script><props.CssLinks /><link rel='icon' type='image/x-icon' href={props.deployment(`${props.contextPath}/resources/img/favicon.ico`)} /></head><body><div id='fusion-app' >{props.children}</div><props.Fusion /></body></html>)}const useScriptSrc = () => {const scriptSrc = `${Domain | Web CDN}/arc/subs/p.js` // Retail Scriptreturn scriptSrc}export default PwsOutputType -
Create a template.
- In PageBuilder, click on
TemplatesandCreate Template. - Set template name. e.g.
Article template- In the Setup tab, under Layout, select either
Single Column - Arc Layoutor another layout of your preference. - In the Curate tab, in the footer add the
Subscriptions Paywall - Arc Block
- In the Setup tab, under Layout, select either
- In PageBuilder, click on
-
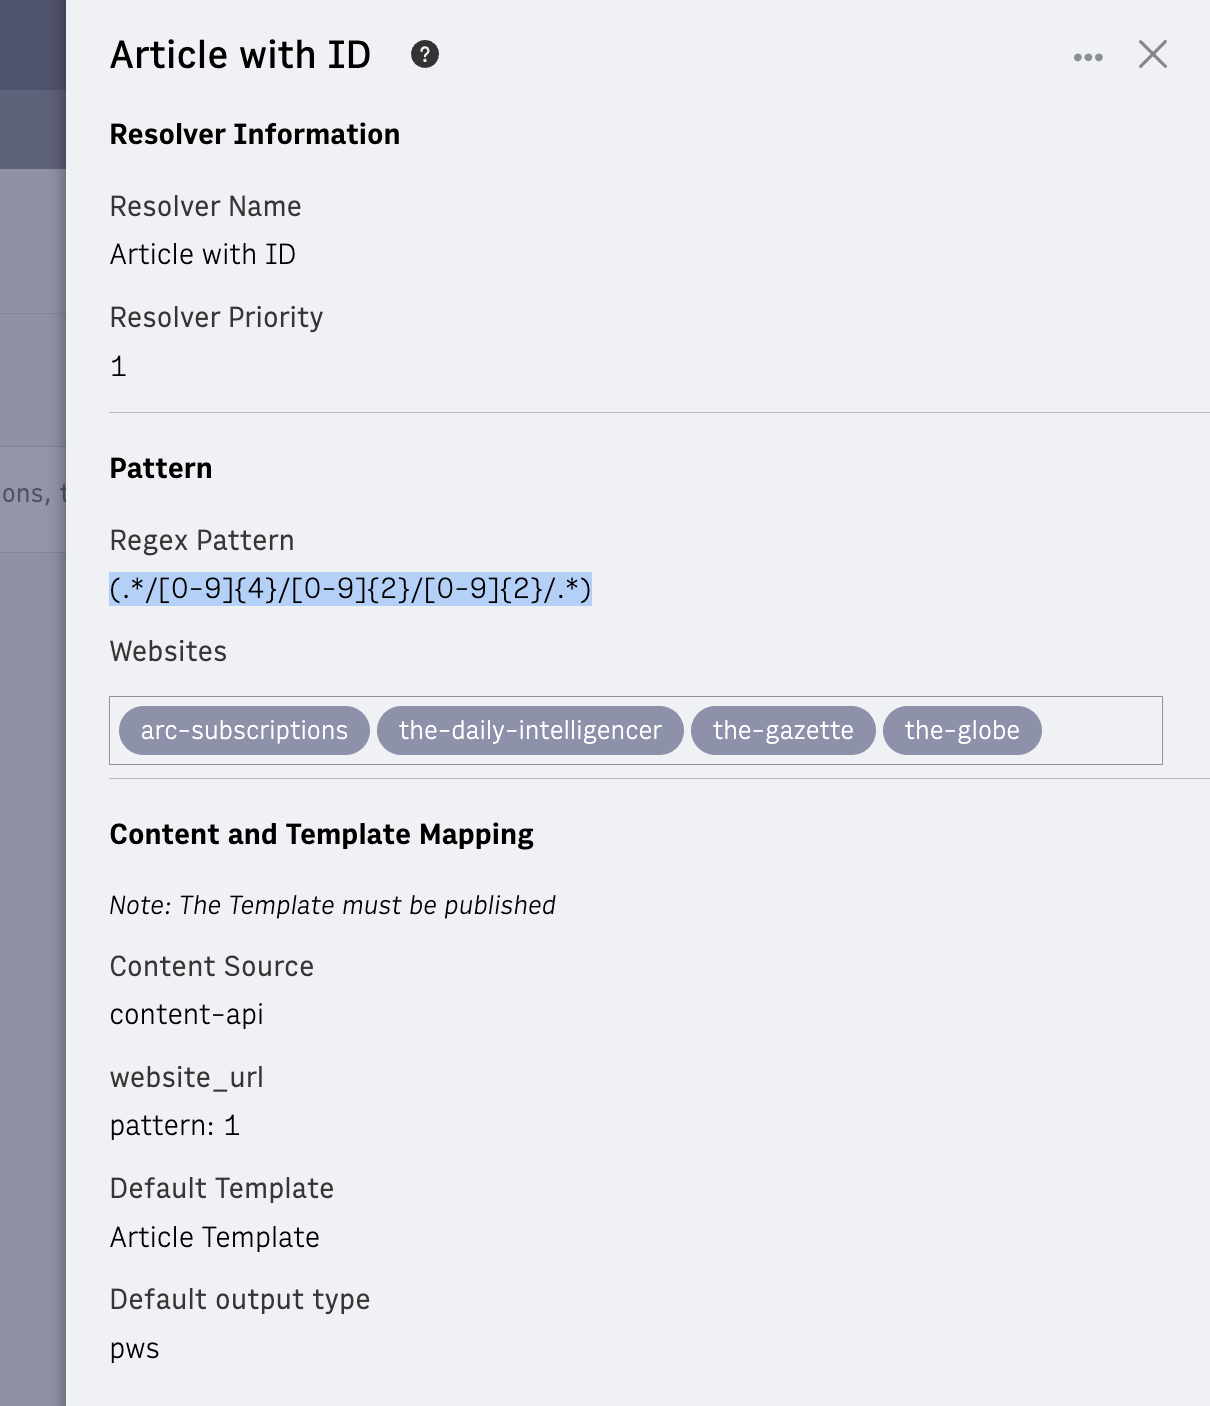
Set up a Resolver. In Page builder, go to Resolvers tab under Developer tools, and create a new resolver.
- The resolver should contain a regex pattern based on the
Website URL(e.g., (.*/[0-9]{4}/[0-9]{2}/[0-9]{2}/.*)). On this way you can ensure the p.js will be loaded and executed only on the pages/articles following this pattern instead of every single page. - Select the template and output type created in the previous steps.
- The resolver should contain a regex pattern based on the
Once the previous steps have been completed and published, the ArcP object should appear in localStorage when reading the first article. The rules will then be evaluated according to the configuration defined in the p.js, and either a regwall or paywall should pop up depending on those rules.
Refer to the Developers guide to setting up a Paywall to understand how the paywall works.
The Subscriptions Paywall - Arc Block includes the following custom fields that an admin can configure:
| Custom field | Description |
|---|---|
| Preview | By selecting Show Registration Wall or Show Payment Wall, you can preview the popup in Page Builder without needing to run the rules. |
| Log In link text | An text to be displayed as a link to the login page. |
| Log In link URL | The login URL to wich the end user is redirected. |
| CTA button text | The text to be displayed in the button. |
| CTA button URL | The URL to wich the end user will be redirected when clicks on the button. |
| Log In text for paywall, Reason prompt text, Header Text, Subheader Text | Text to be displayed on the pop up. |