How to add Stripe Intents as a payment provider
Stripe Intents is a powerful API provided by Stripe, designed to simplify and secure the process of accepting online payments.
Prerequisites
-
Add Stripe Intents as a payment provider through the Admin tool.
-
Verify domain(s): Stripe Intents supports
Apple Pay,Google Pay, among others as wallets. To provide these payment options to your end users, you need to enable them in the Stripe Developer Console. Our Theme blocks will renderApple Pay(Safari) orGoogle Pay(on the web) options automatically if they are enabled. In this guide, we will show you the code required in case you want to implement the Stripe Intents form by your own.
To enable Apple Pay and/or Google Pay as wallets
-
Enable Apple Pay & Google Pay: In Stripe developer console, go toSettings, click onPayments, then selectPayment methods. In the “Wallets” section, enable “Apple Pay” and/or “Google Pay”.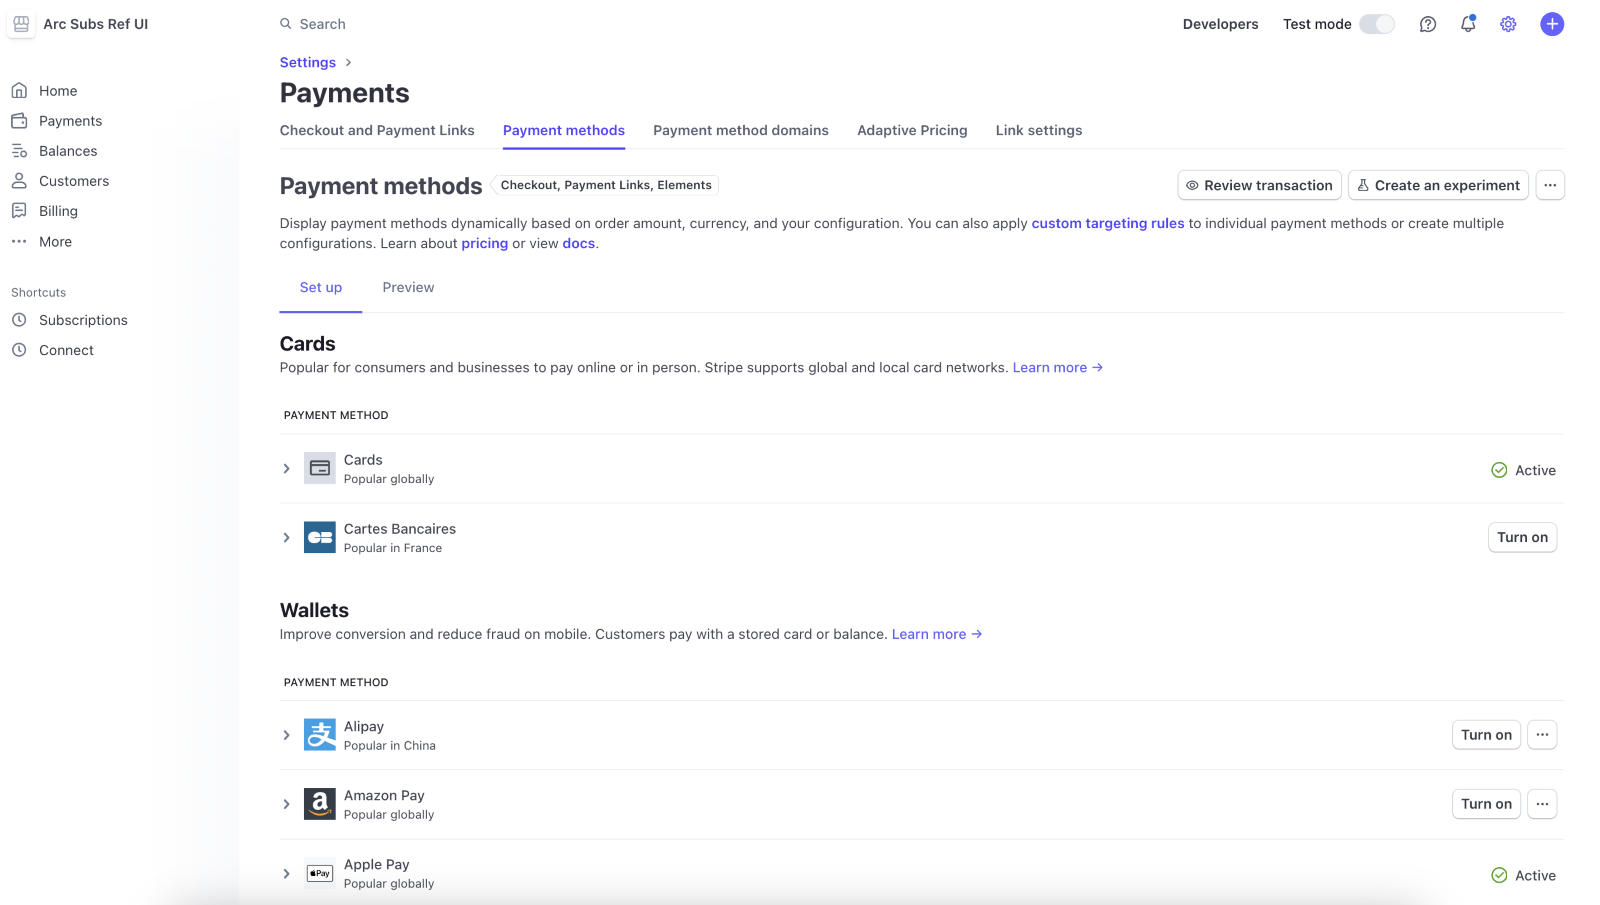
-
Register and verify the domain: ExpandApple PayorGoogle Pay, and click onConfigure domains. Then, enter your domain.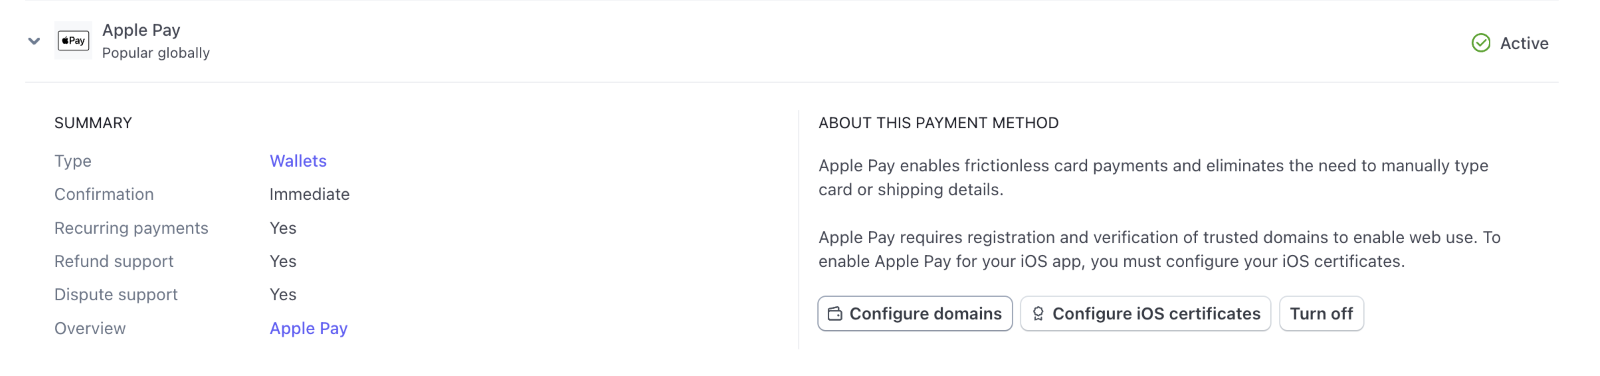
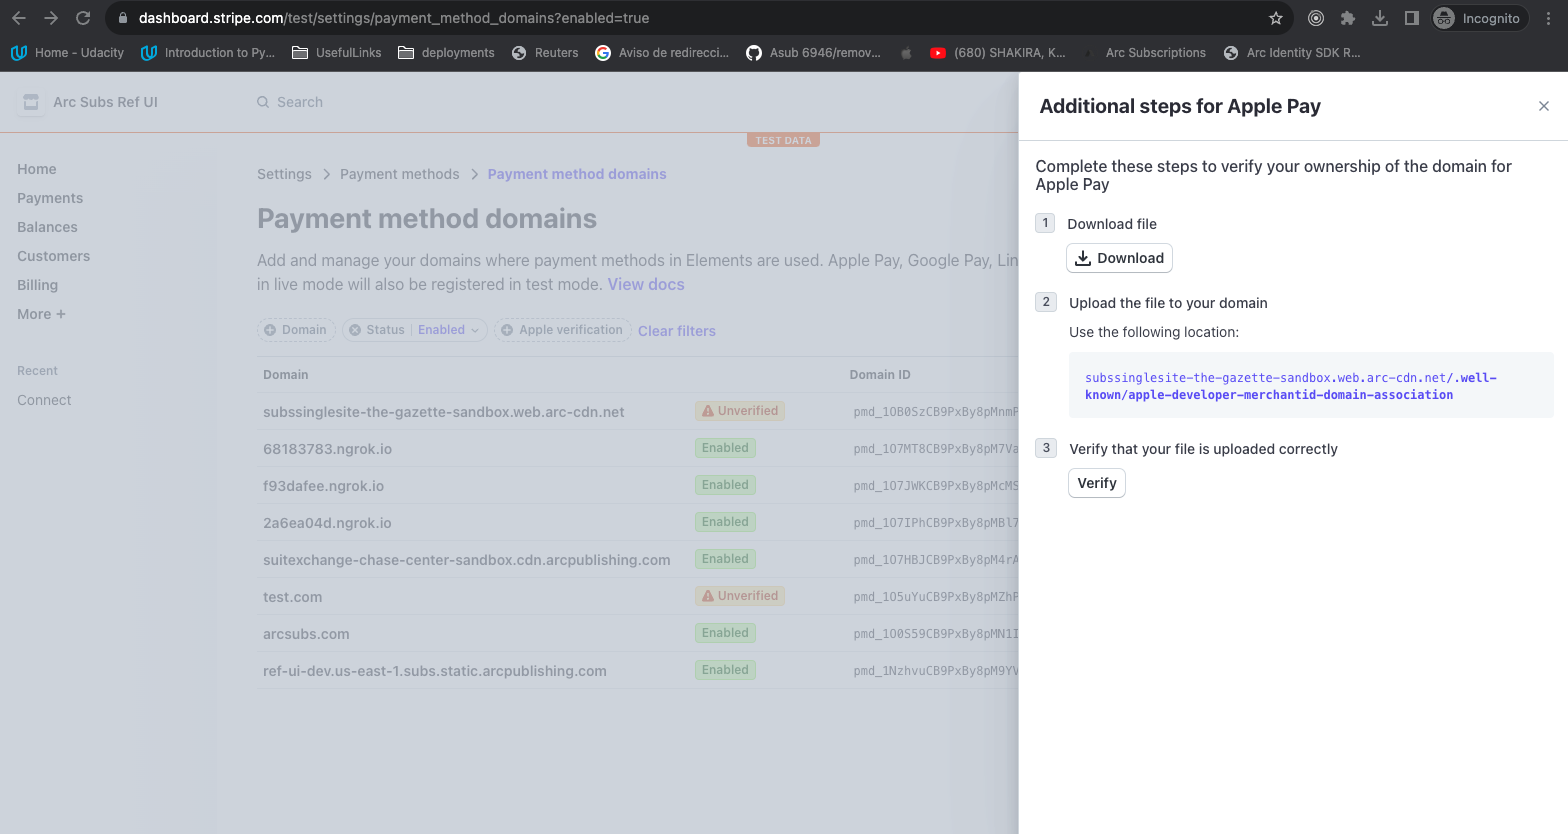
Once the domain is registered, it appears as
unverified. Ensure to verify the domain: Host the file provided by Stripe inside the .well-known folder. Alternatively, you can verify the domain as Stripe describes in: Register domains for payment methods.Contact Arc XP Customer Support in case you are using fusion. You will need to provide them the file and they will host the file for you.
Checkout flow
The Stripe Intent checkout workflow follows the steps defined on Checkout to purchase a subscription. The code provided below is explained according to the regular checkout flow.
-
Authenticate: The end user logs in before starting to put items into the cart. -
Get products and prices. There is no SDK method for this, but you can retrieve a live offer by calling:GET /retail/public/v1/offer/live/defaultorGET /retail/public/v1/offer/live/{campaignName} -
Add item(s) to cart: The live offer may contain multiple products and prices. The end user should add each desired item (product and price) to the cart. -
Create order: When the end user has at least one item in their cart, they can initiate the payment flow by calling create order.As described on Secure your site against attacks: CORS Domains, Blocked email domains and reCAPTCHA, reCAPTCHA can be enabled for
checkoutflow. If reCAPTCHA is enabled, you must to pass a reCAPTCHA token when callingcreateOrder().A successful
createOrder()call requires a valid reCAPTCHA token, if reCAPTCHA is enabled for checkout. Therefore, the reCAPTCHA should be displayed or hidden based on the tenant’s settings.-
Obtain the tenant configuration: Retrieve the configuration from Sales to check if reCAPTCHA is enabled for checkout (i.e.Sales.getConfig()). However, since the parameters to initialize reCAPTCHA are found in Identity, you will also need to retrieve the configuration from Identity (i.e.Identity.getConfig()). -
Display or hide the reCAPTCHA and pass reCAPTCHA tokenwhen callingcreateOrder(). See Registration implementation, where code related to reCAPTCHA implementation is provided. You will need to apply few adjustements to check if reCAPTCHA is enabled for checkout.
-
-
Get payment options: Retrieve the payment gateway configuration set up in the Admin tool for the tenant (organization + site) making a call toSales.getPaymentOptions(). This SDK returns an array containing all payment methods configured for the tenant. -
Initialize payment: On the previous step, you can identify payment methods set up for stripe Intents, by checking if they havepaymentMethodType: 18. For each element returned on the previous step, you will see apaymentMethodID, this value together with the orden number are required when callingSales.initializePayment(). This method will create a payment session with the chosen payment provider and the billing details for the order.const orderNumber = Sales.currentOrder.orderNumber;const paymentProvider = chosenPaymentOption; // chosen by the user with paymentMethodType: 18...const payment = await Sales.initializePayment(orderNumber, paymentProvider.paymentMethodID);If successful, Sales.initializePayment will resolve to an object. The token returned as
parameter2is used to initialize the interaction with Stripe and render the elements on the payment form.Execute Stripe’s js
import { loadStripe } from "@stripe/stripe-js";import { Elements } from "@stripe/react-stripe-js";import { CardElement, useStripe, useElements } from '@stripe/react-stripe-js';...export const StripeIntentCheckout = props => {...// stripe hooks have to be within Elements wrapper// https://stripe.com/docs/stripe-js/react#useelements-hookconst elements = useElements();const stripe = useStripe();const [stripePromise, setStripePromise] = useState(null);//payment contains the values returned by Sales.initializePayment()useEffect(() => {const initStripe = async () => {try {loadStripe(payment.parameter2).then(data => setStripePromise(data));} catch (e) {...}};initStripe();}, [payment]);const handleSubmit = async (event, elements, stripe, details) => {event.preventDefault();const cardElement = elements.getElement('card');const { error, paymentMethod } = await stripe.createPaymentMethod({type: 'card',card: cardElement,billing_details: details});if (error) {setError(error);return;}let result;const totalOrder = Sales.currentOrder.total;if (totalOrder > 0) {// https://docs.stripe.com/js/payment_intents/confirm_card_paymentresult = await stripe.confirmCardPayment(payment.parameter1, {payment_method: paymentMethod.id});} else {// https://docs.stripe.com/js/setup_intents/confirm_card_setupresult = await stripe.confirmCardSetup(payment.parameter1, {payment_method: paymentMethod.id});}if (result.error) {setError(result.error);return;} else {const isLoggedIn = await Identity.isLoggedIn();let orderDetails;if (isLoggedIn) {if (totalOrder > 0) {await Sales.finalizePayment(orderNumber, paymentMethodID, result.paymentIntent.id);// If you need to pass reCAPTCHA// Sales.finalizePayment(orderNumber, paymentMethodID, result.paymentIntent.id, null, captcha)} else {await Sales.finalizePayment(orderNumber, paymentMethodID, result.setupIntent.id);// If you need to pass reCAPTCHA// Sales.finalizePayment(orderNumber, paymentMethodID, result.setupIntent.id, null, captcha)}// go to success page}}}if (stripePromise) {<Elements stripe={stripePromise}>// CheckoutStripeIntentForm contains the Stripe elements<CheckoutStripeIntentFormhandleSubmit={handleSubmit}error={error}/></Elements>}} -
Finalize payment: In the previous code, you can see that different Stripe methods need to be called depending on the total order amount:- If total order amount is greater to zero use stripe.confirmCardPayment().
- If total order amout is zero use stripe.confirmCardSetup()
If the response from stripe.confirmCardSetup() or stripe.confirmCardPayment() is successful, it indicates the payment was approved by Stripe, and a token will be returned:
- result.paymentIntent.id if you called stripe.confirmCardPayment(), that means if the total order amout was greater to zero.
- result.setupIntent.id if you called stripe.confirmCardSetup(), that means if the total order amout was zero
This token, along with the order number and the reCAPTCHA token (if this feature is enabled for checkout) should be passed when calling
Sales.finalizePayment().For orders with a total of zero, no charges apply to the end user, but a stripe token and a transaction must be generated for future renewals.