Configure third-party authentication providers: Facebook, Google, Apple, and OIDC
Arc XP Identity supports integration with several third-party authentication providers, including Google, Facebook, and Apple. It also supports integration with any authentication provider that uses the OIDC protocol. To enable this feature on your site, follow these steps:
- Navigate to the Settings tab.
- Under the Identity section, select Authentication Providers.
- Choose and set up the desired authentication providers from the available options.
If your organization is multi-tenant (i.e., multi-site), you will need to enable these settings for each tenant where you want these features to be available.
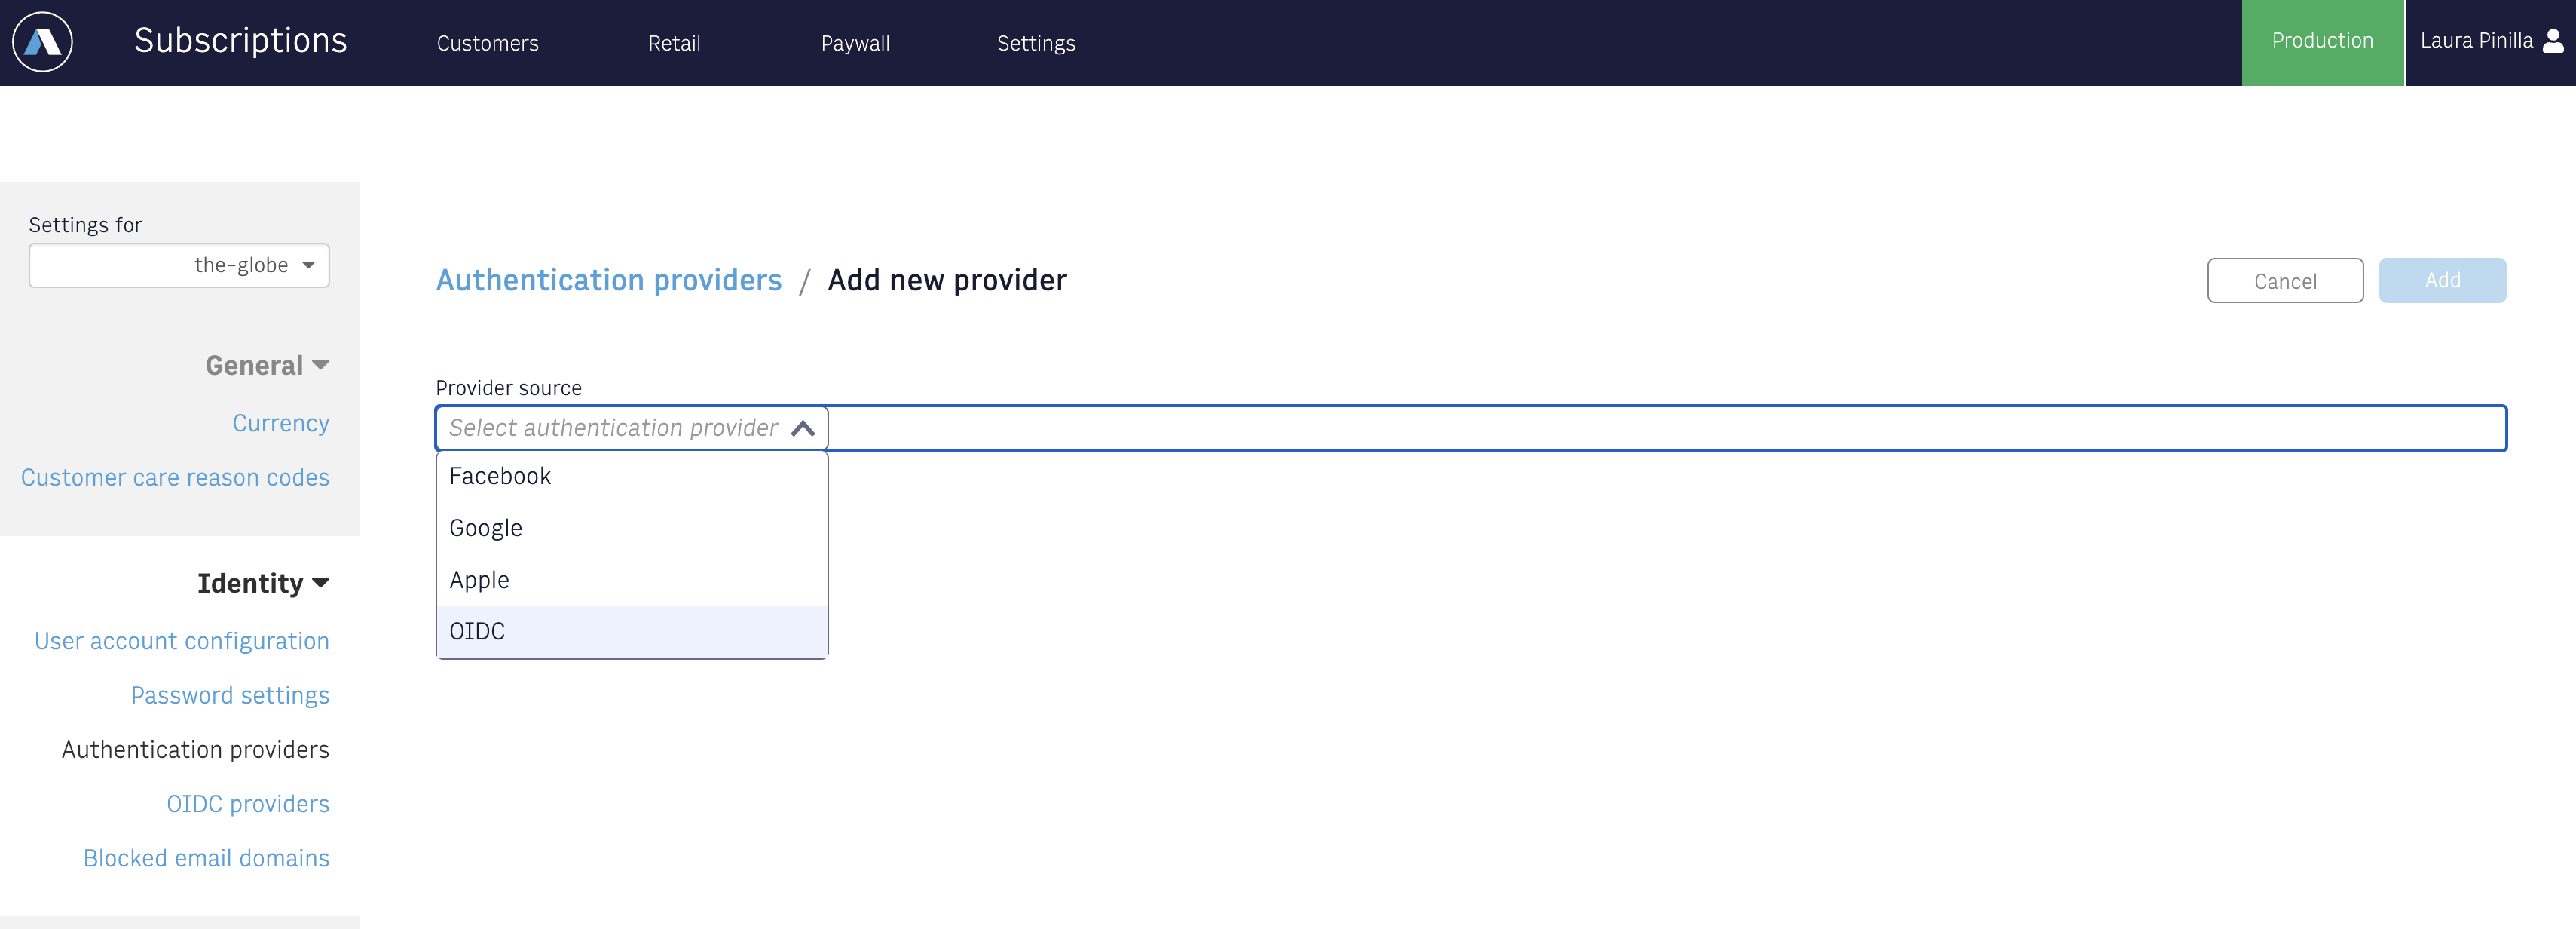
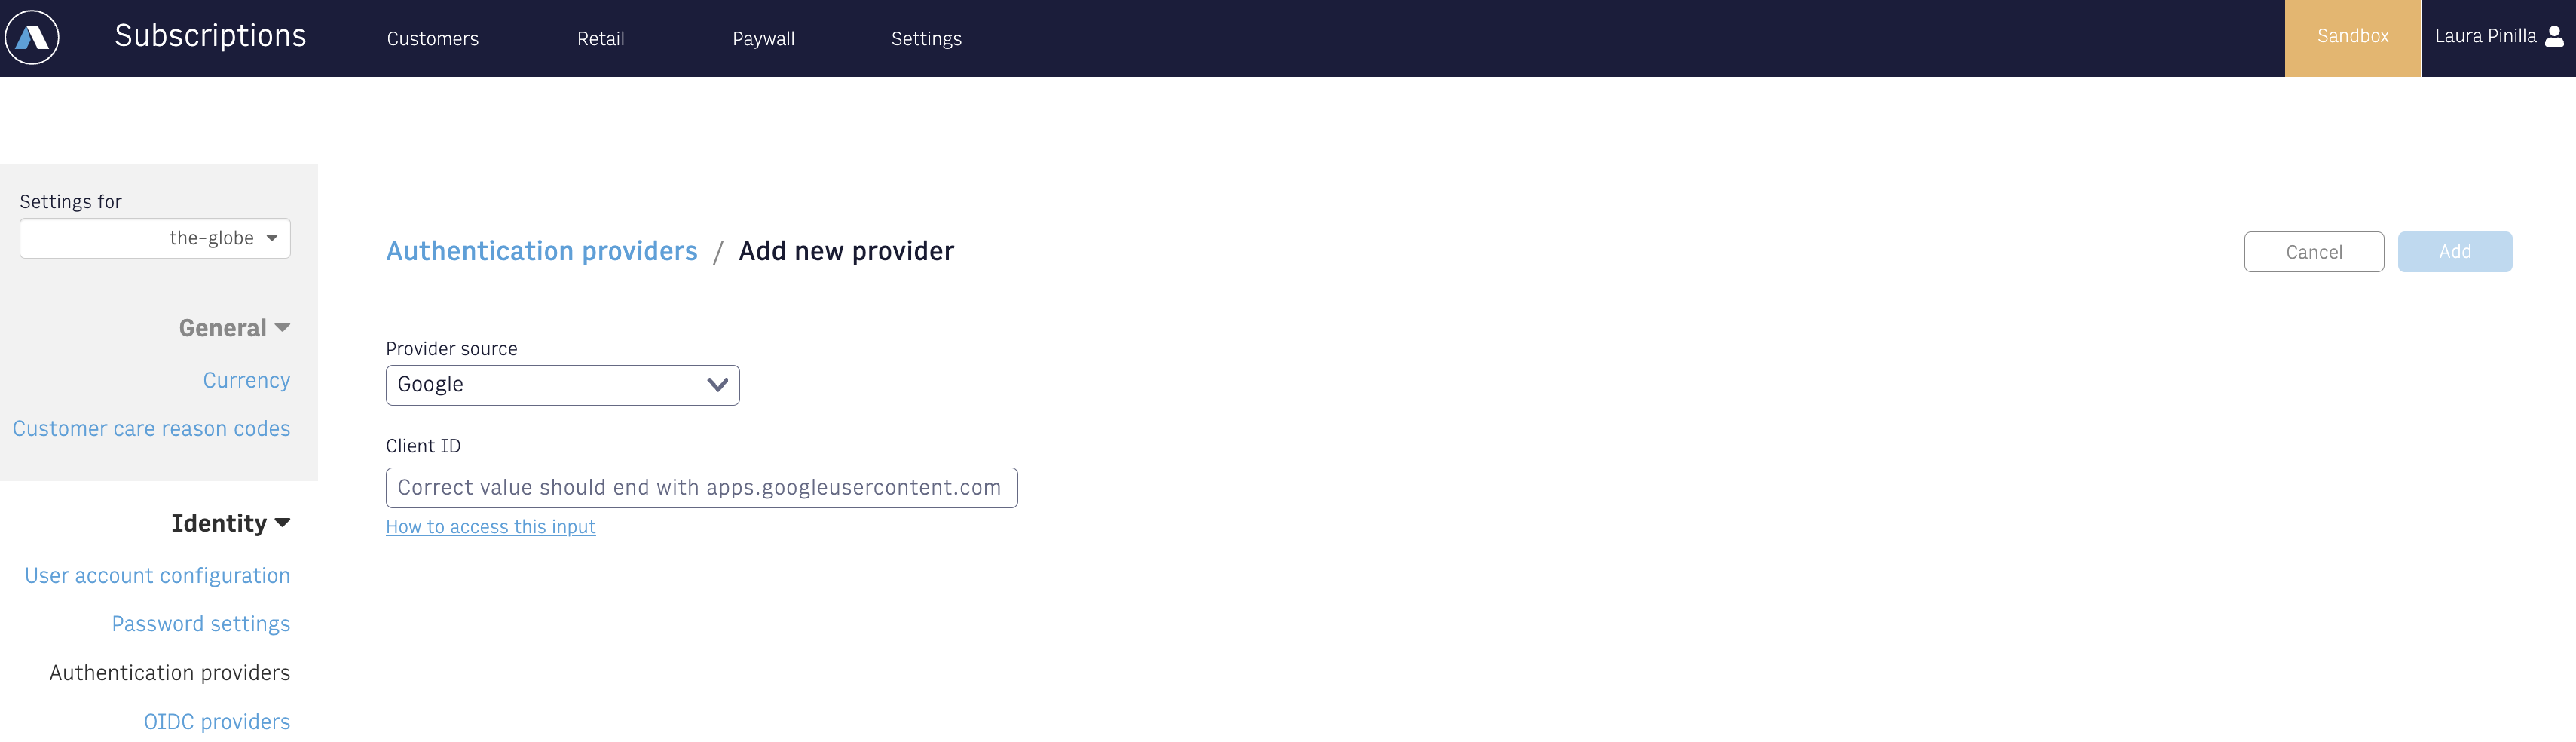
Once you select the third authentication provider (Facebook, Google, Apple, OIDC), fill out the form with the information given by the provider or as required by the flow you want to implement in your site.
-
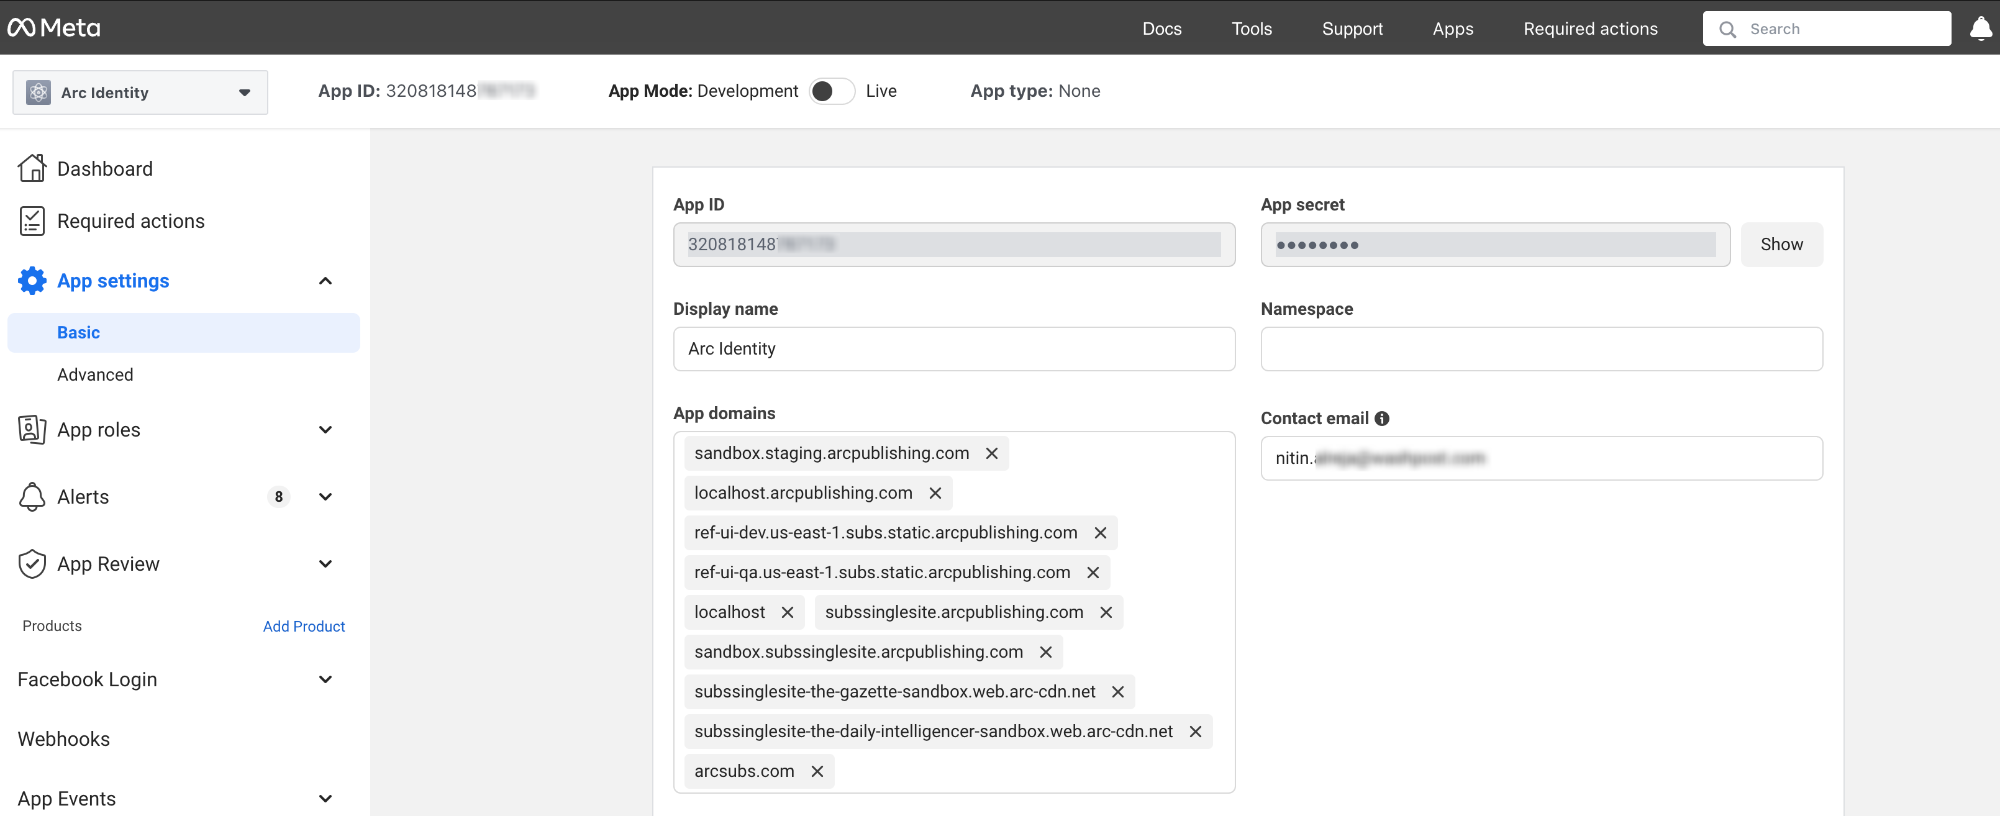
Create the App ID on the Facebook developer console
- Navigate to the Facebook Developer Console.
- If you don’t already have an app, click on “Create App” to start the process. Follow the prompts to complete the app creation. Check Create an App for more details.
- Add a product (Facebook login).
- Once the App is created, go to the “Dashboard” or “App Settings” section of your app.
- You will find the App ID and App Secret listed there.
-
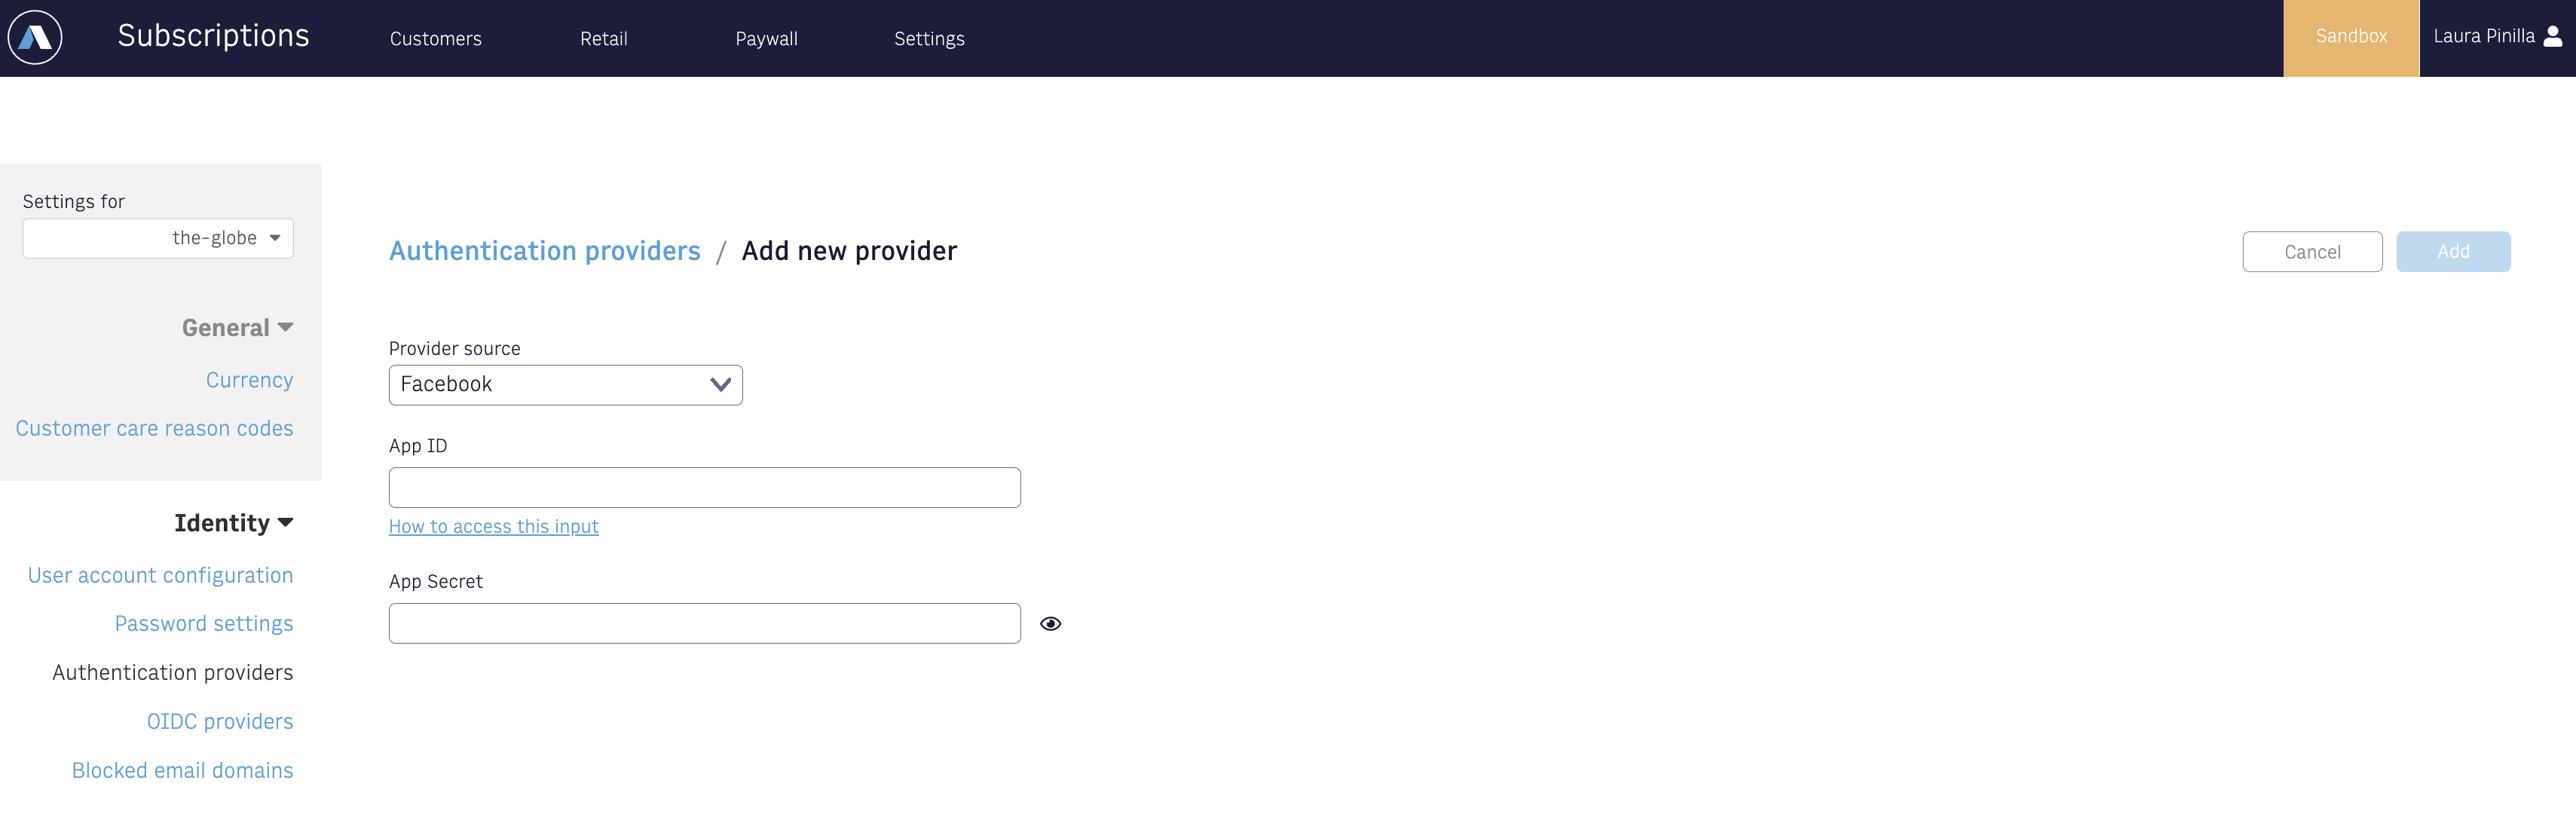
Configure App on Admin tool
Copy and paste App ID & App secret from the Facebook Developer console into the Admin tool.
-
Create the App ID on the Google developer console
- Navigate to the Google Developer console.
- If you don’t already have a project, create a project and get your Google API Client ID.
- Create the OAuth Client Credentials page. Add the domains for your site to the Authorized JavaScript origins and Authorized redirect URIs sections.
You can also add origins and URIs for your test or staging environments, including local developer environments, but we suggest creating a second set of OAuth Client IDs for your test and developer environments.

After you add your origins and URIs, click Create, after which you should be presented with your Google OAuth Client ID and Secret.
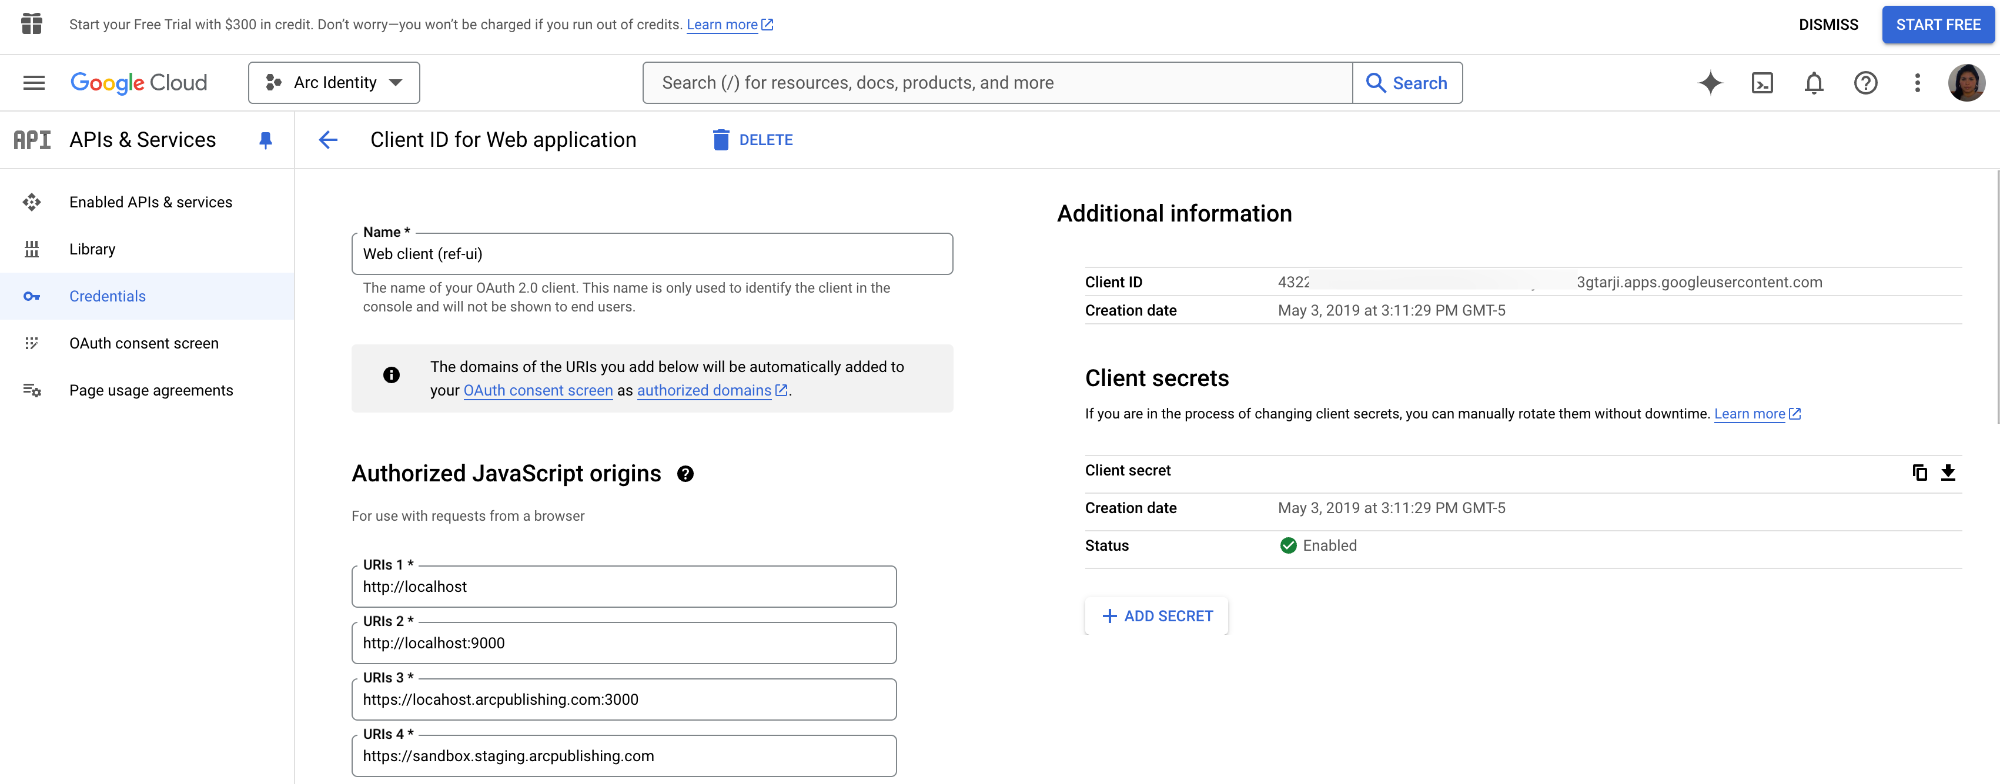
Save the Client ID and Secret in a safe place.
-
Configure App on Admin tool
Copy and paste Client ID from the Google Developer console into the Admin tool.
Apple
Whether you are adding Apple as a third-party authentication provider or as an OIDC provider, you will need to follow the next steps.
-
Register an App ID: Create your Apple App ID
- Create or login to Apple account: sign in to the Apple Developer Portal and Join The Apple Developer Program. You will have to enable Two-Factor Authentication For Apple ID.
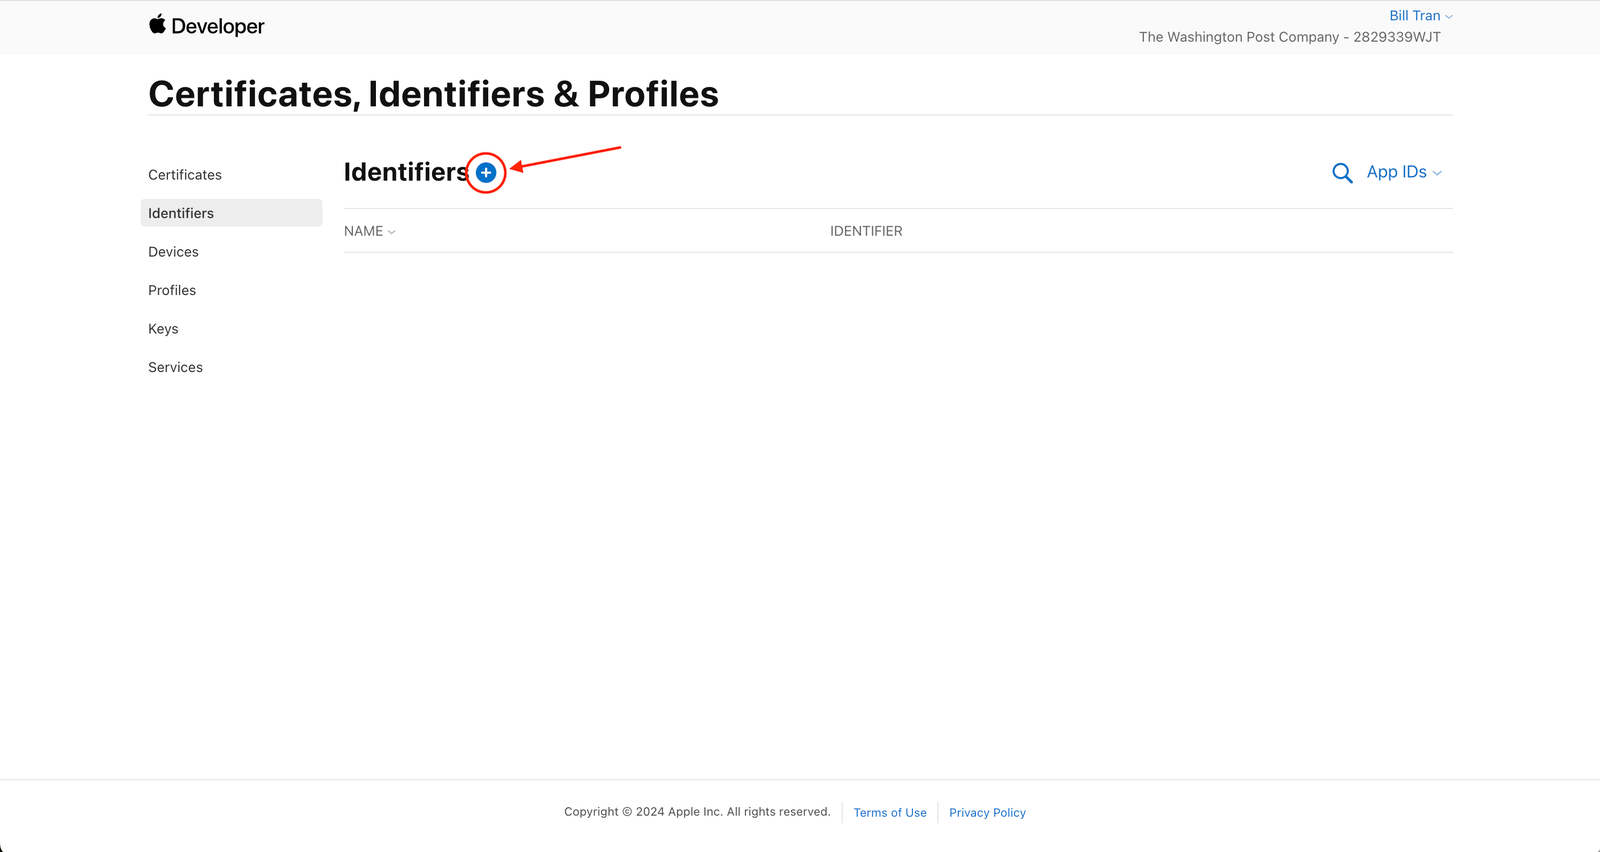
- In your Developer Account go to Create certificates > Create Developer ID certificates > click on Certificates, Identifiers & Profiles
- Make sure you are on the App IDs dropdown and click on the + button.
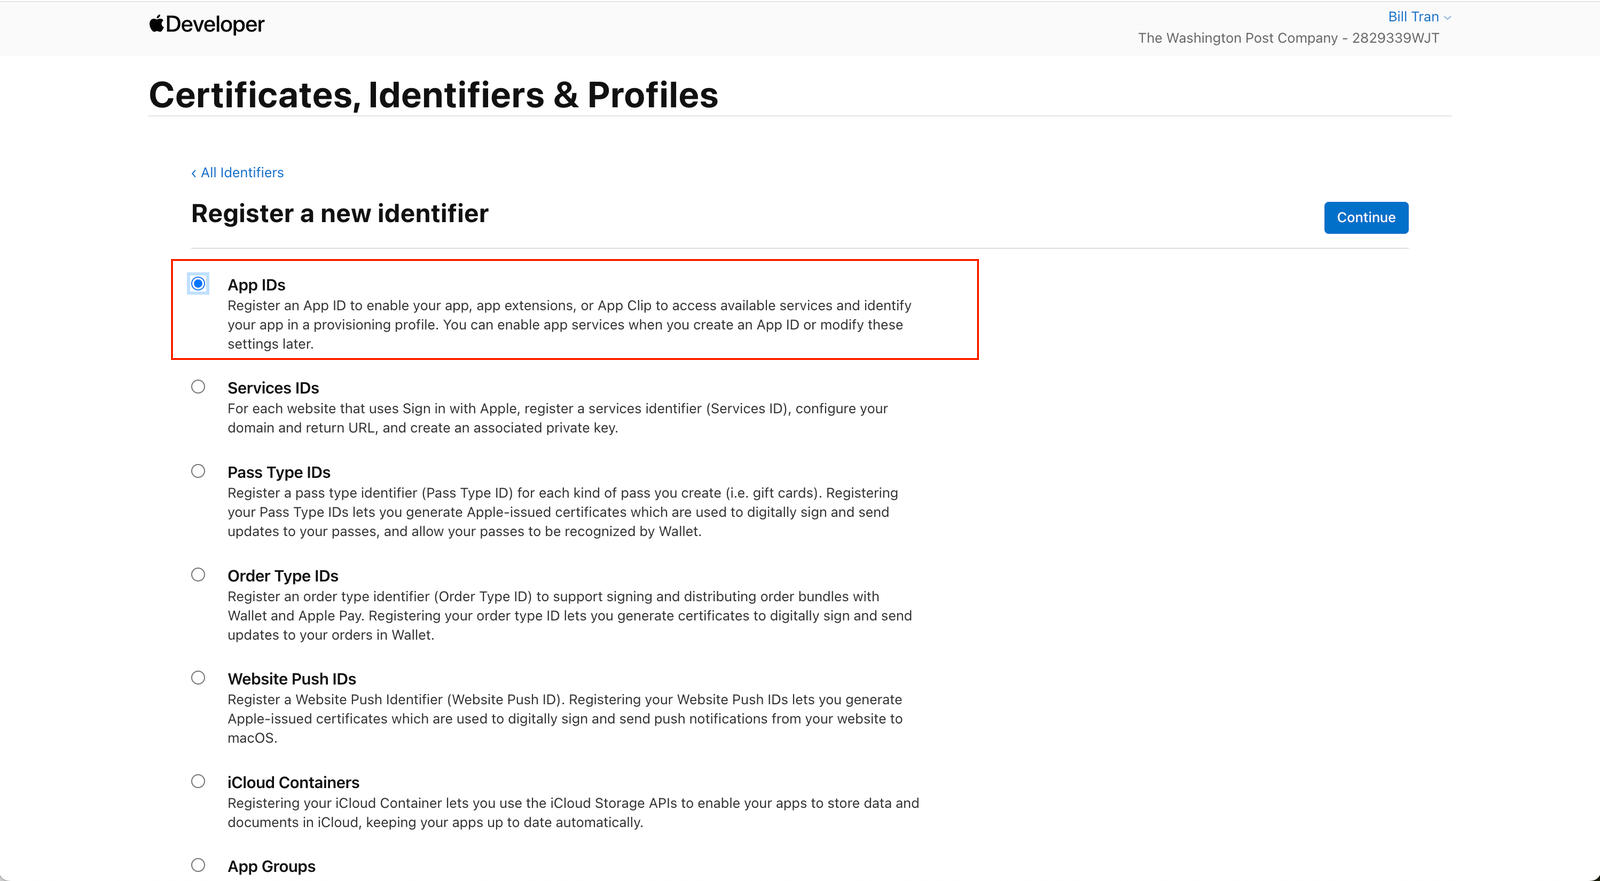
- Select the App IDs option
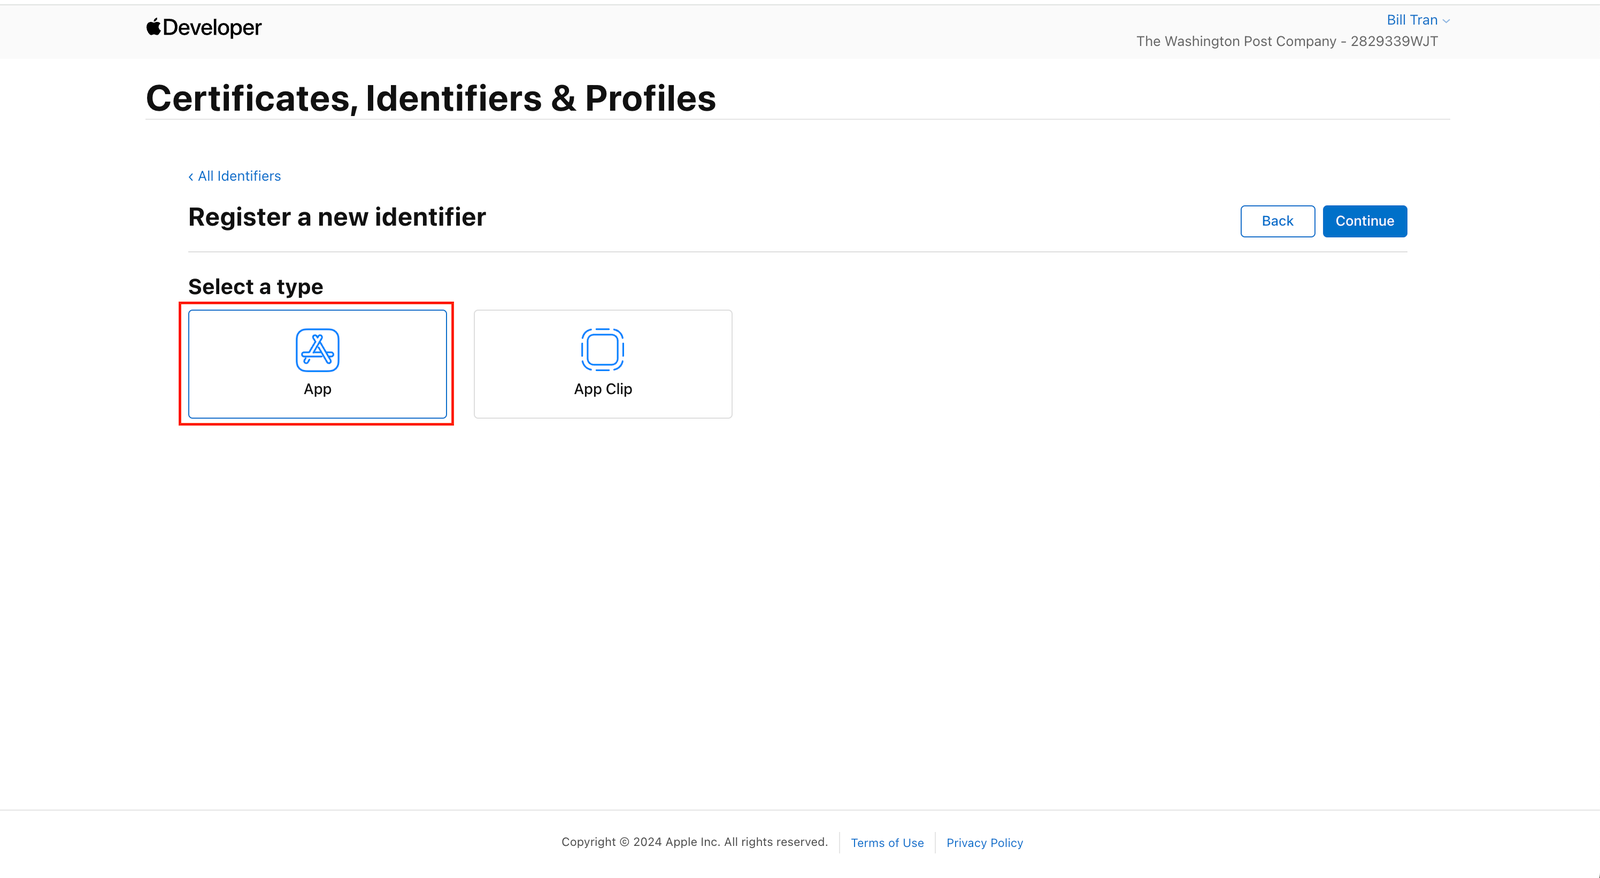
- Select App and Continue
- Add your App description and the Bundle ID. The Bundle ID should just be something like com.myreallycoolapp
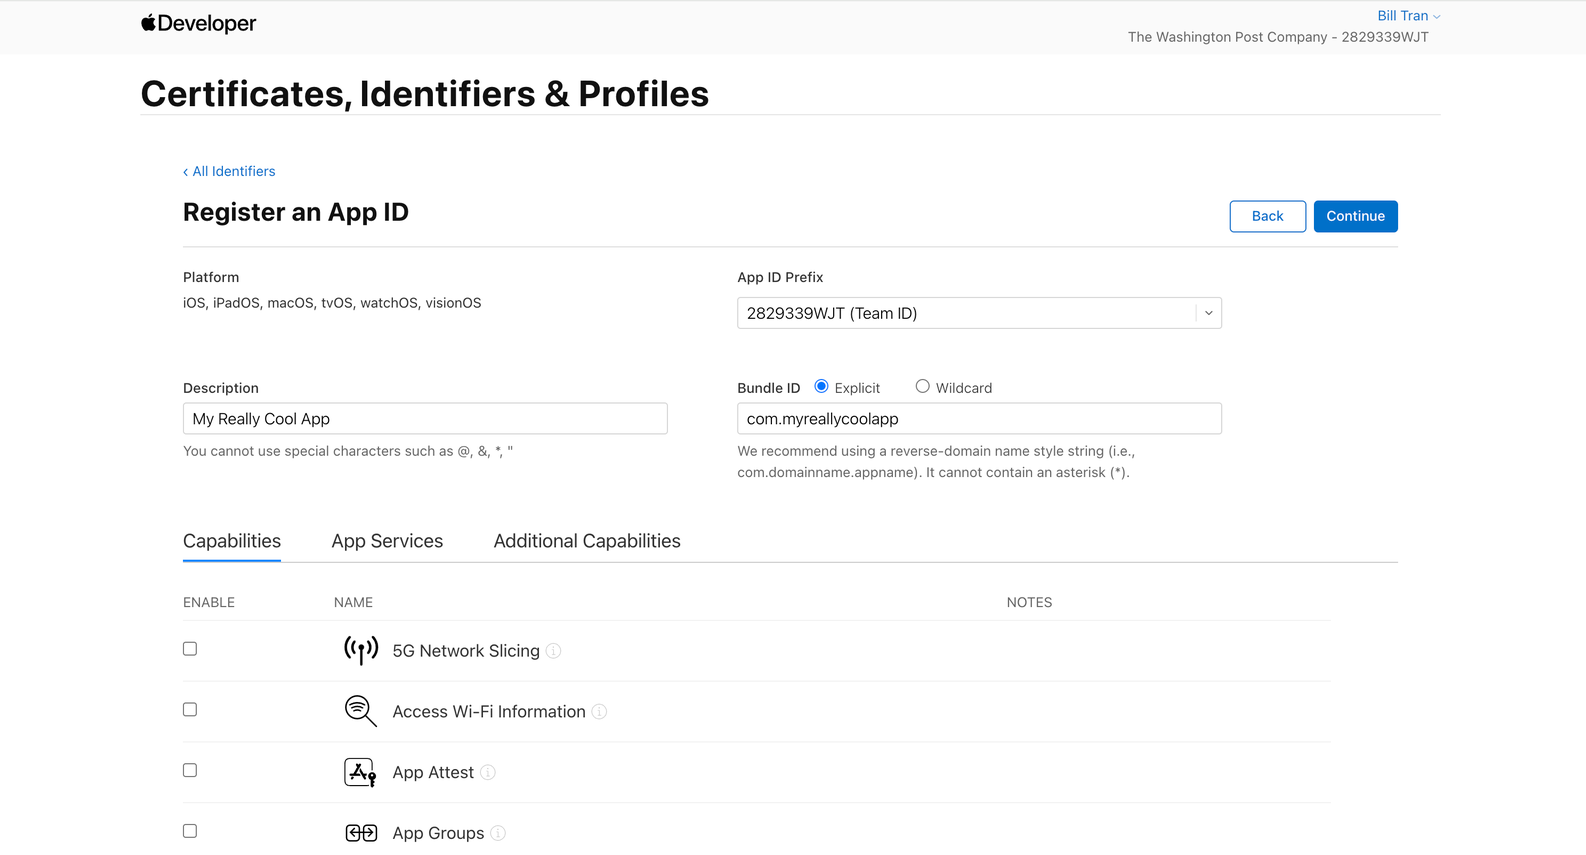
- Add Sign in with Apple and click on the checkbox
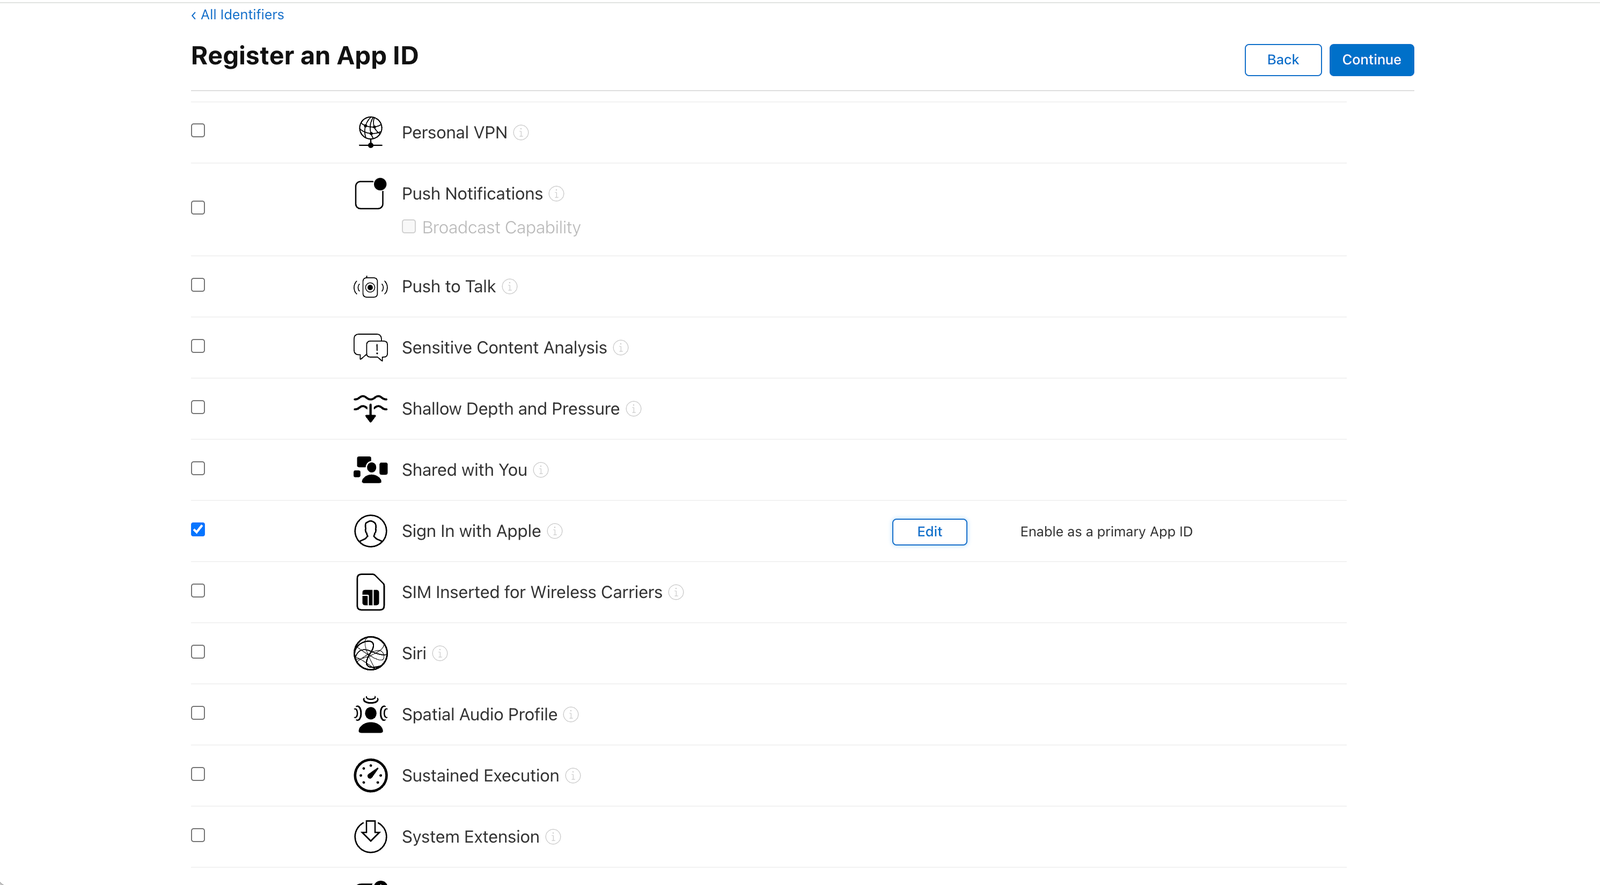
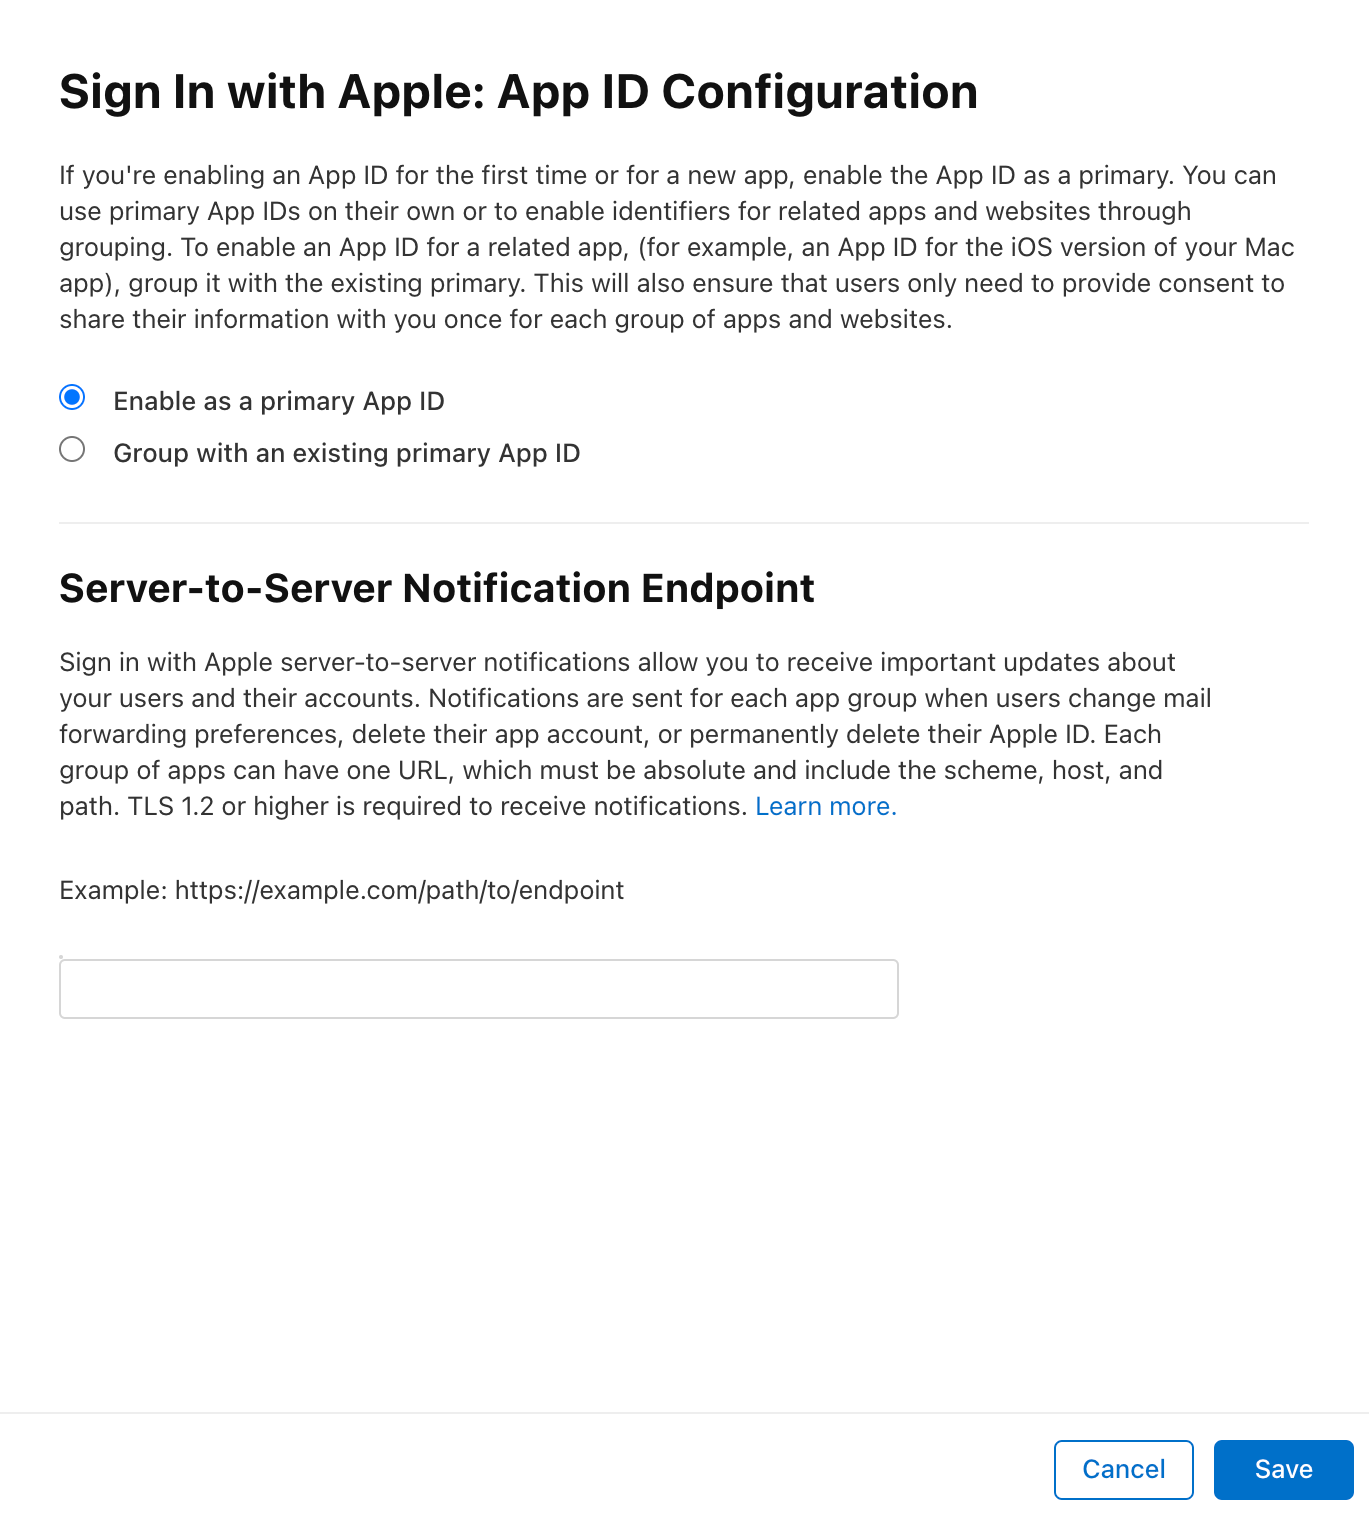
- Click on Edit and make sure Enable as primary App ID is selected and Save. After, click on Continue
- Click on Register

-
Register a Service ID.
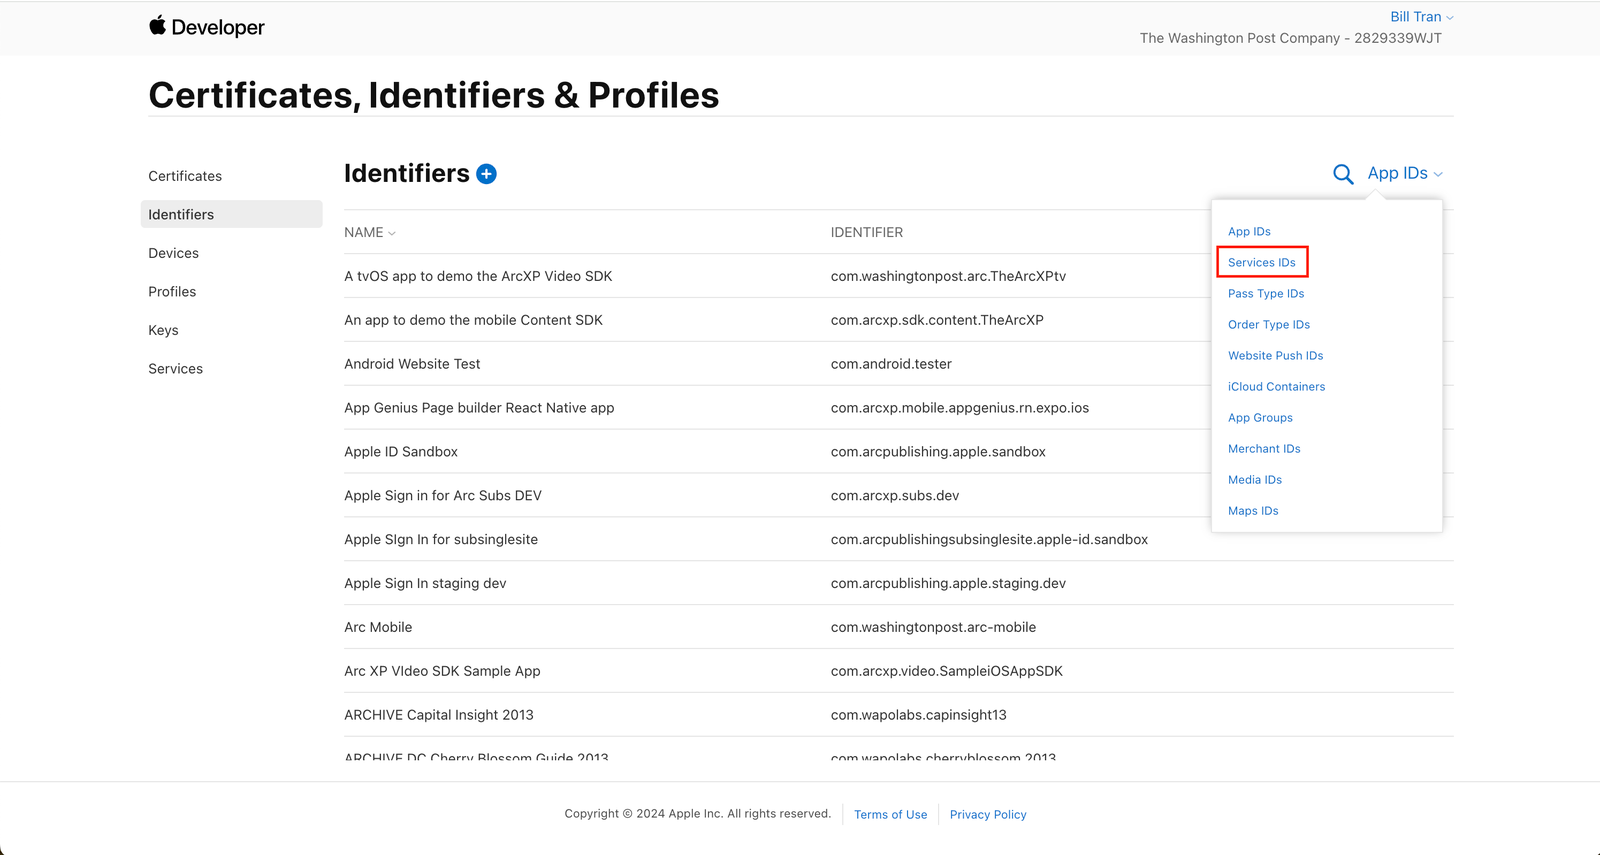
- Go to Certificates, Identifiers & Profiles and Click on the + button to add an Identifier
- Select the Services IDs option
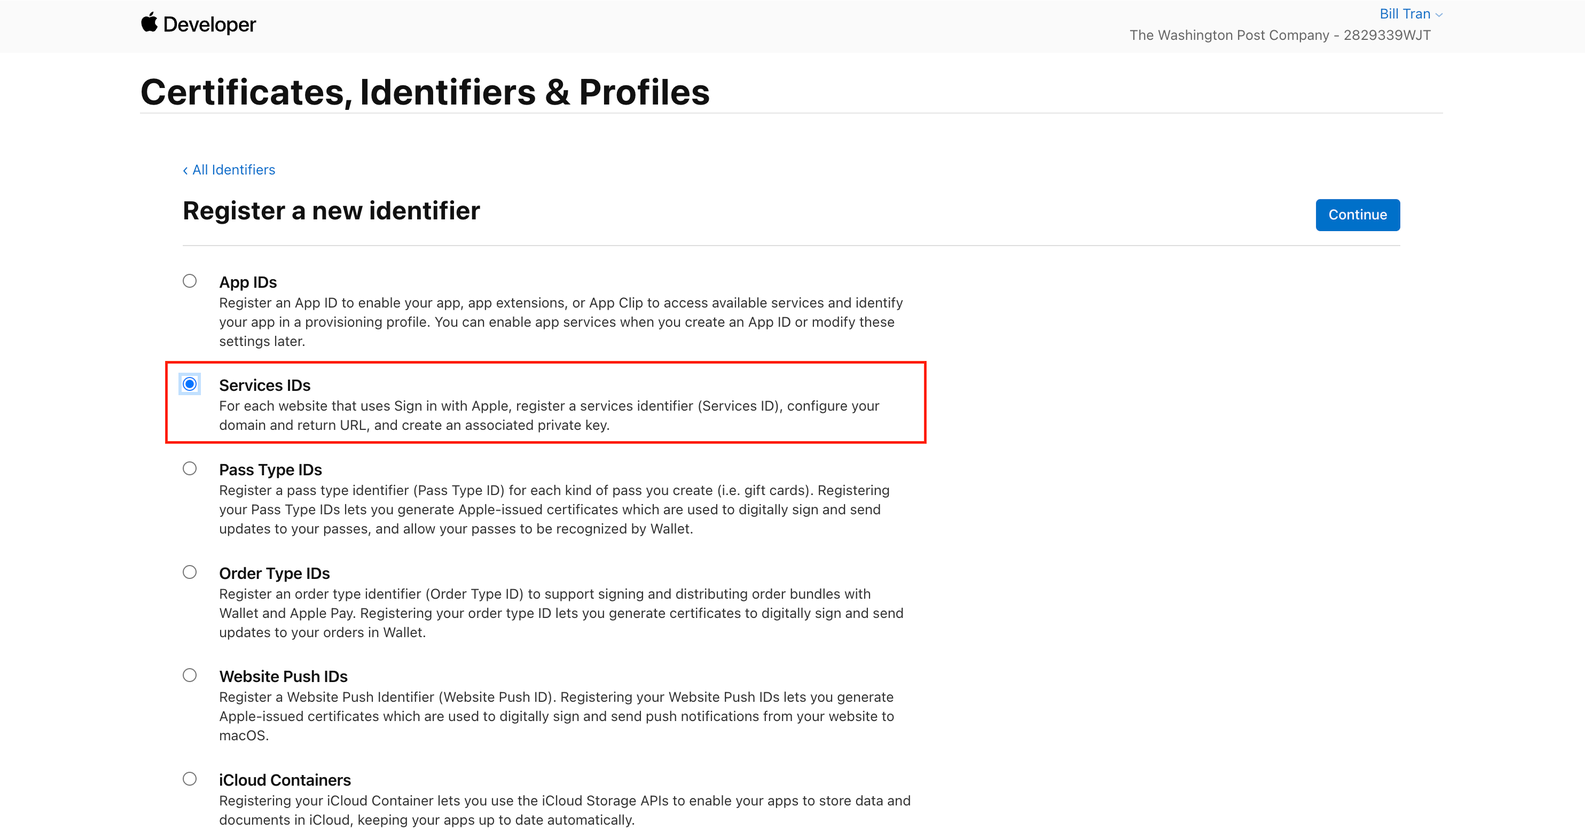
- Then select the Continue button on the far top right of the page to create your Service ID.
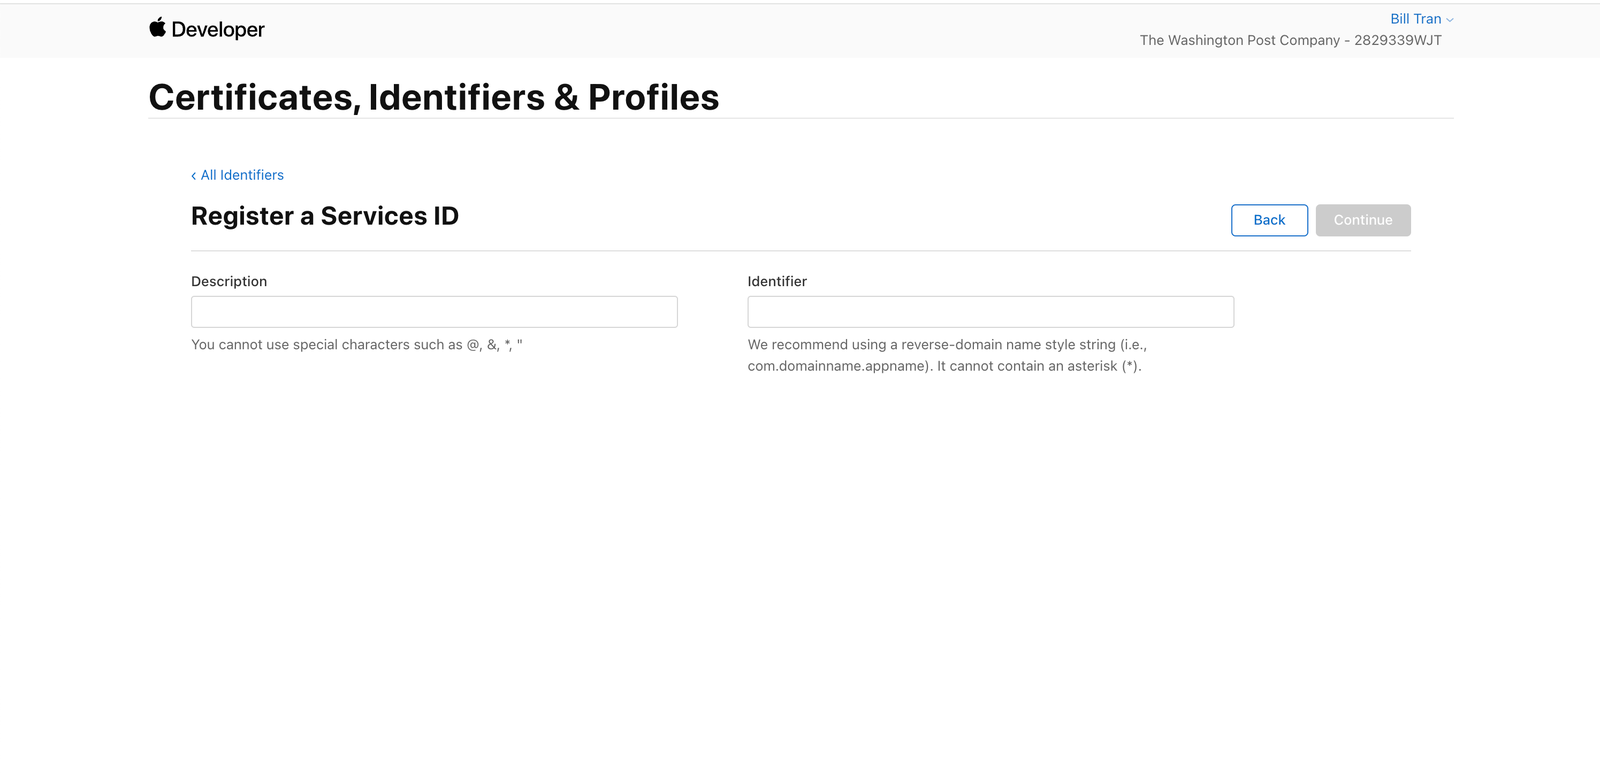
- Fill out the form with the name of your app under Description and your Identifier name. After you fill it out, click on Continue to verify the info entered, and click on Register to create the Service ID.
- So in this example the description would be My Really Cool App and your Identifier (Client ID) would be com.myreallycoolapp.appname.
The format to be used as Identifier would be [com].[your App ID name].[your app name]. Here are a few examples of how you can use your identifier: com.myreallycoolapp.web, com.myreallycoolapp.mobile, com.myreallycoolapp.desktop.
-
Add site to the Service ID
Once you have created your Identifier (Service ID) you will have to apply additional configurations.
- Go to Certificates, Identifiers & Profiles, and select the Services IDs filter.
- Click on the Service ID you register on Step 2.
- Select the Sign in with Apple checkbox, then click on Configure button to access the Sign in with Apple configurations.
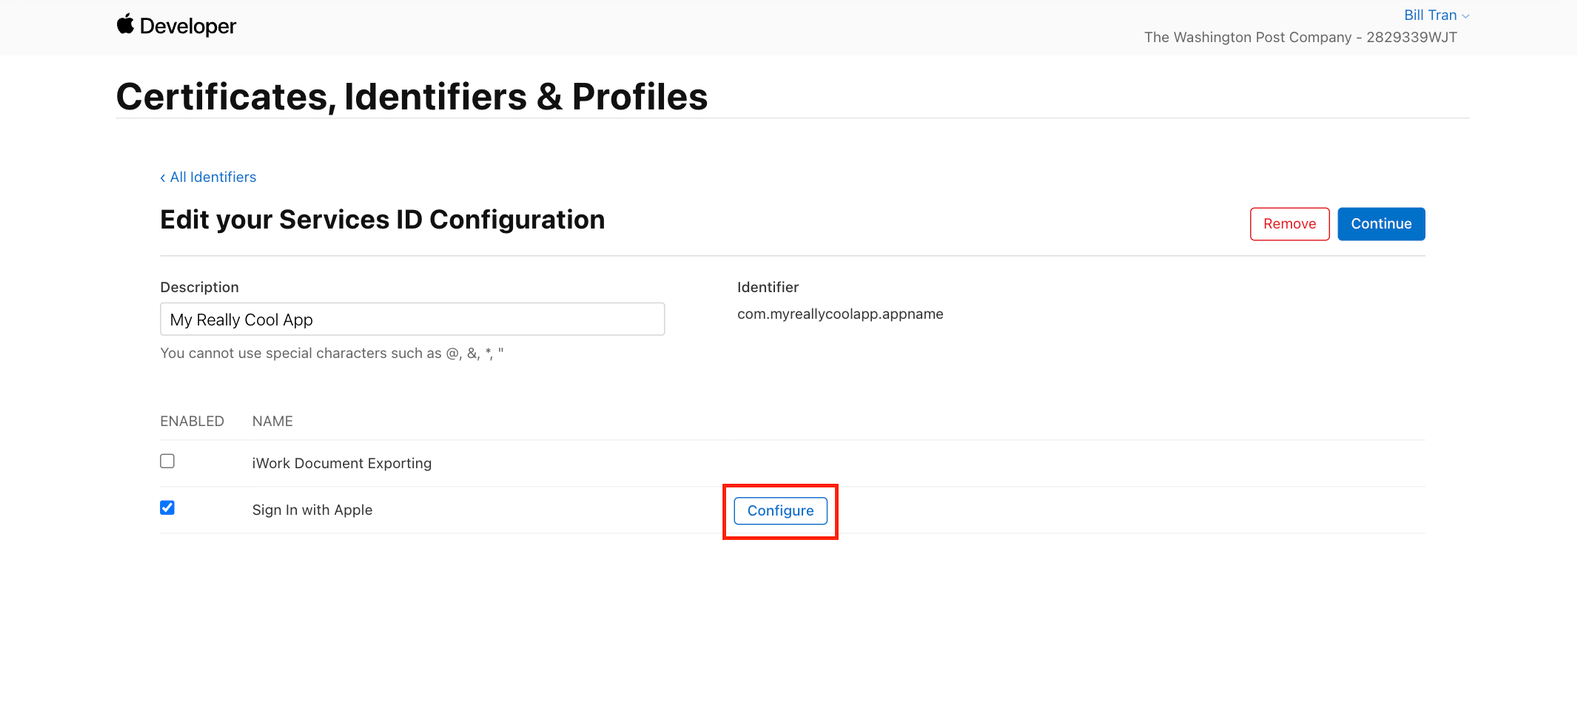
- Select your App ID (the one created on Step 1) from the drop down, and click on the + button to add your website urls. You will need to add the domain urls that you will be using with Sign in with Apple. This allows Apple to know which websites can have access to Sign in with Apple.

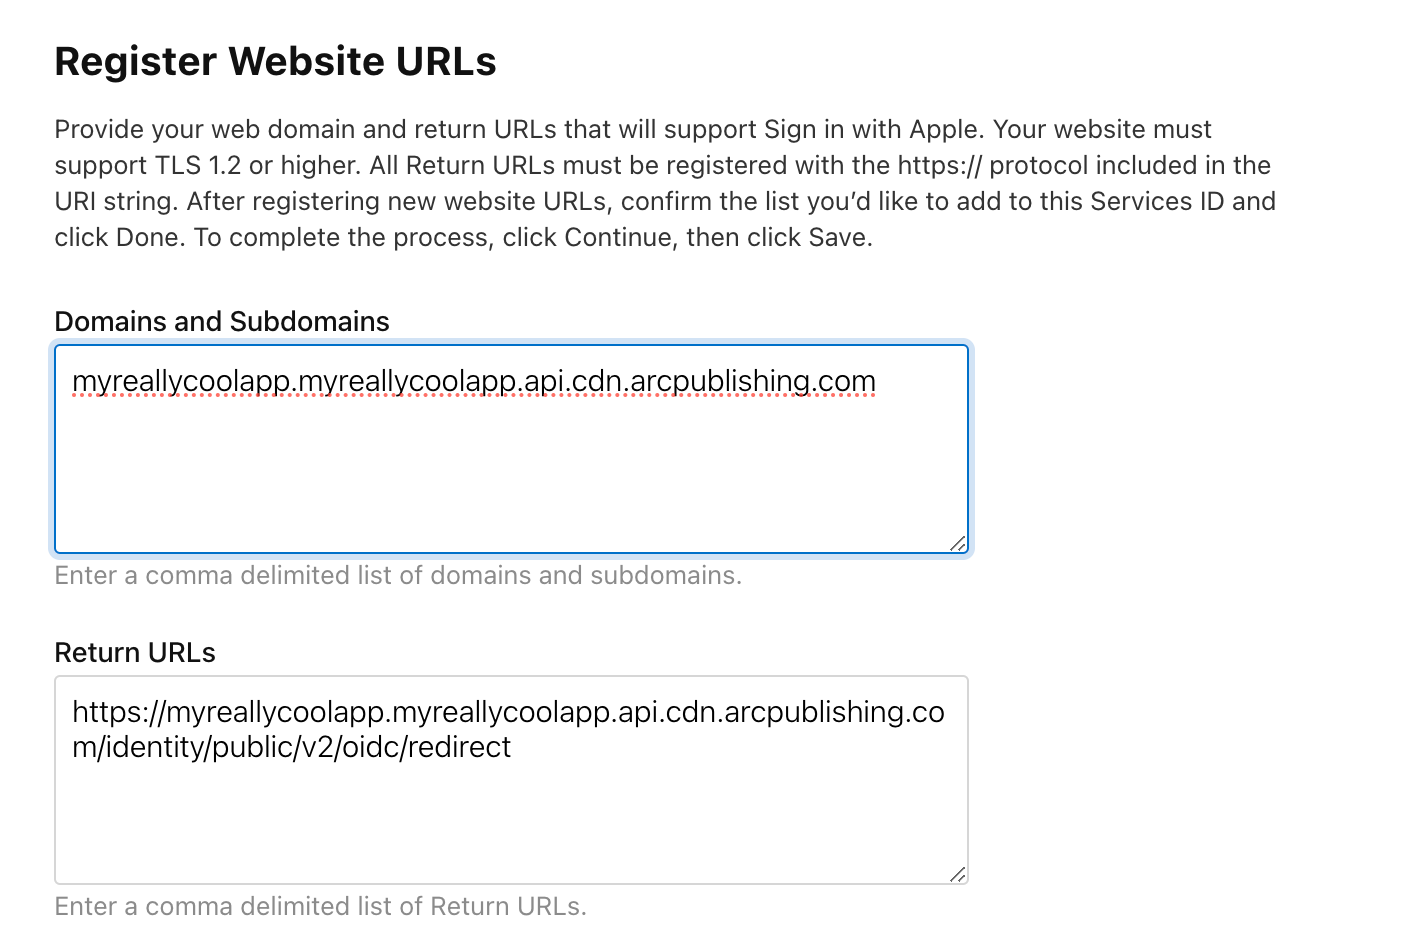
- Domains and Subdomains: When entering the Domain portion of the form you will need to add a comma delimited list. You also need to make sure you remove the “https://“ from the url and just have the domains or subdomains. We also require you to add your CDN endpoint (provided by the Delivery team) to the Domains and Subdomains (e.g. myreallycoolapp.com, myreallycoolapp.myreallycoolapp.api.cdn.arcpublishing.com)
- Return URLs you will need to add a required redirect url that will handle the authentication after a user is signed in. The format will be
https://{endpoint}/identity/public/v2/oidc/redirect. This does require you to have thehttps://in the url.
- After you add that to the form, make sure you click Done, then Continue at the top right, and then Save.
-
Create a Private key
- Navigate to the Apple Developer Console to add an auth key: https://developer.apple.com/account/resources/authkeys/add
- Create a name for your Private Key
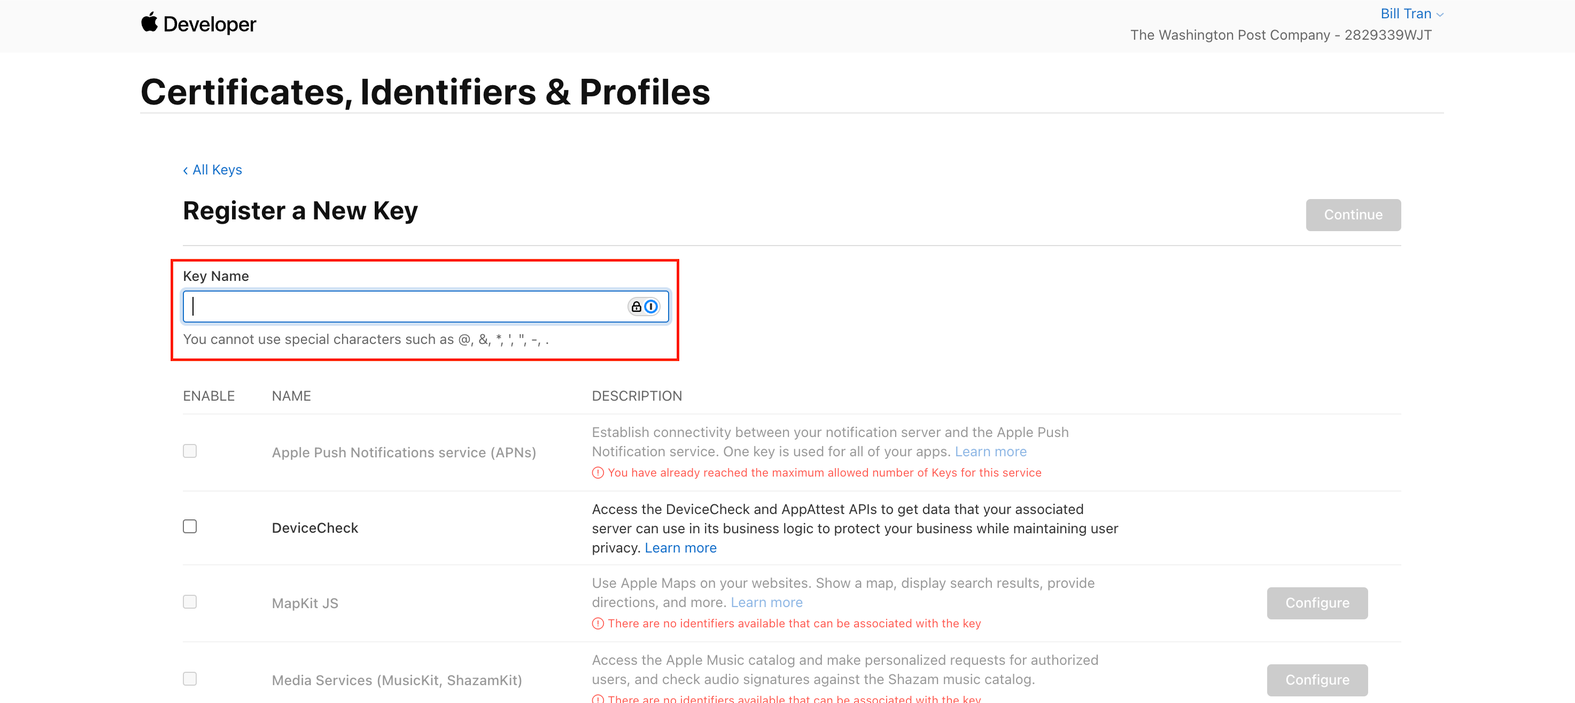
- Select Sign in With Apple checkbox & click Configure
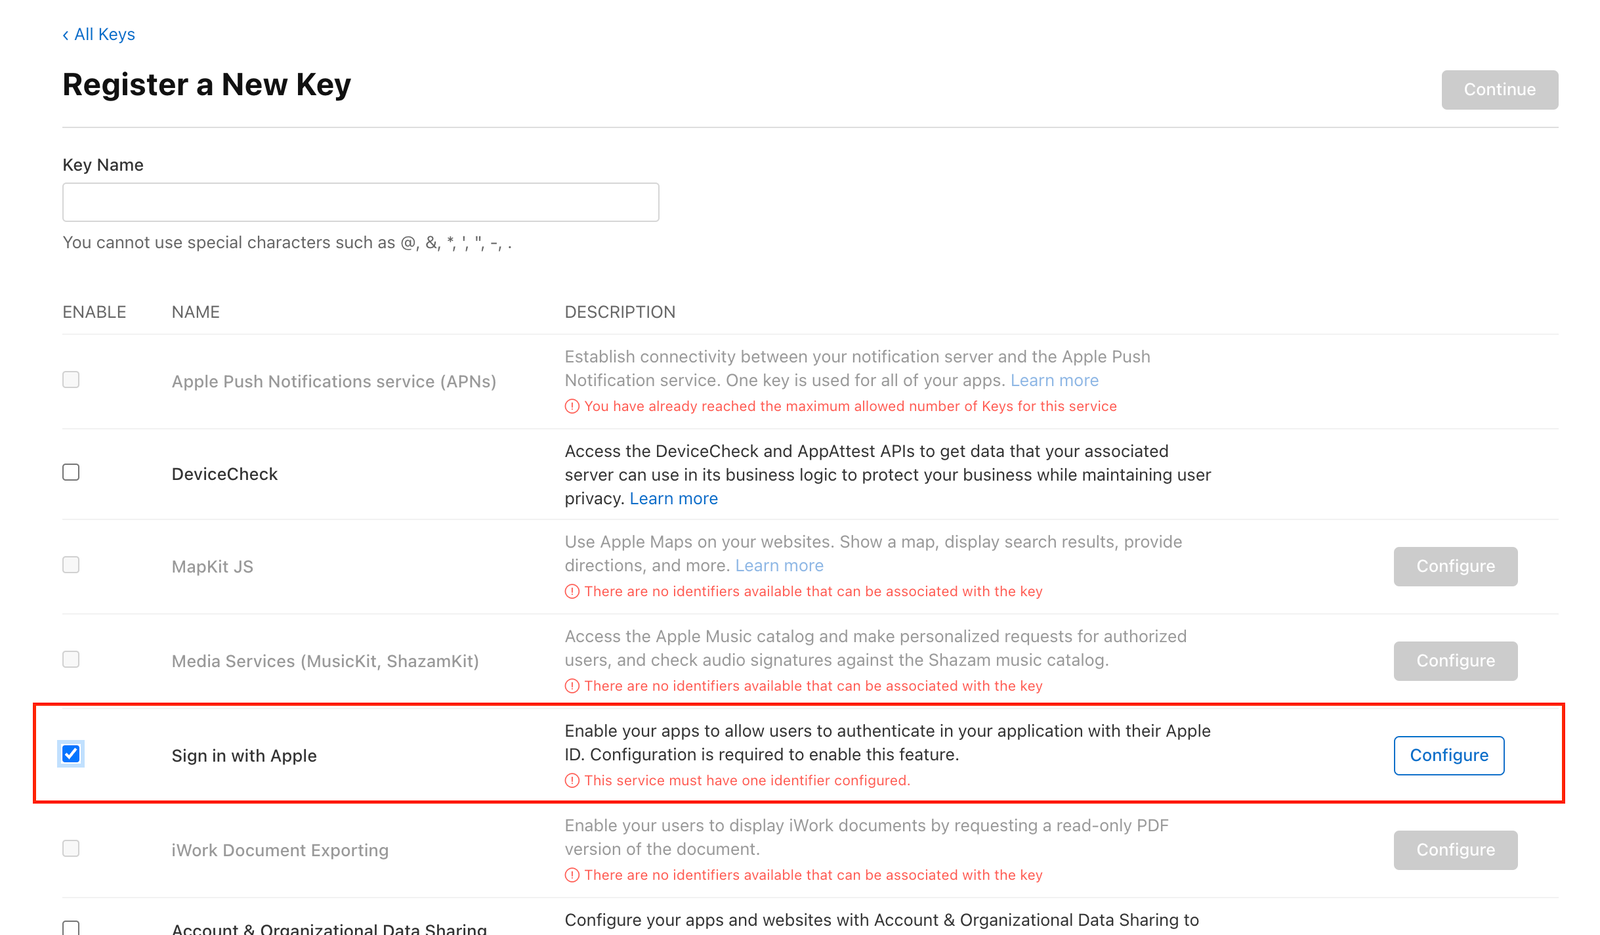
- Choose your Primary App ID. The one created on Step 1
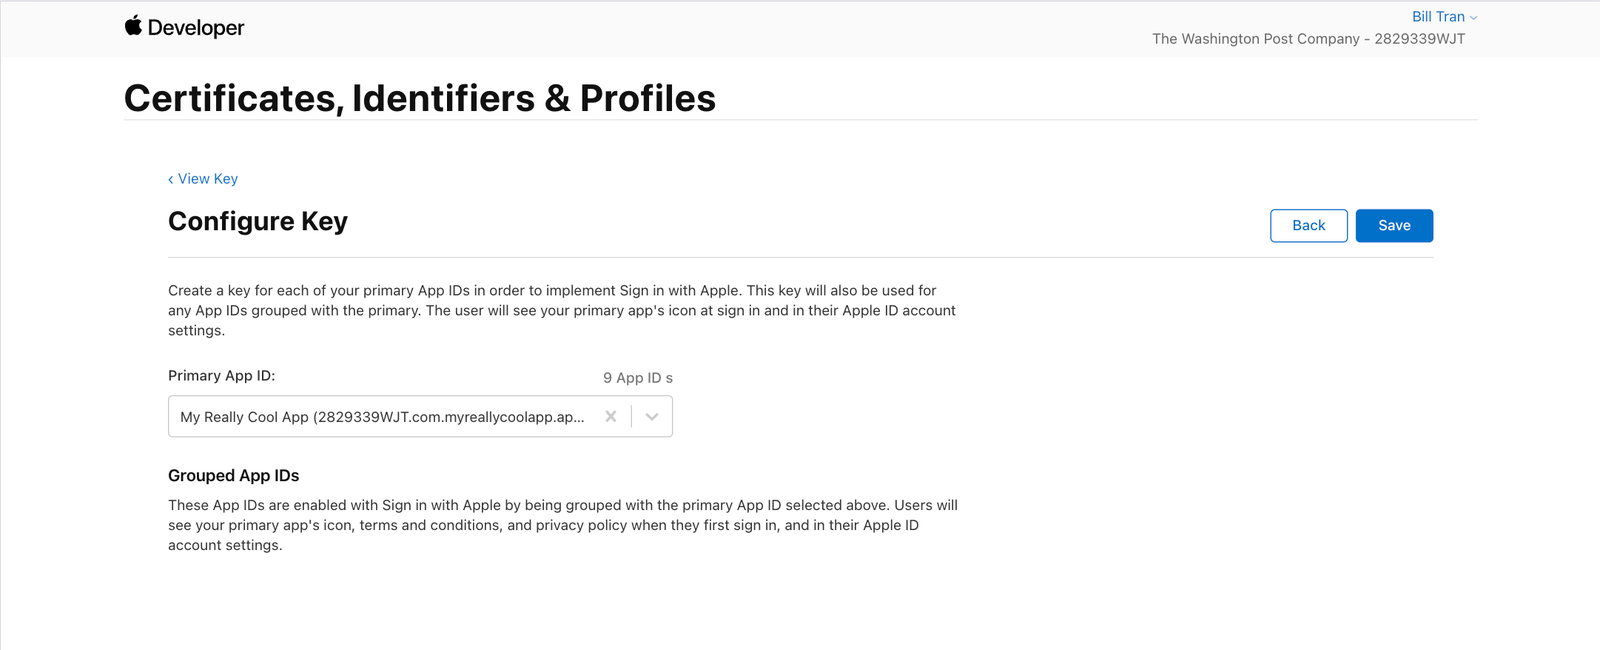
- You will then be brought back to the previous screen. Click on Continue, and then on Register.
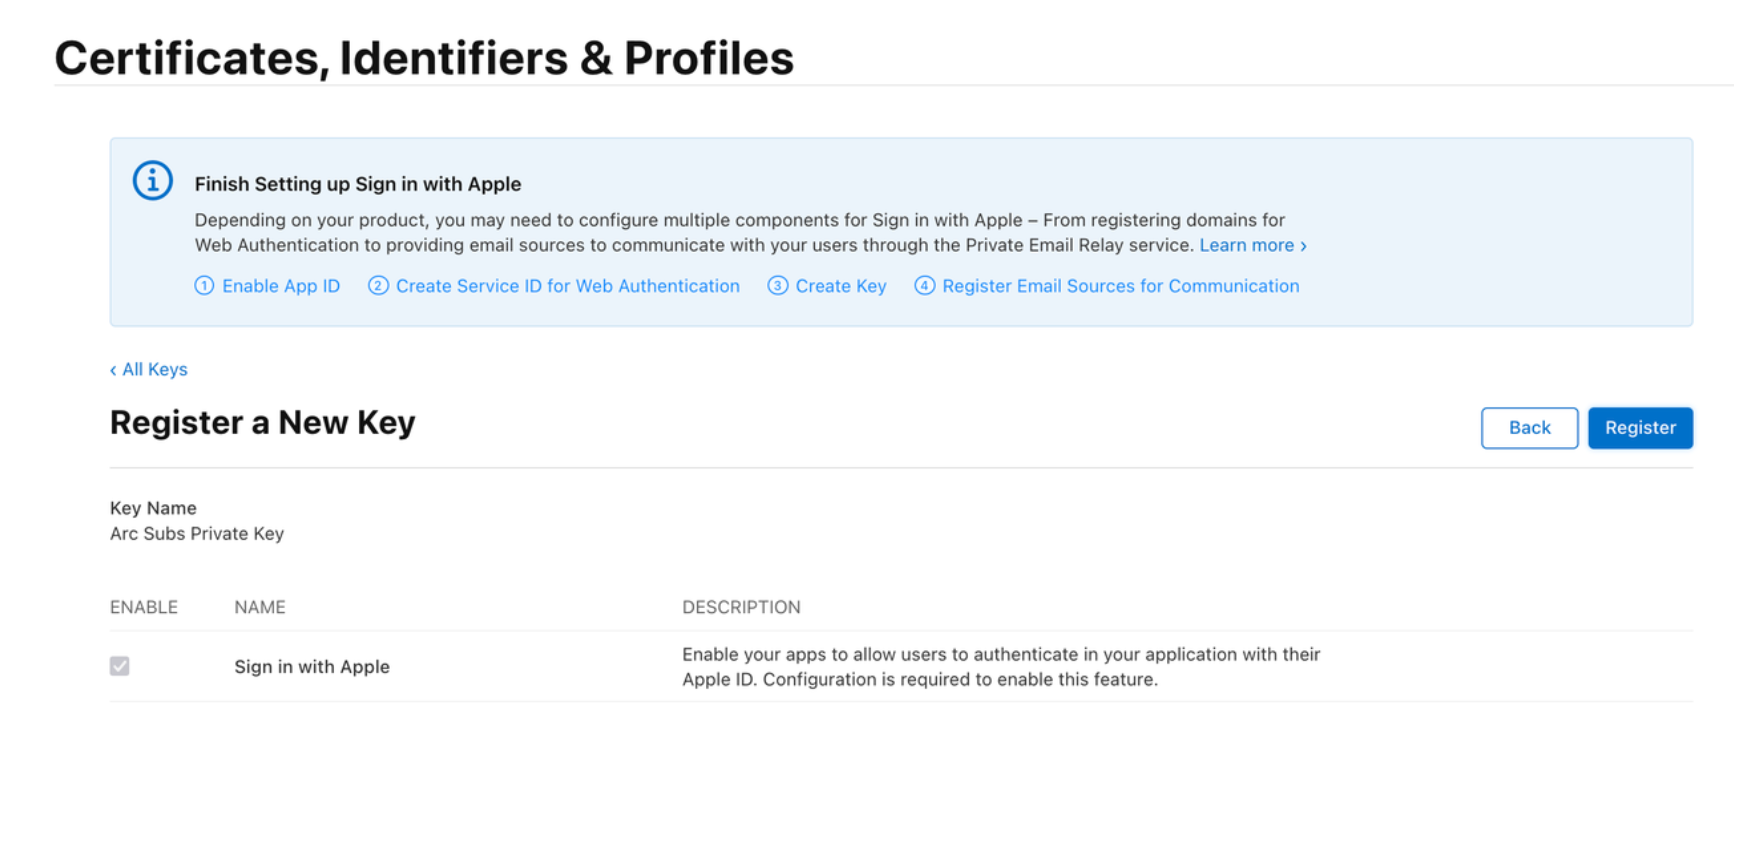
- On the next screen, you can download your private key. Click the “download” button. You should have a file named something like: AuthKey_U672Q22ZFQ.p8
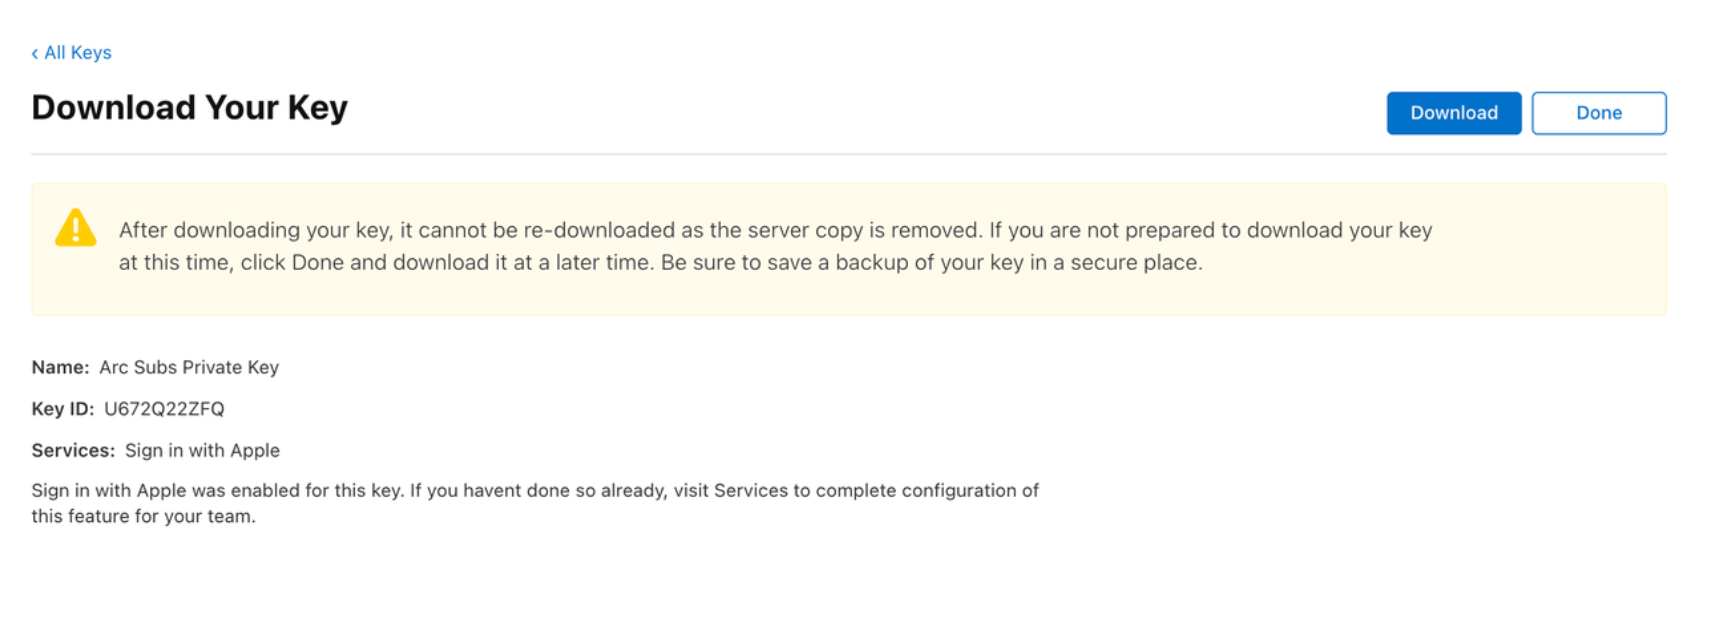
- Copy the text in the file, EXCLUDING the “-----BEGIN/END PRIVATE KEY-----” sections.
-
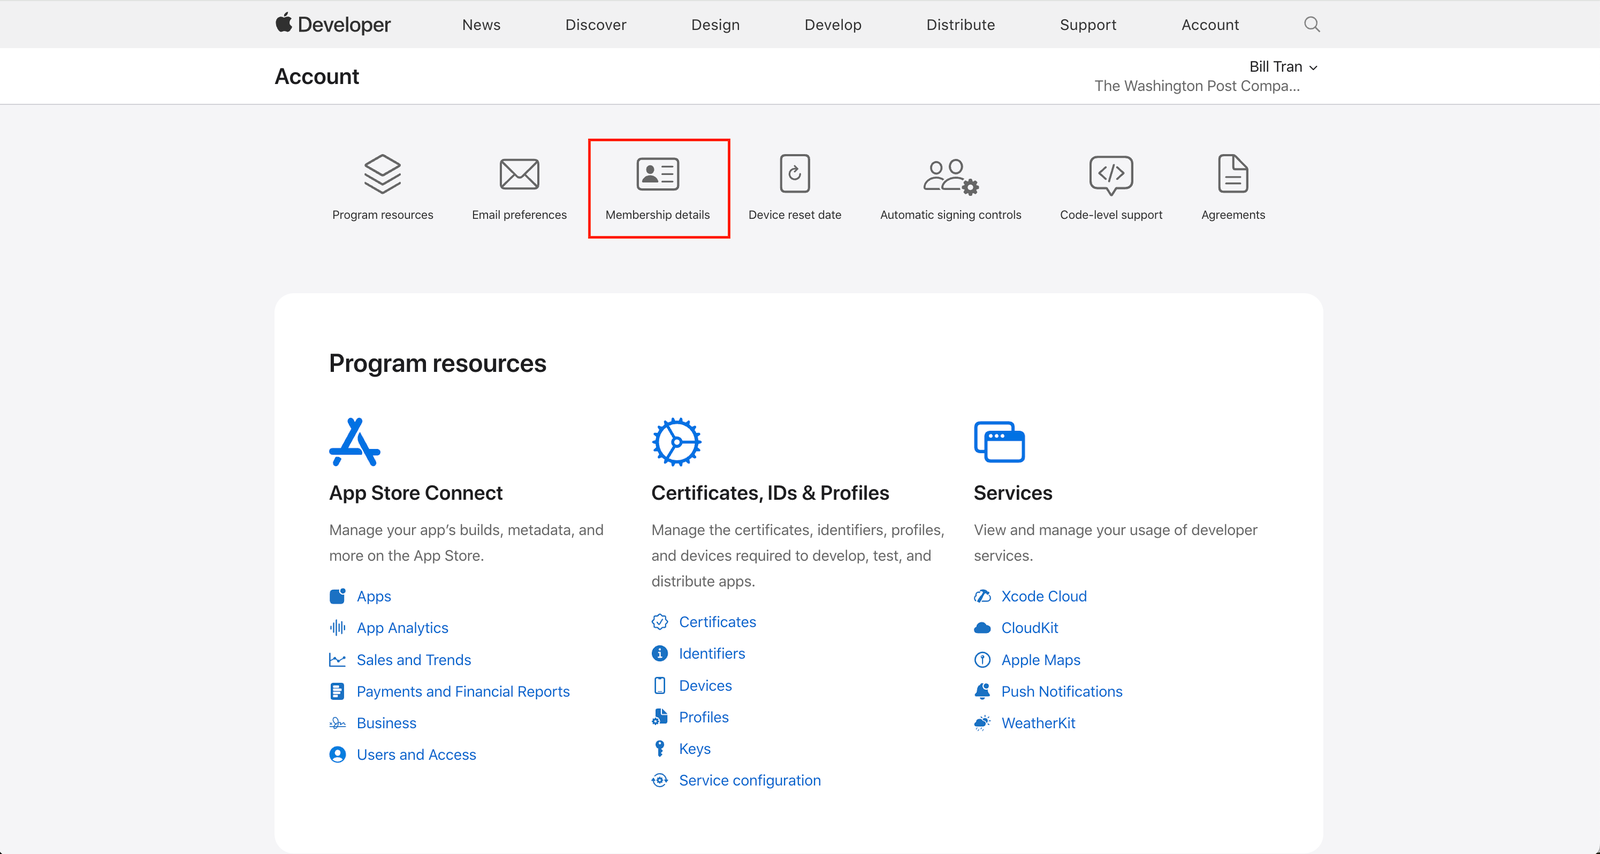
Grab the Team ID
- From Apple developer account, you will need to get the Team ID (see How To Find Team ID). You should be able to find it under your Membership Details.
-
Configure App on Admin tool
Once you have completed setup on Apple and gathered all necessary information for your app, you can proceed to create a new Authentication Provider. Complete the form with the gathered information. The Redirect URI is the url that directs users to the login page.

OIDC
To integrate any authentication provider using the OIDC protocol within Arc XP Identity, you first need to retrieve specific configuration settings from the provider. These settings allow secure communication between your application and the provider during the authentication process. Below is a general overview of how to obtain these settings from any authentication provider:
-
Register Your Application:
- The first step is to register your application with the authentication provider. This process typically involves creating a developer account on the provider’s platform.
- Provide details like your application’s name and description, and register it to receive credentials.
- As part of the application setup, you will need to specify one or more Redirect URIs. These are the URLs where the provider will send the user back to your application after authentication.
-
Obtain Client Credentials:
- Once the application is registered, the provider will generate some settings values, such as a Client ID, depending on the provider, a Client Secret and other values.
- These credentials are unique to your application and are used to authenticate your app during OIDC communication.
-
Configure App on Admin tool:
- After completing the setup on the provider’s side and gathering all necessary information, proceed to create a new Authentication Provider in Arc XP Identity by selecting the OIDC type.
- In the image below, you’ll see an option to select either Standard or Apple. Choose the option that corresponds to your provider. Note that Apple requires additional information, such as the Team ID and Key ID, which are not needed for most other providers.
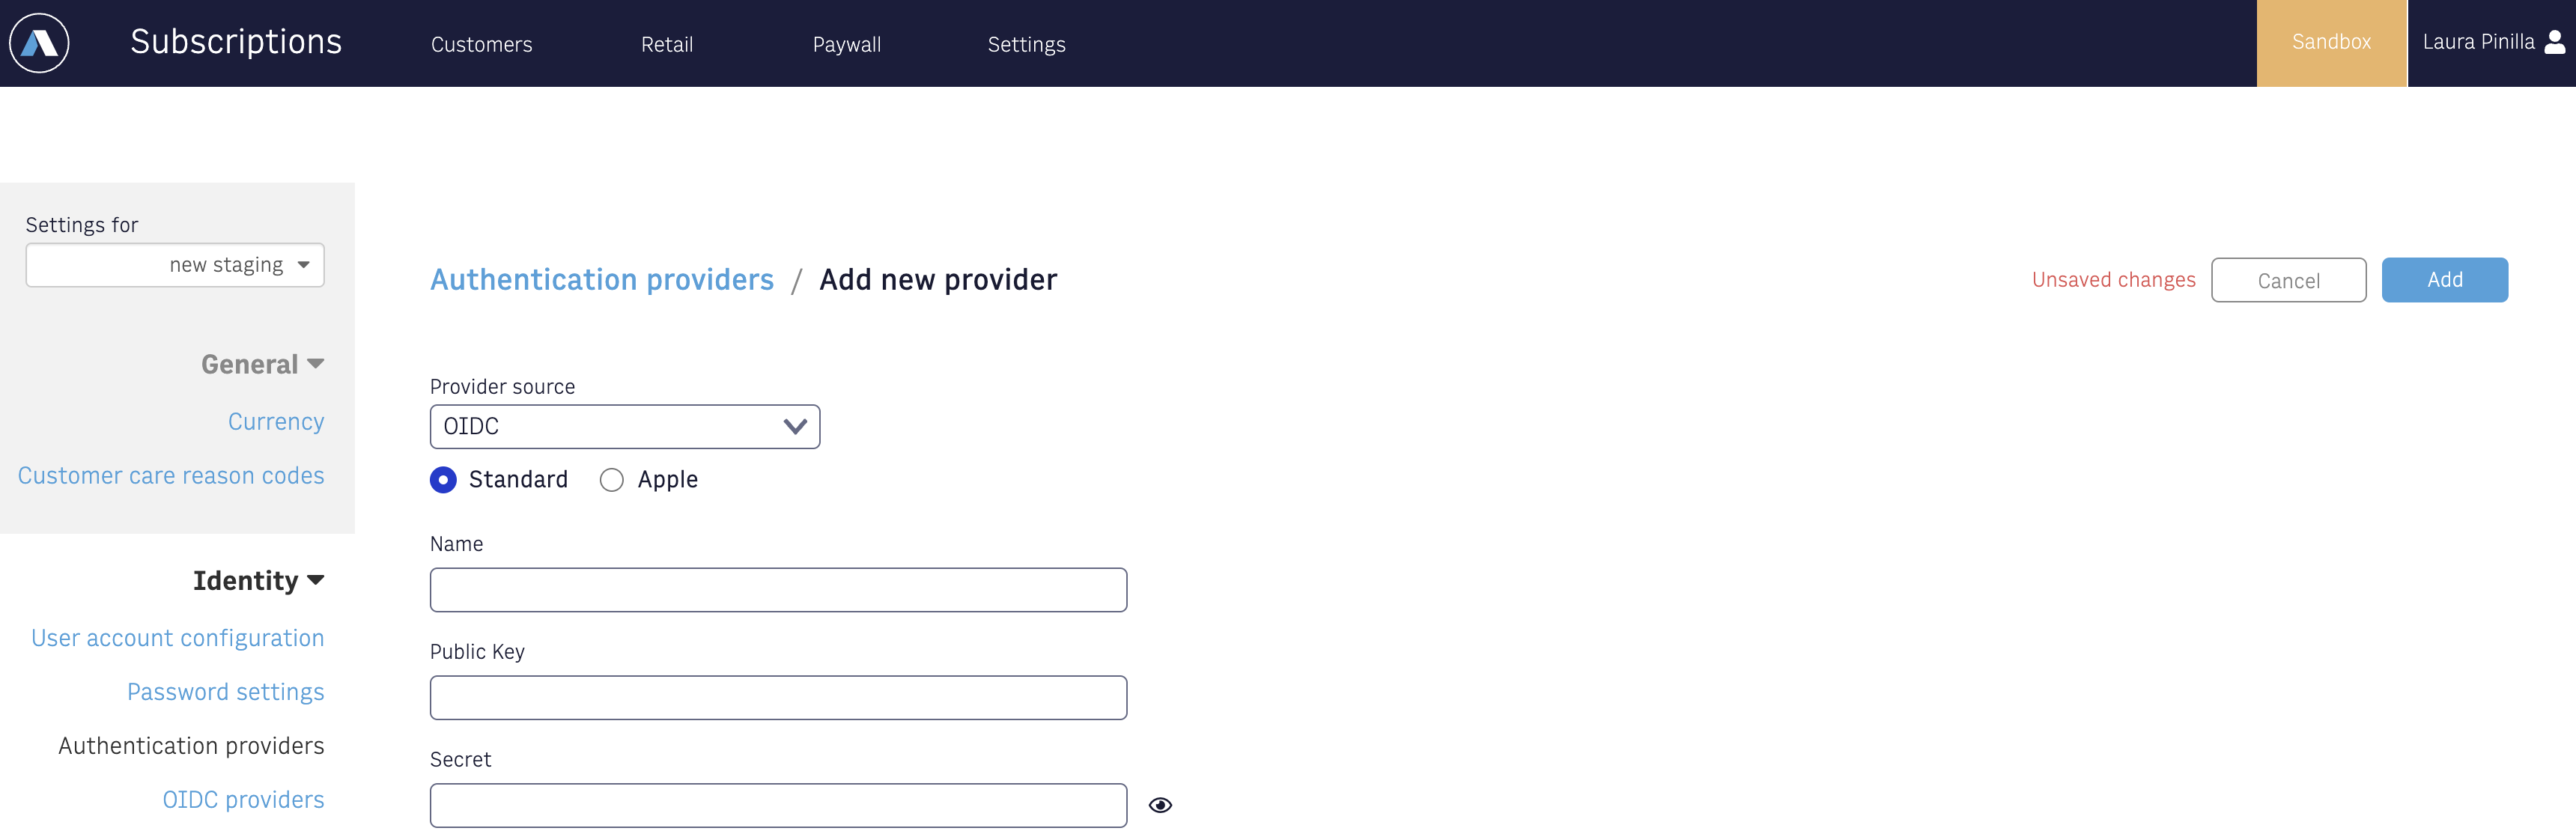
- Fill out the form using the details you’ve collected.
Standard OIDC
If you selected Standard option, make sure you already have the information described below.
| Field | Description |
|---|---|
| name (required) | string - 32 characters A name assigned to the configurtion by Arc’s client |
| publicKey (required) | string - 64000 characters A PEM formatted public key used by Arc for validating the ID token received from the IdP. The CRLF characters must be removed before uploading the key to Arc. |
| secret (required) | string - 256 characters The secret to be used by Arc when calling the IdP’s token endpoint |
| clientId (required) | string - 64 characters The client ID assigned by the IdP |
| redirectURI (required) | string - 256 characters The URL that the IdP will be requested to redirect the browser after the user authenticates |
| authorizationEndpoint (required) | string - 256 characters The IdP’s authorization endpoint |
| tokenEndpoint (required) | string - 256 characters The IdP’s token endpoint to be called by Arc |
| jwksEndpoint | string - 256 characters URL from which the public provider keys can be downloaded |
Apple OIDC
If you selected the Apple option, all the required values for the form can be obtained by following the steps outlined in the Apple section above.