Getting Integrations Running Locally -- Java (Write, Build, Run!)
This is where you should begin your coding! This document is a guide to creating, building and running integrations on your local machine. It assumes you have already created an integration.
The general developer flow for creating integrations is write code locally → build → run → deploy to sandbox → test it! → deploy to production.
You can find the Swagger doc here
In order to build and run your integrations, Java 8 and the latest Maven is required. Here is the recommended way to install these dependencies:
Install Java 8
We recommend the Amazon Corretto distribution but are not limited to it. Other compatible distributions could also be used.
For Mac or Linux, it’s easier to manage your Java SDKs with SDKMAN!.
Once it’s installed, follow these steps:
-
Run the command
sdk list javato list the Amazon Corretto distributions. From this list, choose the latest major version 8’s identifier. In my case, I will use8.0.352-amzn:Using:java: 8.0.352-amzn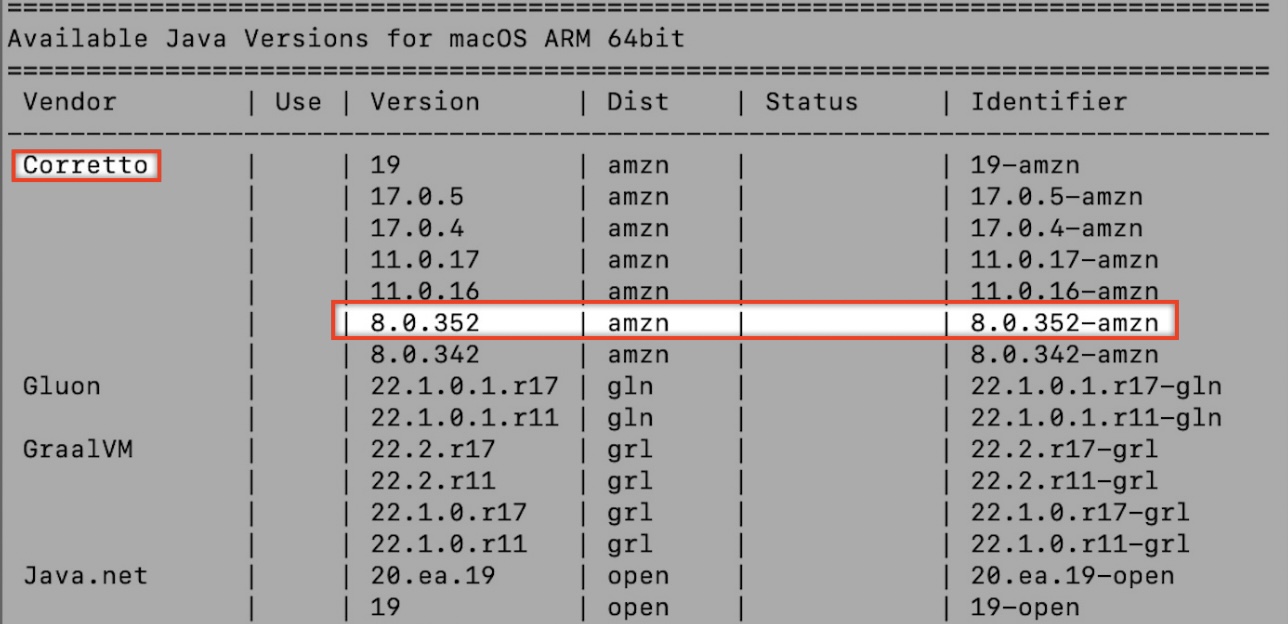
-
Install the latest distribution (use from your list):
sdk install java 8.0.352-amzn -
Verify your environment:
sdk current. You should see something like:Using:java: 8.0.352-amzn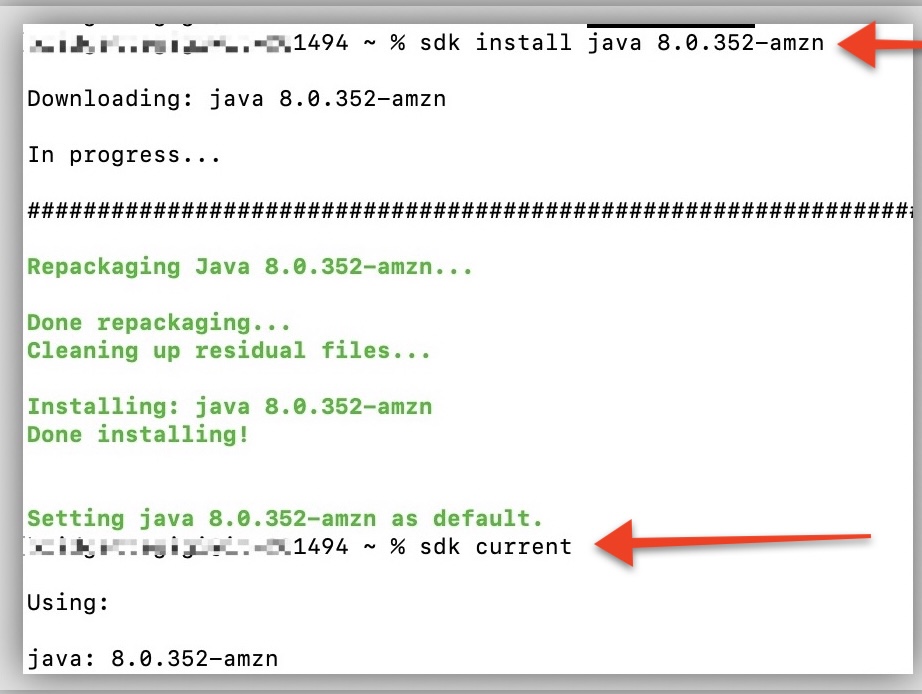
For Windows, follow these instructions to install the preferred Amazon Corretto distribution.
Install Git
Install git by following the instructions https://github.com/git-guides/install-git
Install IDE
Install your preferred Java IDE, for example, IntelliJ IDEA, Eclipse, or NetBeans
Clone your integration locally
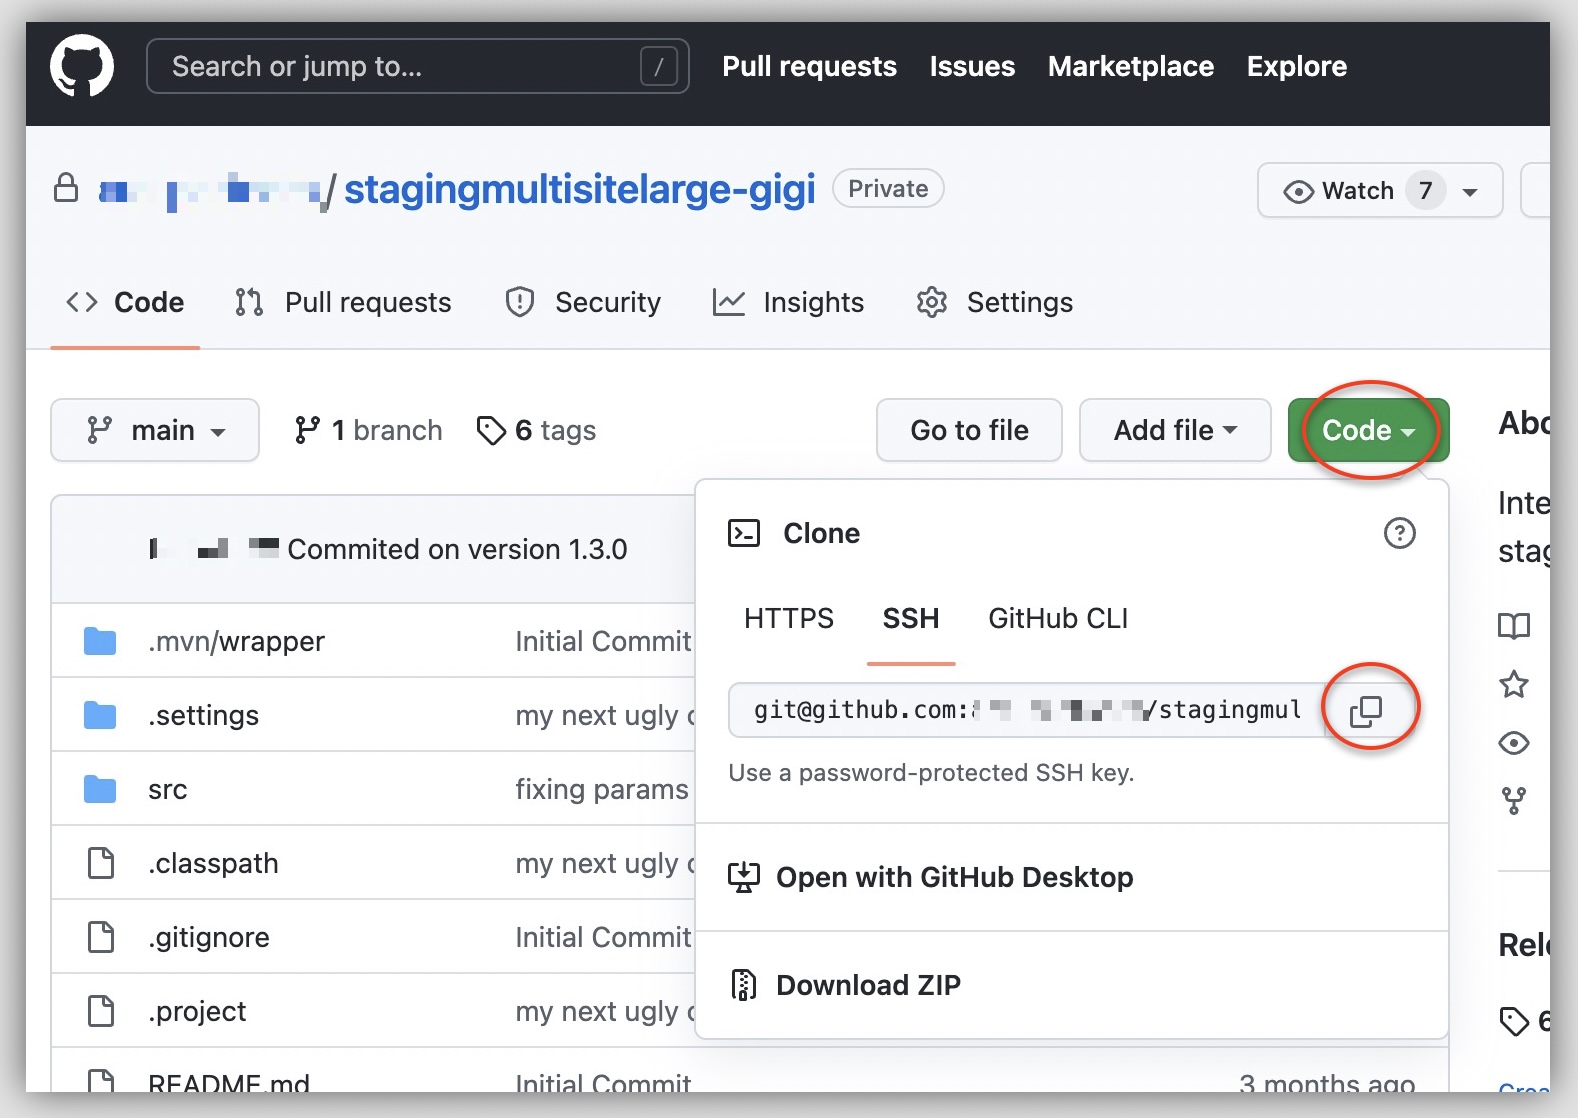
Create a repo using your preferred source control. Clone the integration repository to your local machine. It’s best to use the SSH Option, and you can clone it into the directory of your choice, or use ~/git/. Make sure you have set up an SSH key! First get the SSH URL:
Next, make your new directory or use an existing one and clone the code to that directory:
mkdir ~/git && git clone git@github.com:$my-github-url.git ~/gitCreate a new project
Now you can import your project to your IDE. Here we will use Eclipse as an example to go through its configuration so it can download the IFX dependencies properly.
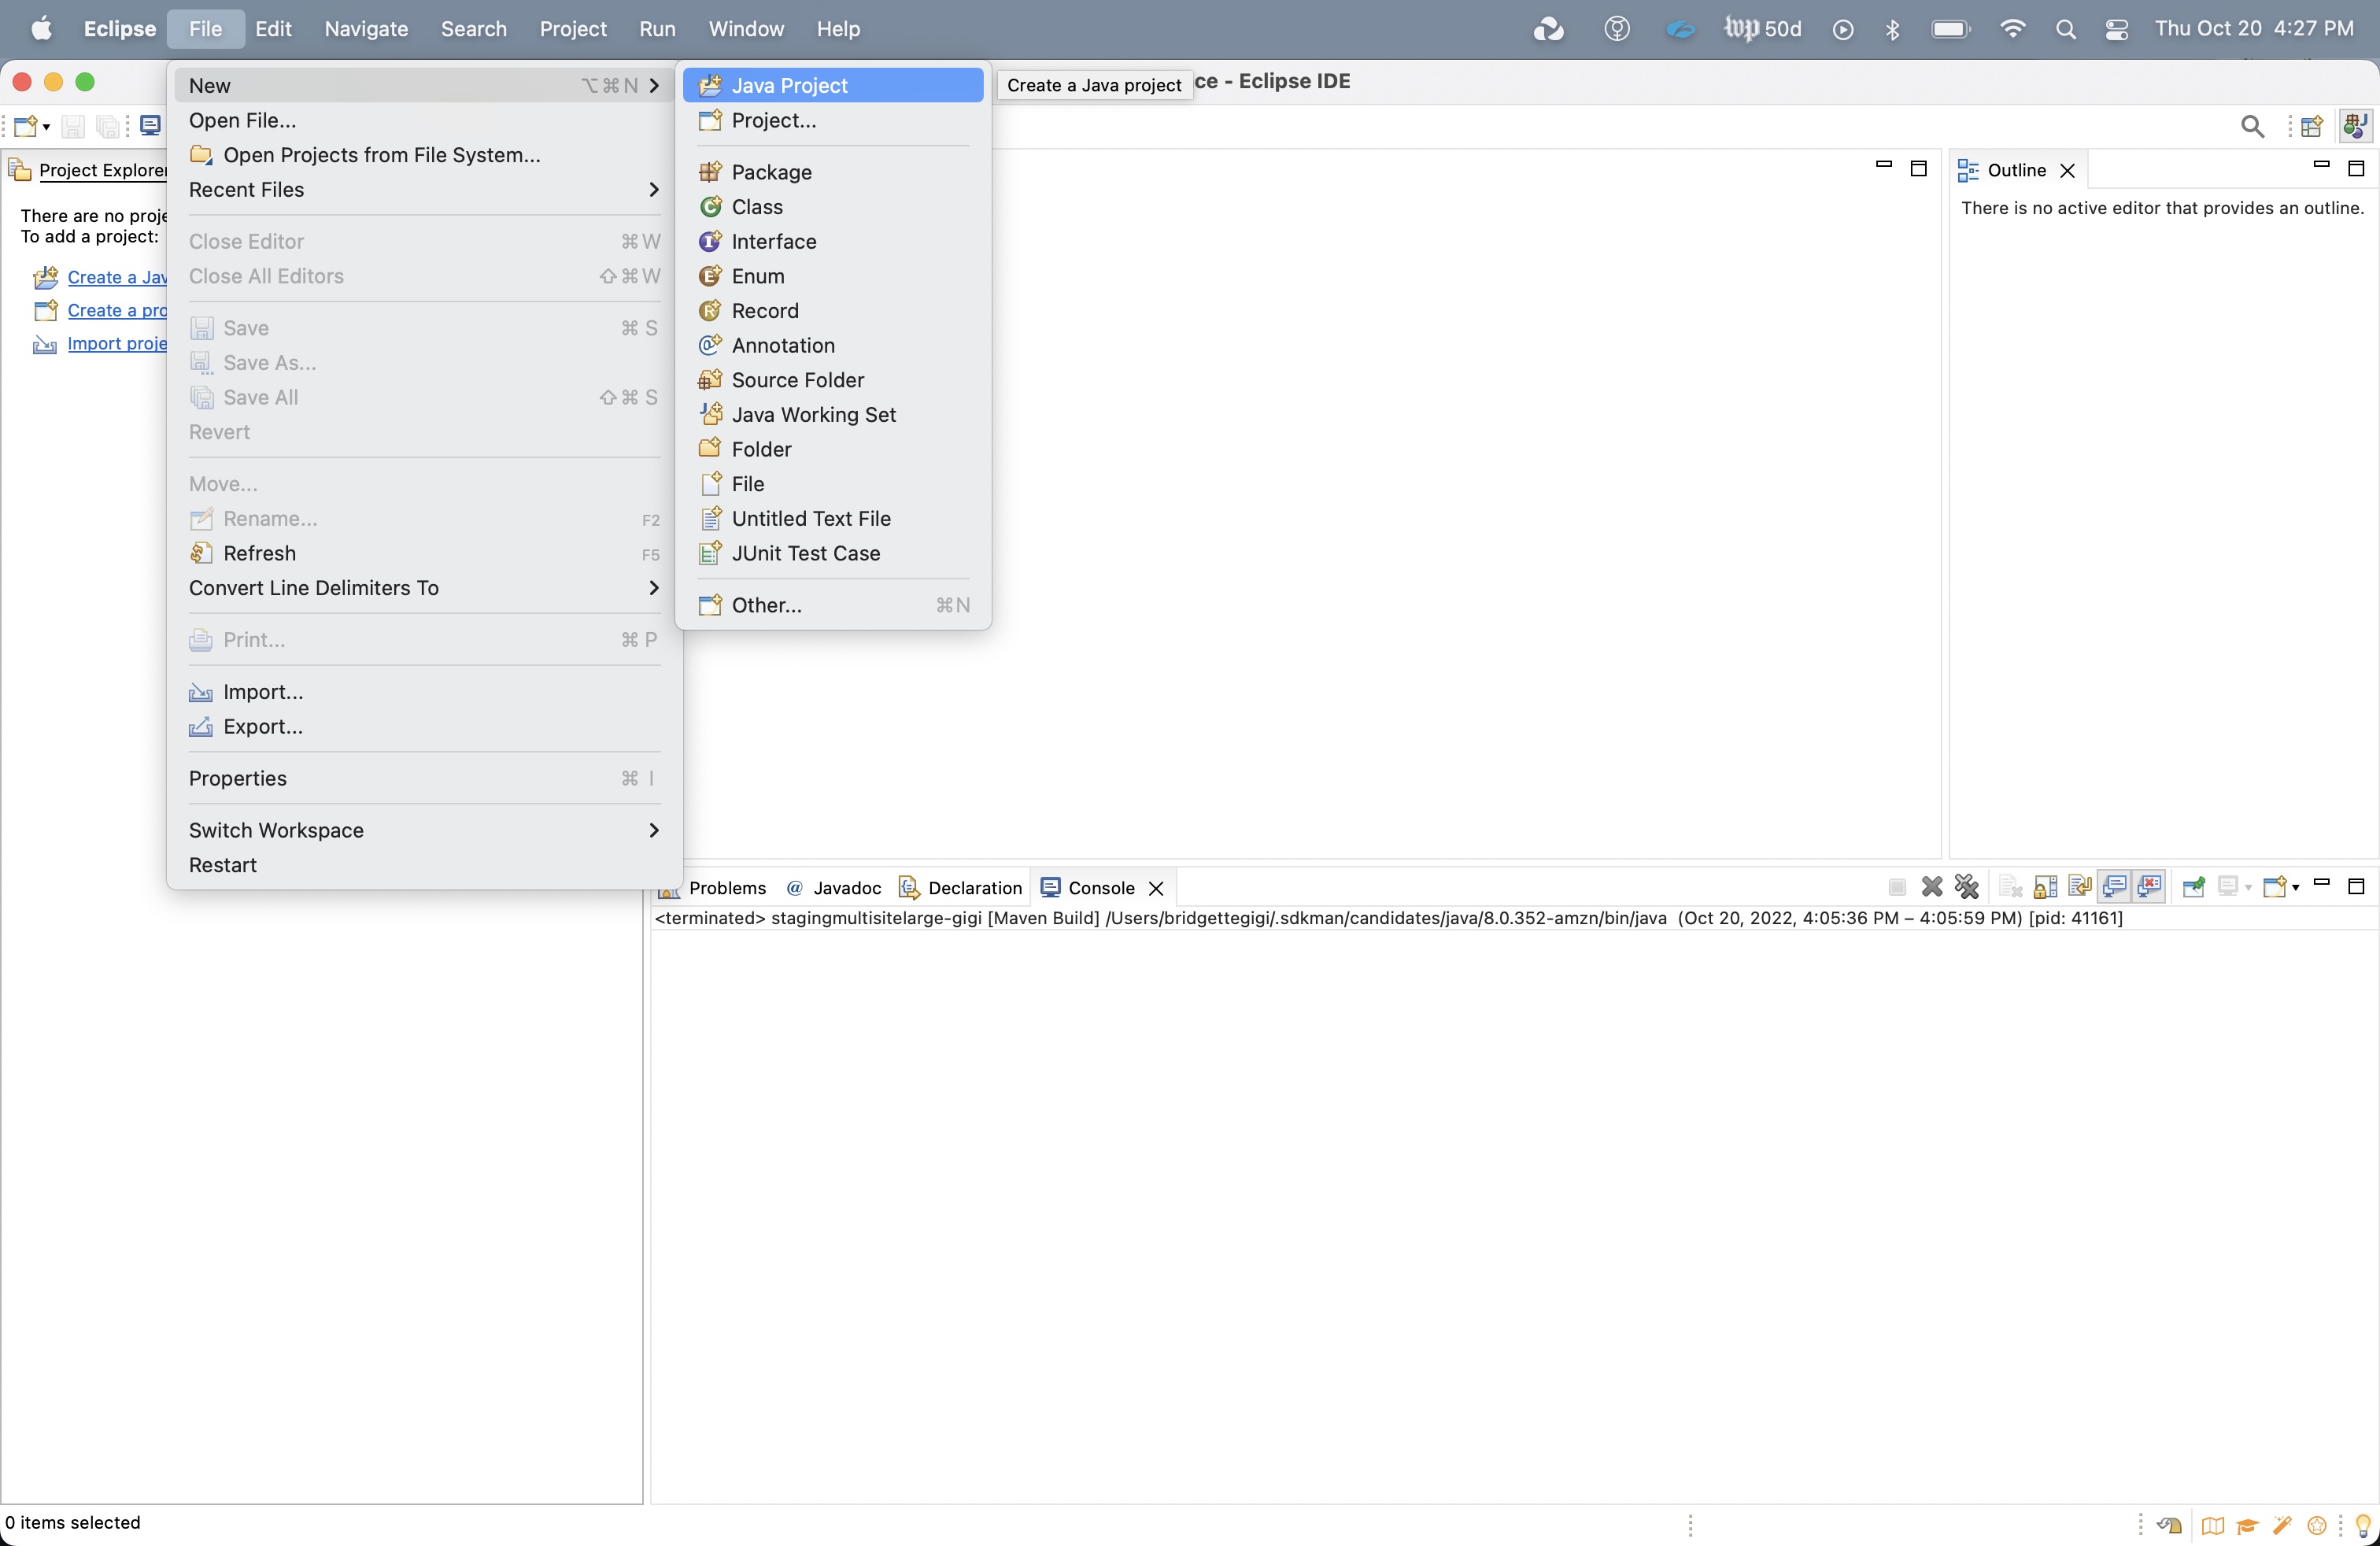
First, go to File → New → Java Project
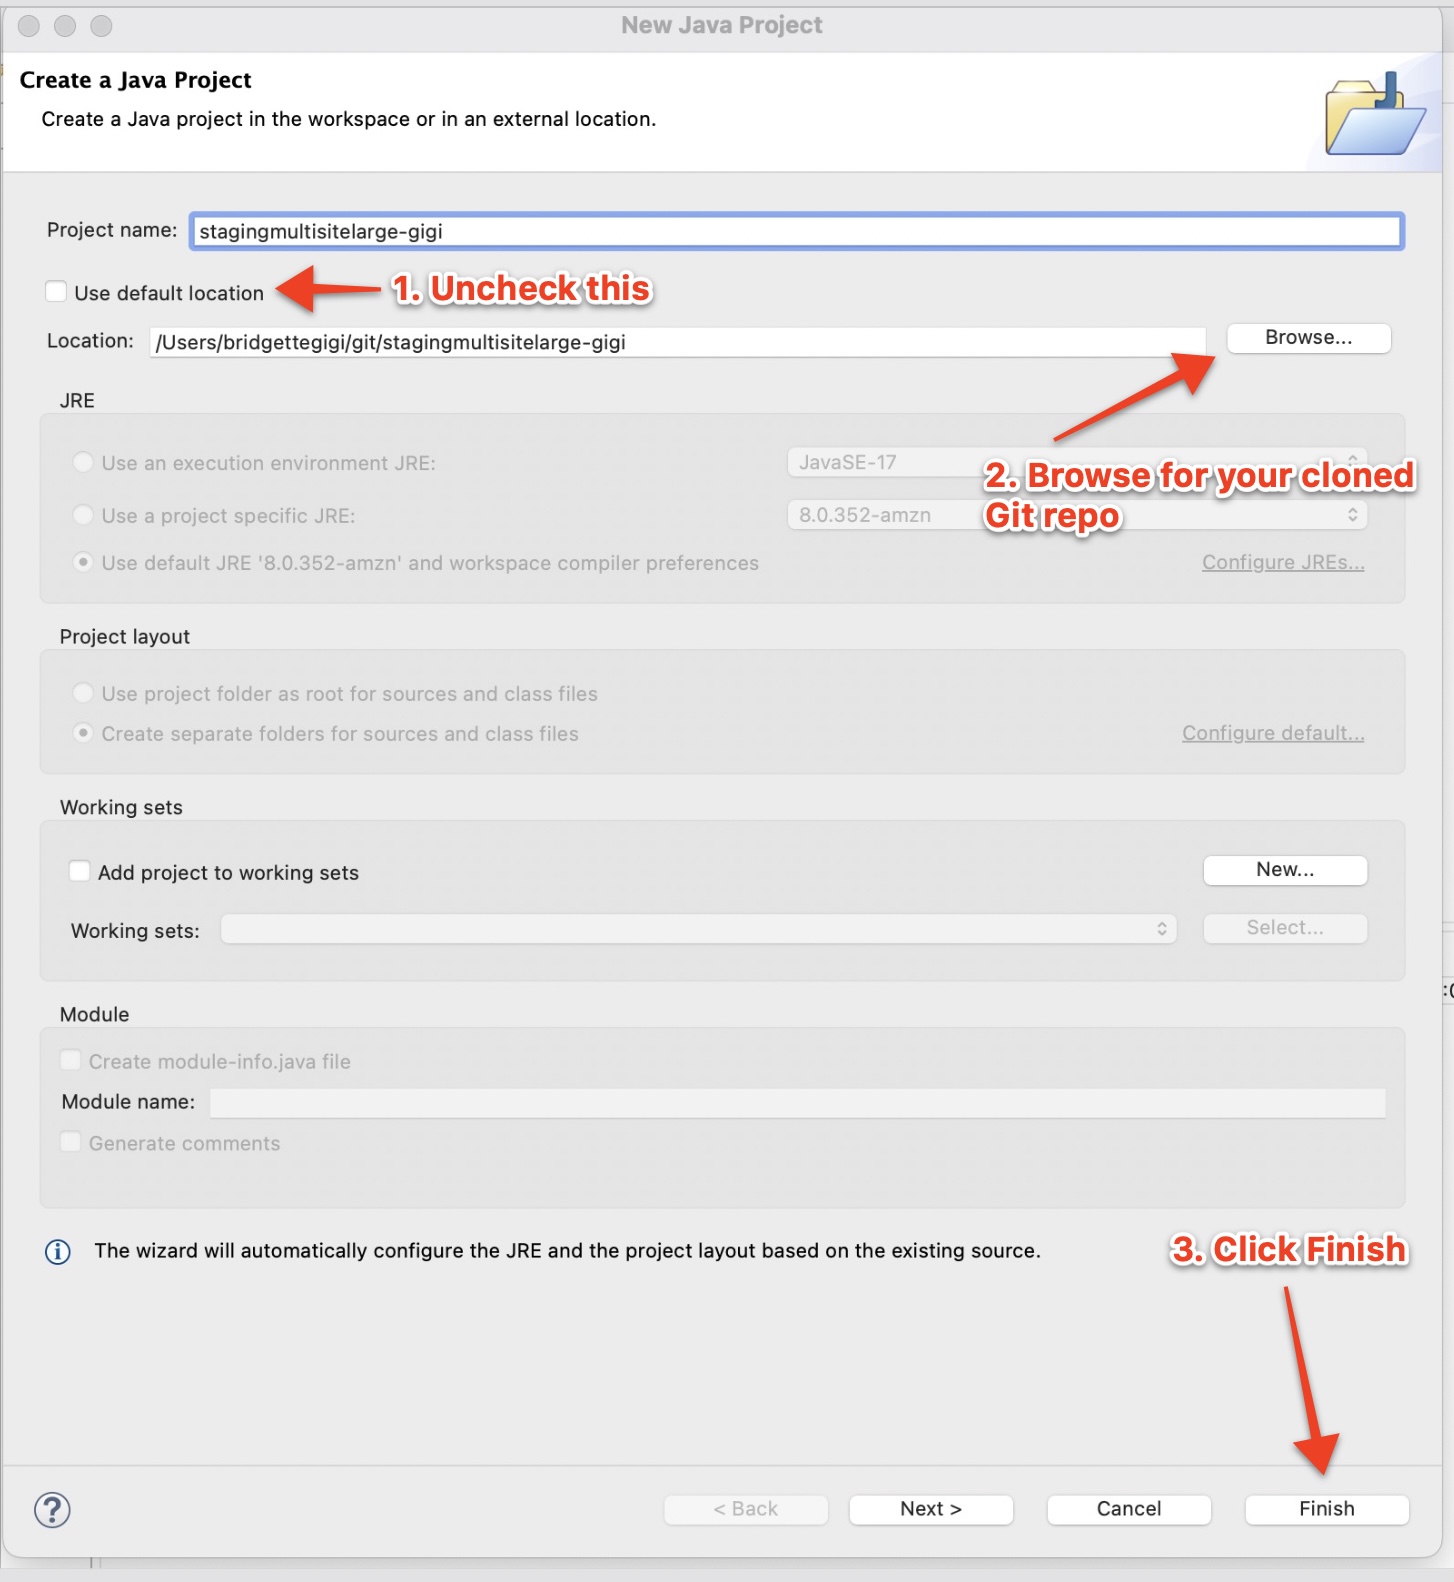
Uncheck “Use default location” and click “Browse” to find your project you cloned in the previous step. In my project, the location is ~/git/stagingmultisitelarge-gigi.
Change nothing more and click “Finish” at the bottom.
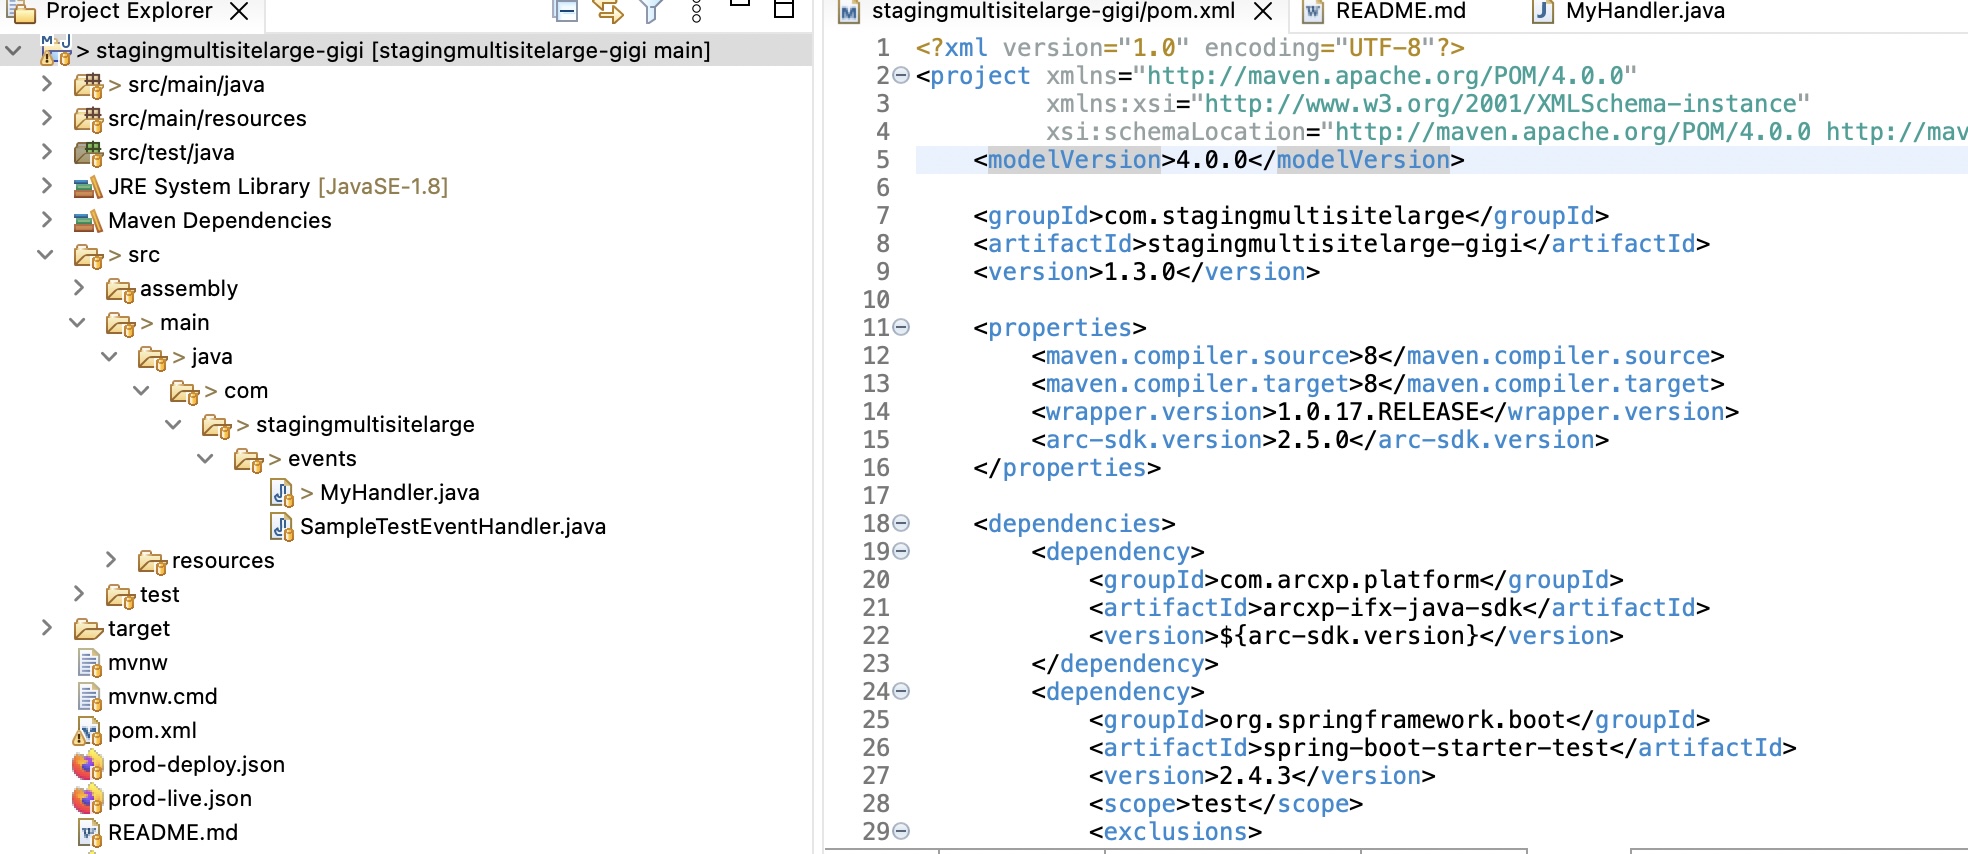
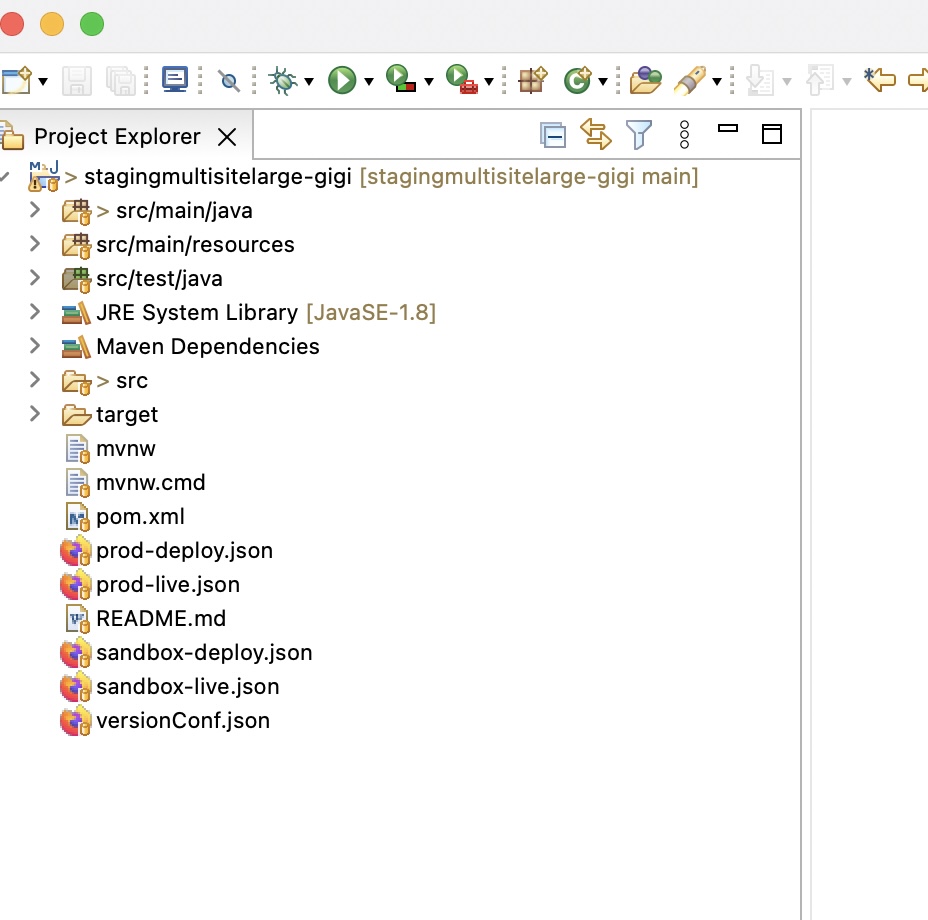
Now I can see the project’s files in the explorer:
Configure the Maven run settings
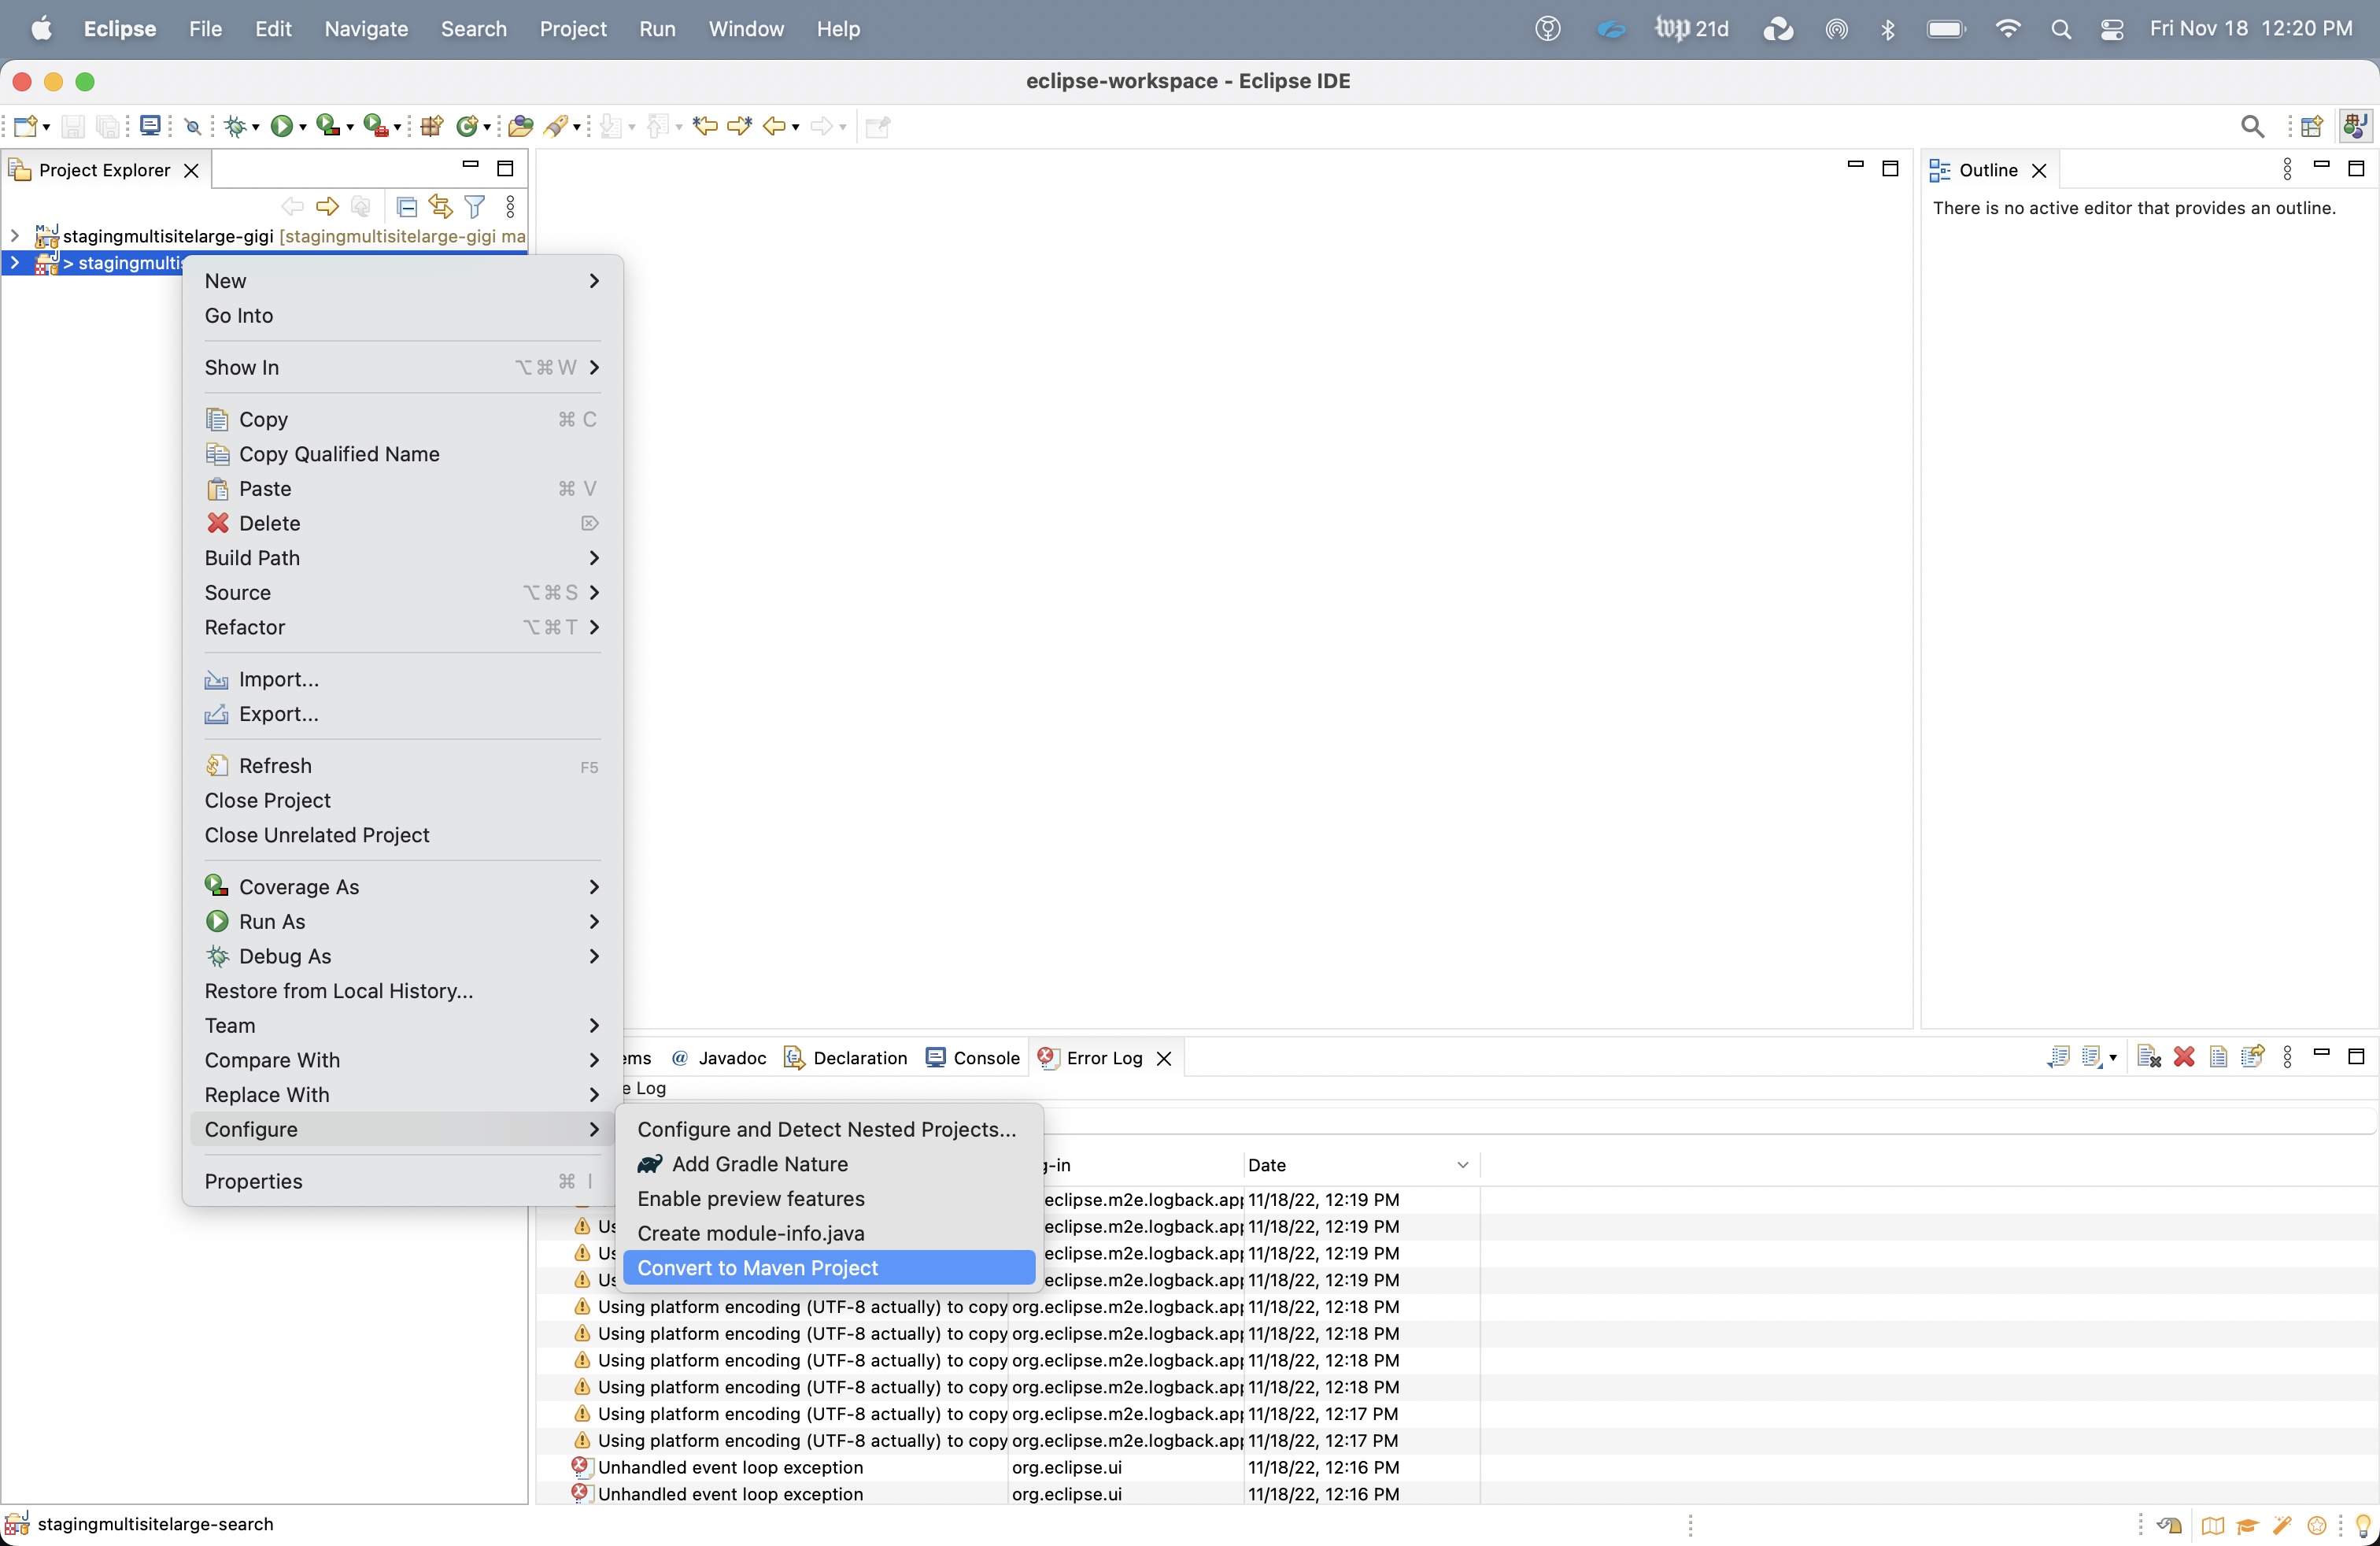
First convert your project to a Maven project. Right click on the project then go to Configure → Convert to Maven Project
Right click on your project in the explorer then go to Run As → Run Configurations
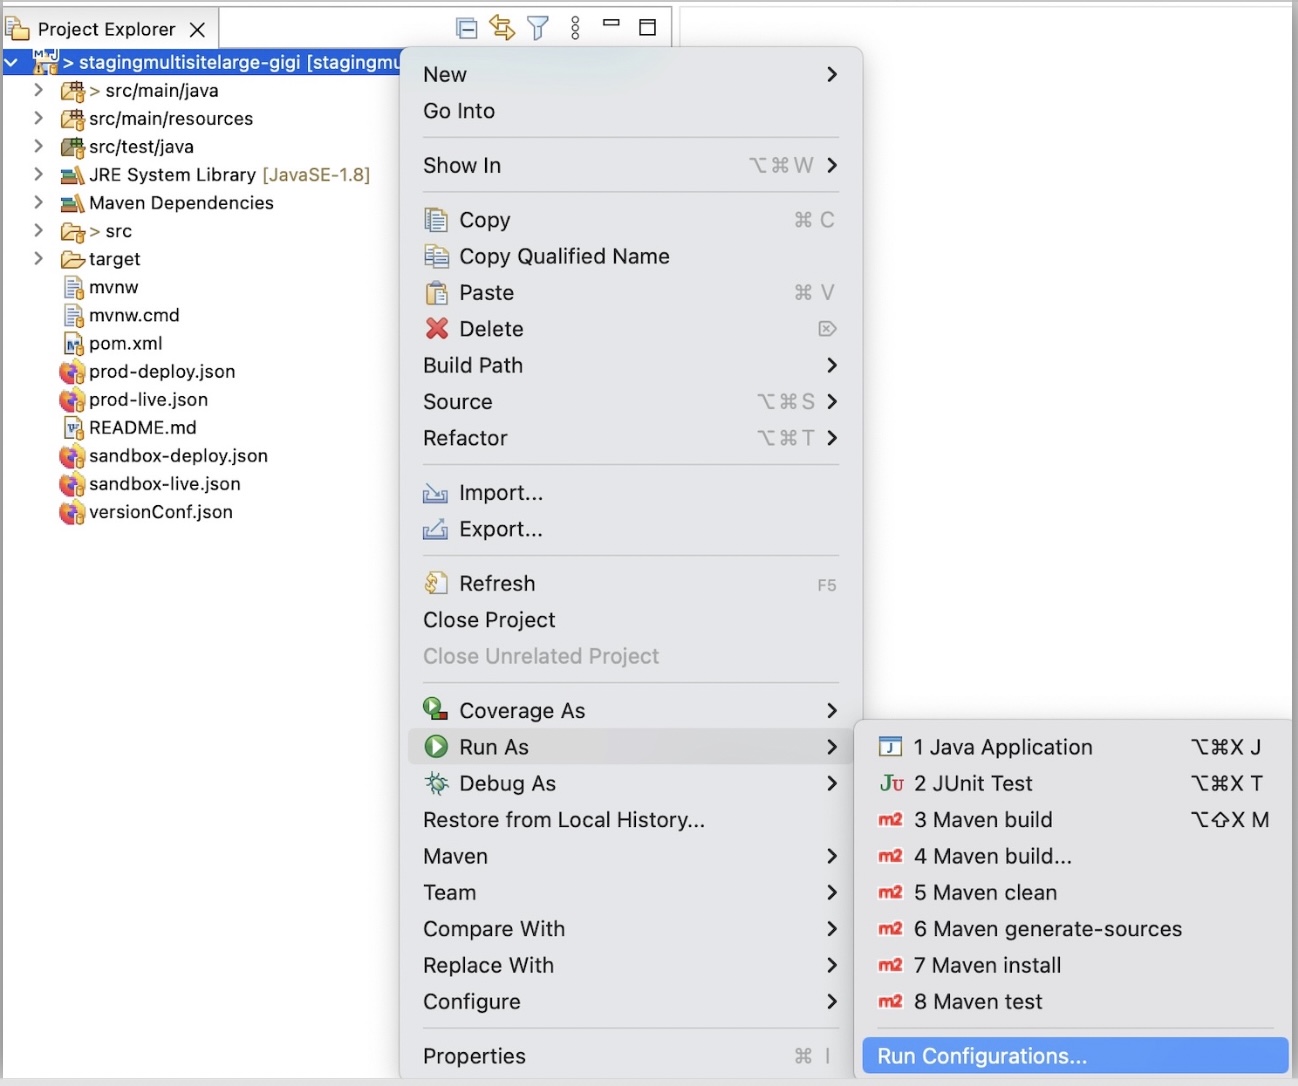
Inside the Run Configurations make sure you have the following:
Name: Whatever you want!
Goals: clean package spring-boot:repackage install
User Settings: In Terminal navigate to your project’s path, then to the .mvn/wrapper directory. Enter the command pwd to get the working directory path and copy it to your clipboard.
This path + /settings.xml is what you want to put in this field. In my case /Users/bridgettegigi/git/stagingmultisitelarge-gigi/.mvn/wrapper/settings.xml. Note: this configuration will not allow you to use the shortcut ~
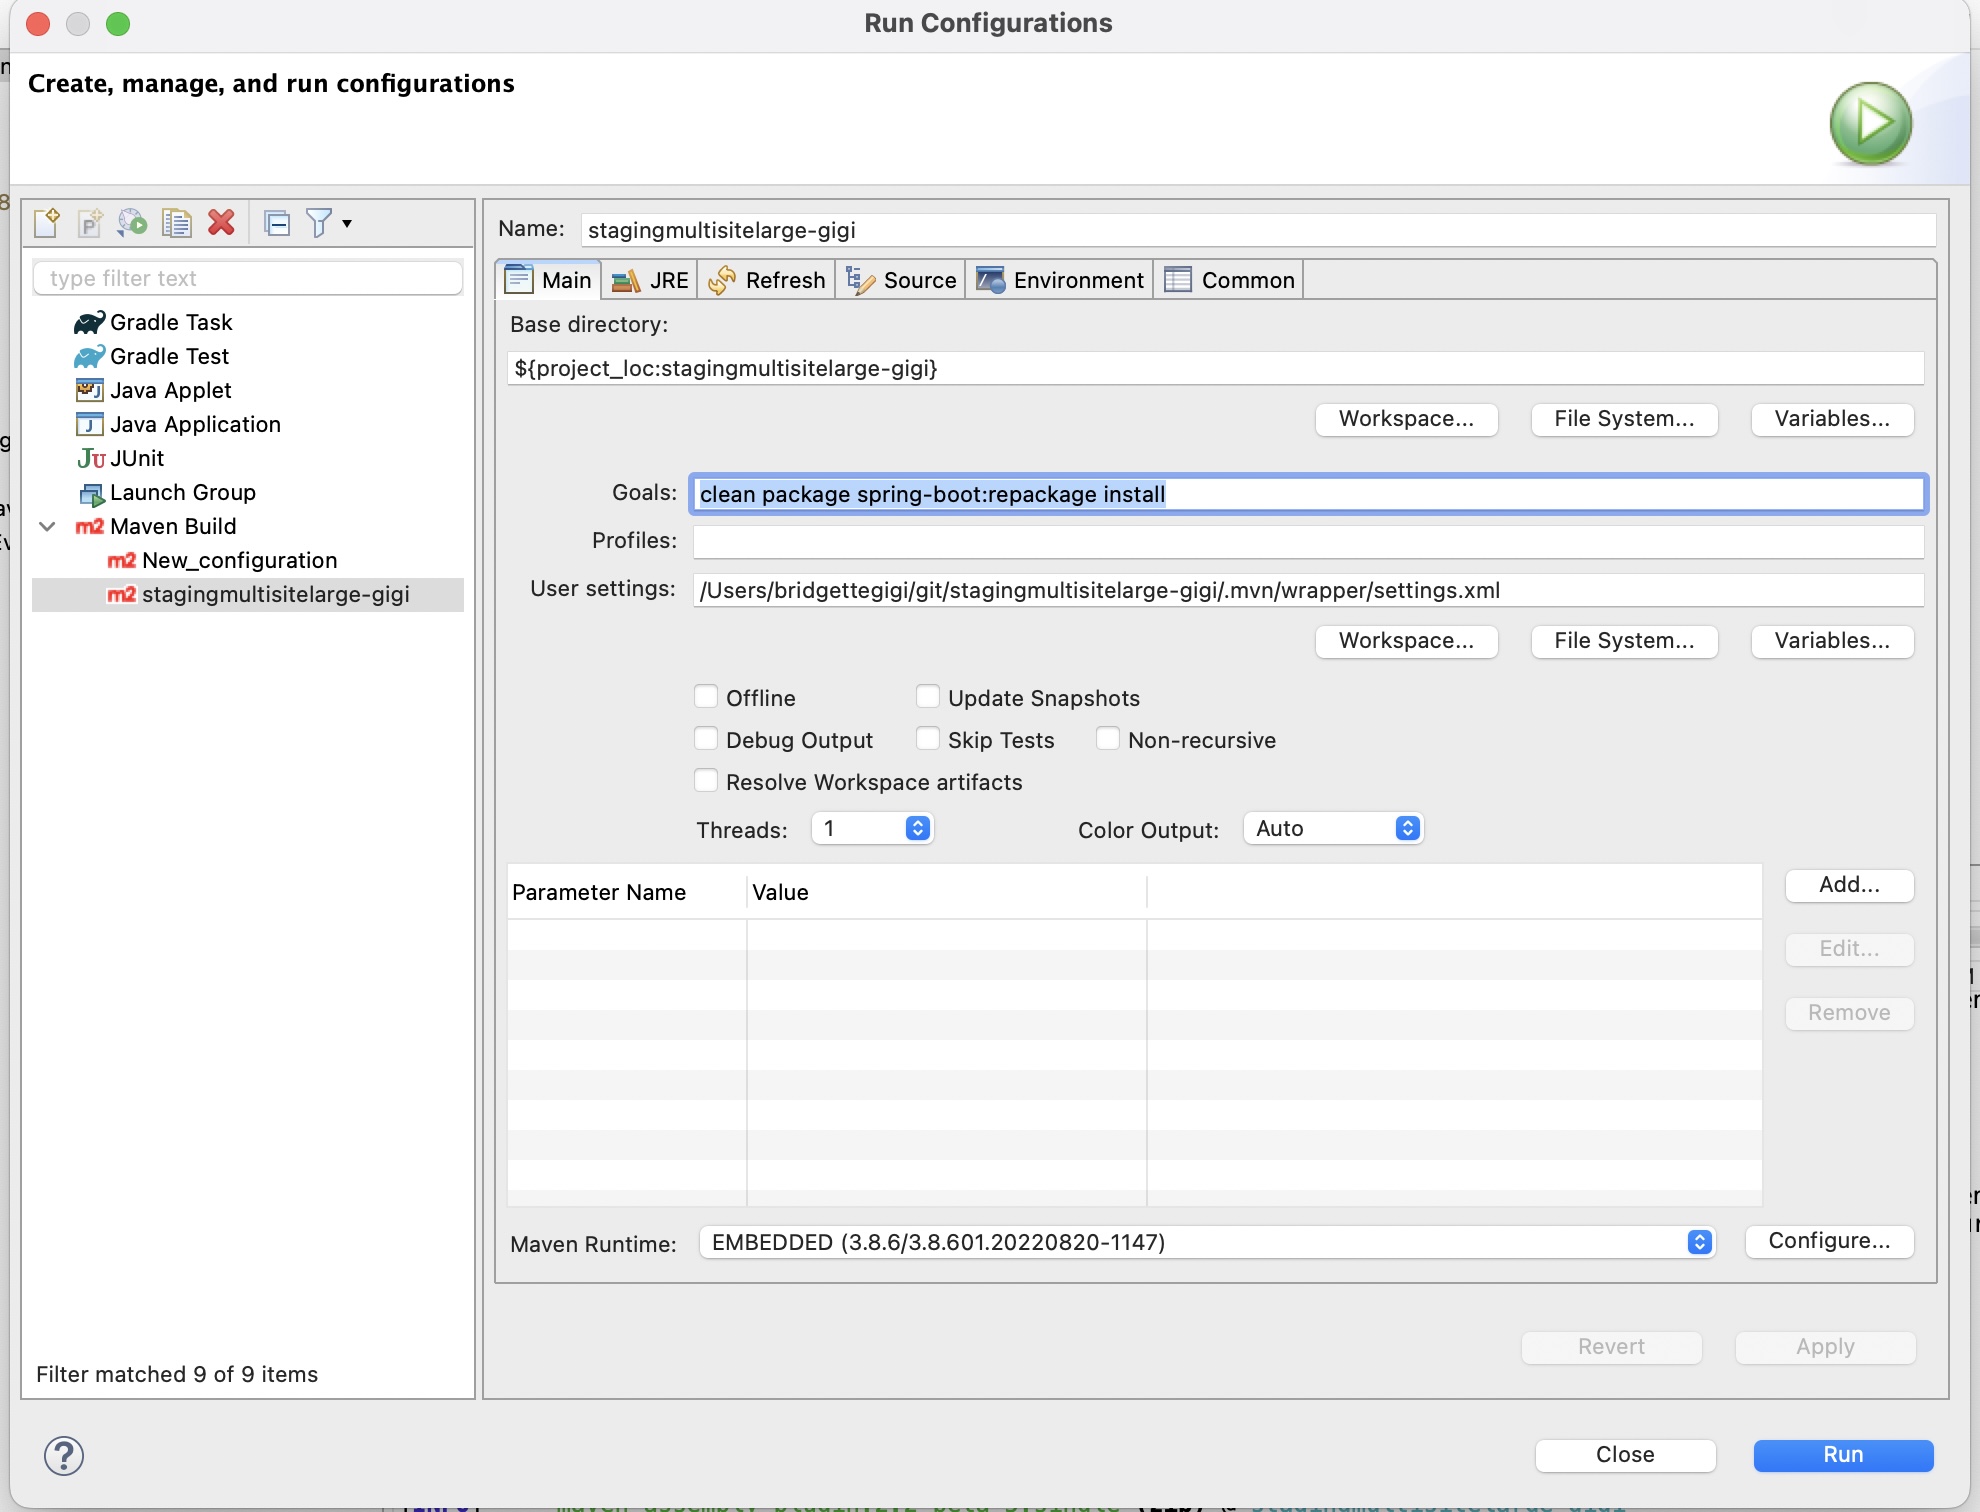
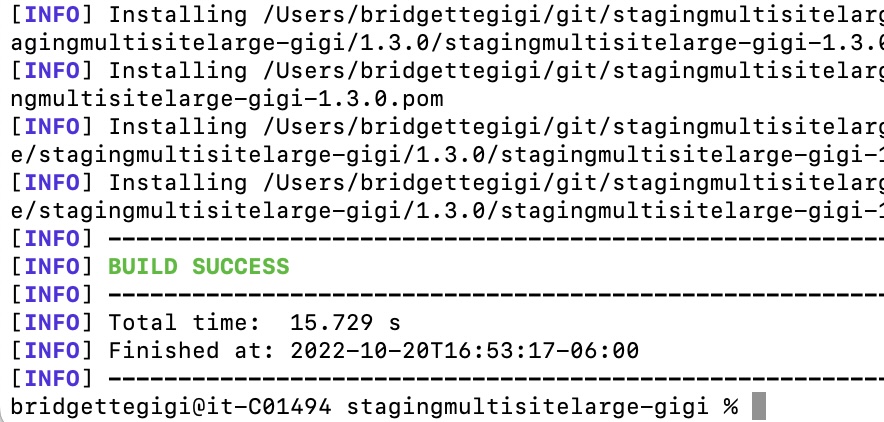
Click on Apply, then Run. The Eclipse terminal should show an output of text as the project artifact is built, and we want to see that lovely BUILD SUCCESS message!
From this point on you can build your integration using Eclipse (option 1), or with Terminal (option 2).
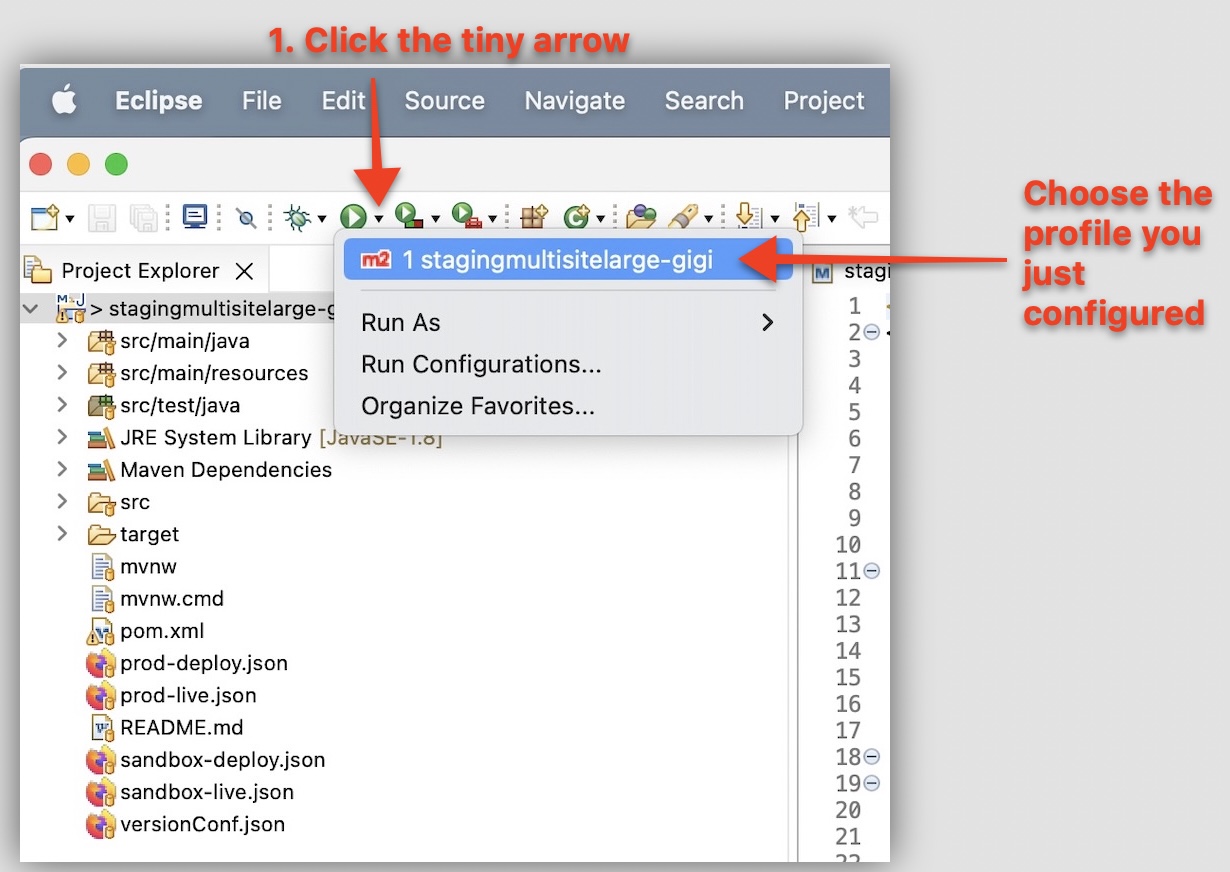
To build with Eclipse
(1) Click the tiny arrow to the right of the play button; (2) Select the build profile you just configured.
To build with Terminal
Open your terminal and navigate to the project’s folder, and run this command to build the artifact (note the path to the settings.xml depends on from where you are running the command) ./mvnw -s .mvn/wrapper/settings.xml clean package spring-boot:repackage install
After it successfully builds your integration, you should see the <organization>-<integration>-<version>.jar available under the target folder.
Configure Your Local Properties
developerKey and app
You only need to do the devKey and app to connect to Commerce or Subscriptions, and, you must have these applications provisioned for the WebSocket to connect.
The local configurations of your integration are defined under src/main/resources/application-local.properties. There are two properties you should modify: developerKey and app, and both are only used on local environments.
The developerKey property is used as an identifier for the Arc Commerce applications to dispatch events to local integrations rather than Sandbox or Prod. It can be any unique string you want - your name, for example. The developerKey is sent in the request header. It will broadcast only to integrations when the developerKey (header) = developerKey (local property).
The app property defines which Arc Commerce app your integration is going to connect to. The options are identity, pim, and sales. IFX will create the WebSocket needed to connect to appropriate app.
PAT
In order to connect to any Arc services from your integration, you need to configure the PAT (personal access token) for your local integration. You can generate the token from the Developer Center in Arc Admin for the sandbox environmen. If the APIs your integration needs to interact with involve PUT, POST, or DELETE methods, you should select the “All Access” type.
When switching to a different environment, the value of your PAT should be updated to use the token from that environment.
⛔ You should never commit any secrets into Git.
The PAT should be stored in the file named secret-local.properties which you will need to create under src/main/resources:
vim /mypath/git/stagingmultisitelarge-gigi/src/main/resources/secret-local.properties
// add this line to the new filePERSONAL_ACCESS_TOKEN=place_your_token_here
Host
The host property is pre-configured for you to connect to the sandbox services. If you need to connect to other environments, follow this format:
// Non-productionhost=api...arcpublishing.com
// Productionhost=api..arcpublishing.com
Write some code; send an event!
Ok let’s do a very simple example to walkthrough the entire process of writing some code and getting it to receive data from events.
In my integration I added a very simple handler for story:create where all I will do is output a log message:
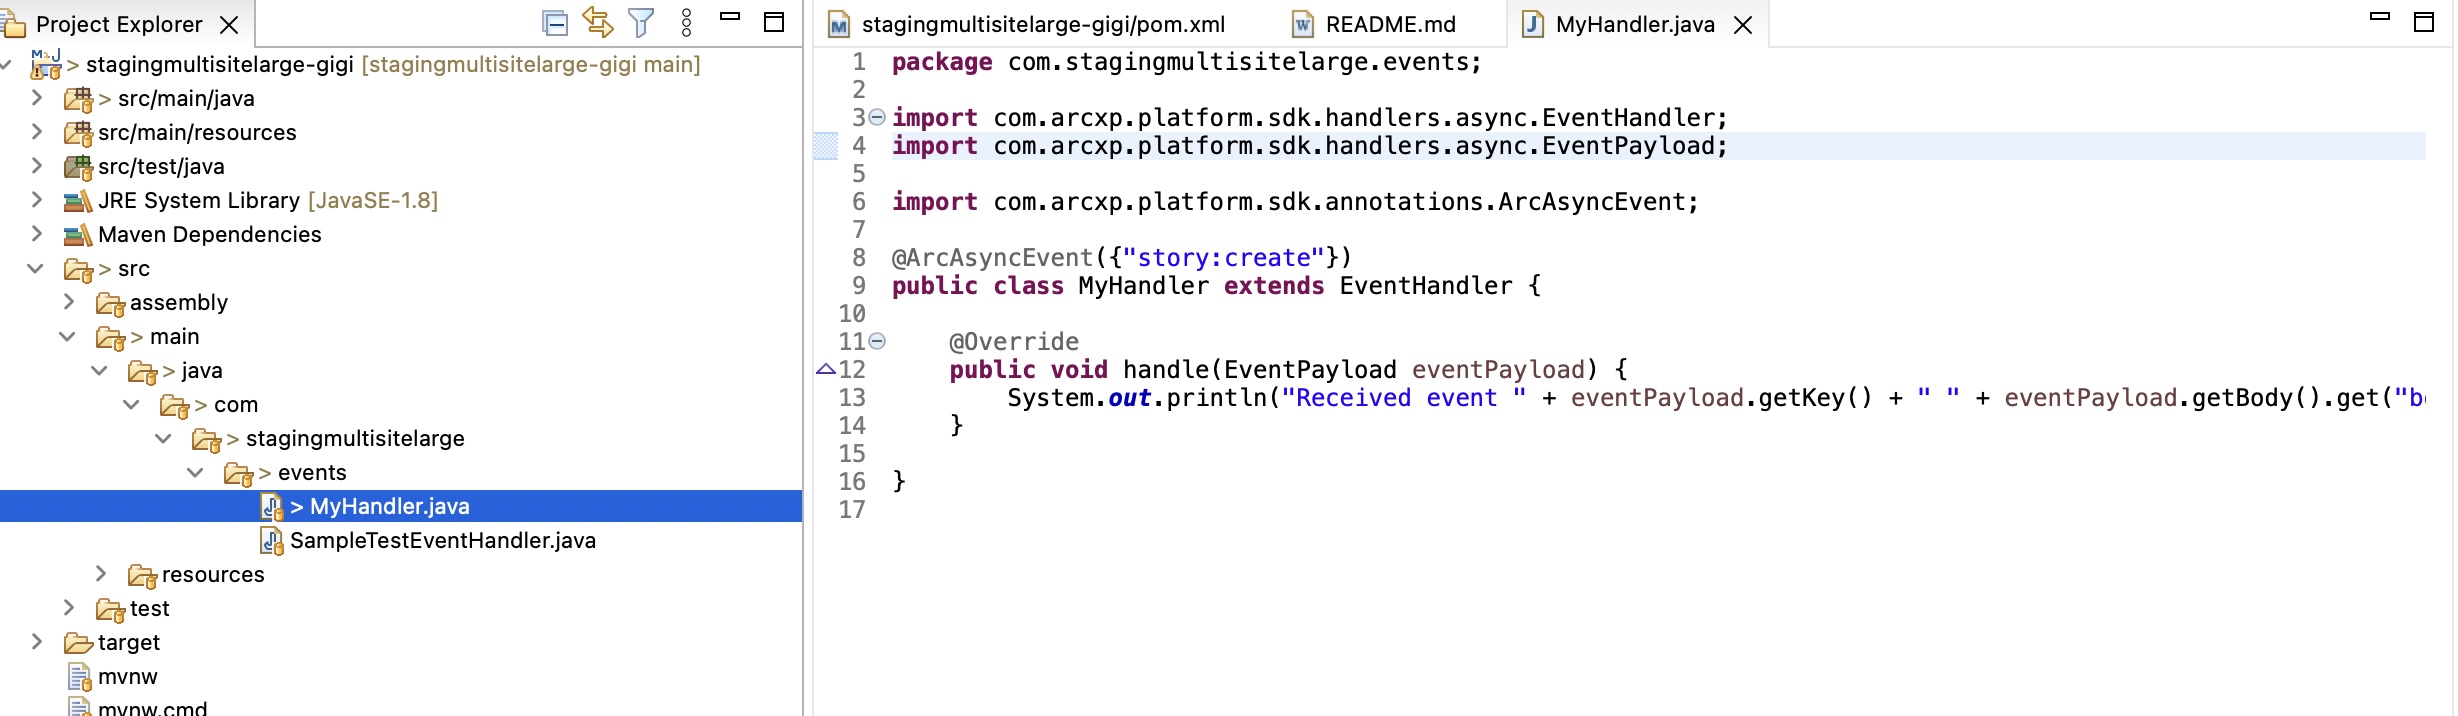
The code:
package com.stagingmultisitelarge.events;
import com.arcxp.platform.sdk.handlers.async.EventHandler;import com.arcxp.platform.sdk.handlers.async.EventPayload;import com.arcxp.platform.sdk.annotations.ArcAsyncEvent;
@ArcAsyncEvent({"story:create"})public class MyHandler extends EventHandler {
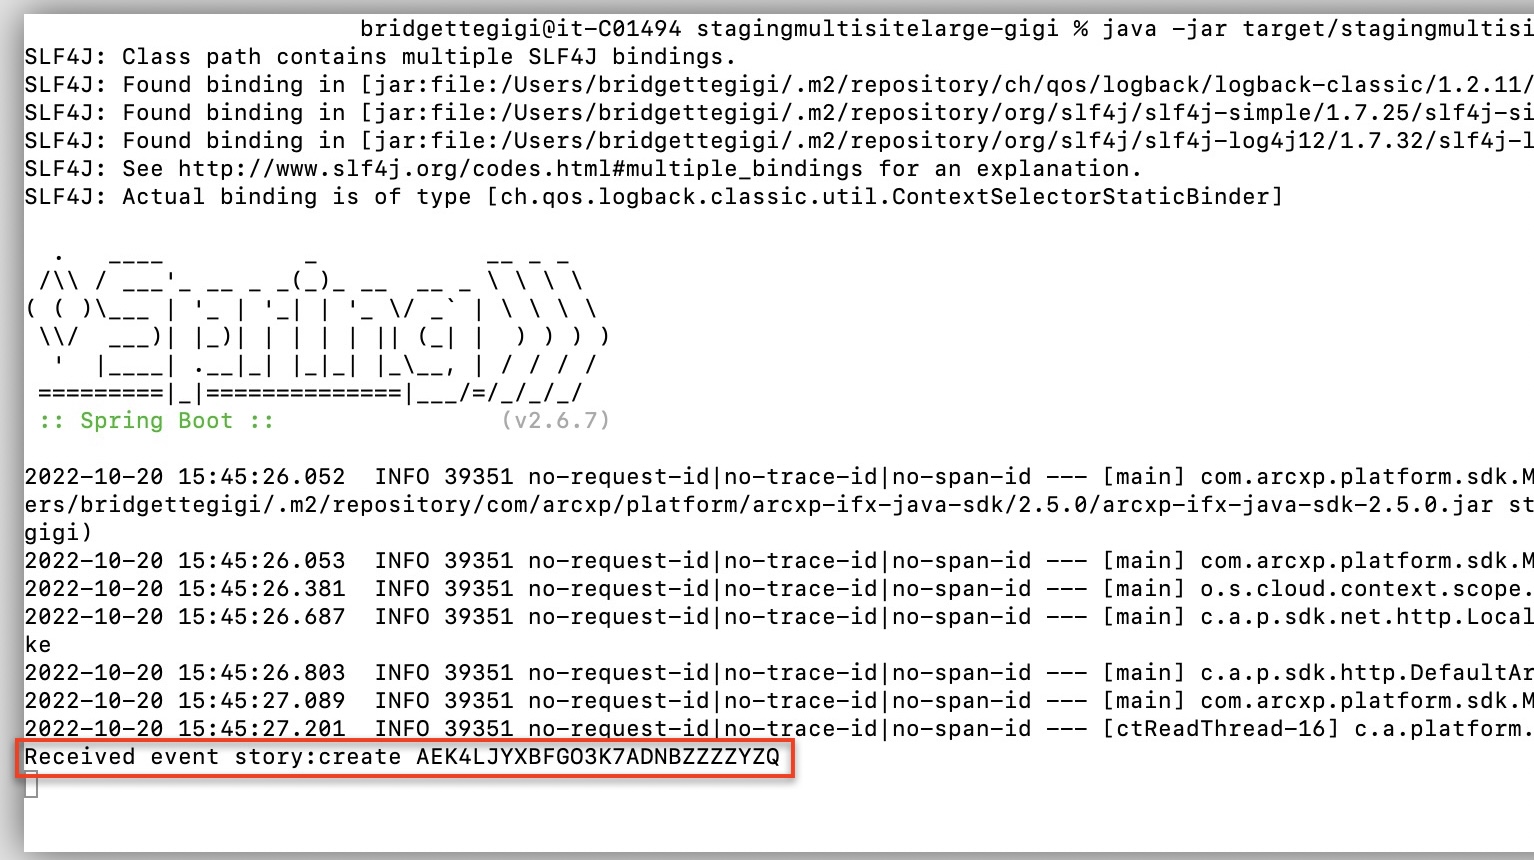
@Override public void handle(EventPayload eventPayload) { System.out.println("Received event " + eventPayload.getKey() + " " + eventPayload.getBody().get("body").get("id").asText()); }
}I have saved my file’s changes and now I need to build the integration and then run it so that it can receive events.
Build
In Terminal from my project’s main directory ~/git/stagingmultisitelarge-gigi, I will issue the command ./mvnw -s .mvn/wrapper/settings.xml clean package spring-boot:repackage install
Once I see BUILD SUCCESS I am ready to run the integration and receive events.
Run
With my successful build, I now see a jar file in my project’s target directory ~/git/stagingmultisitelarge-gigi/target/stagingmultisitelarge-gigi-1.3.0.jar
To run my integration, in Terminal I will execute the command java -jar target/stagingmultisitelarge-gigi-1.3.0.jar
We can now see my integration is running and waiting on some code to execute! Notice the cursor with no command prompt…
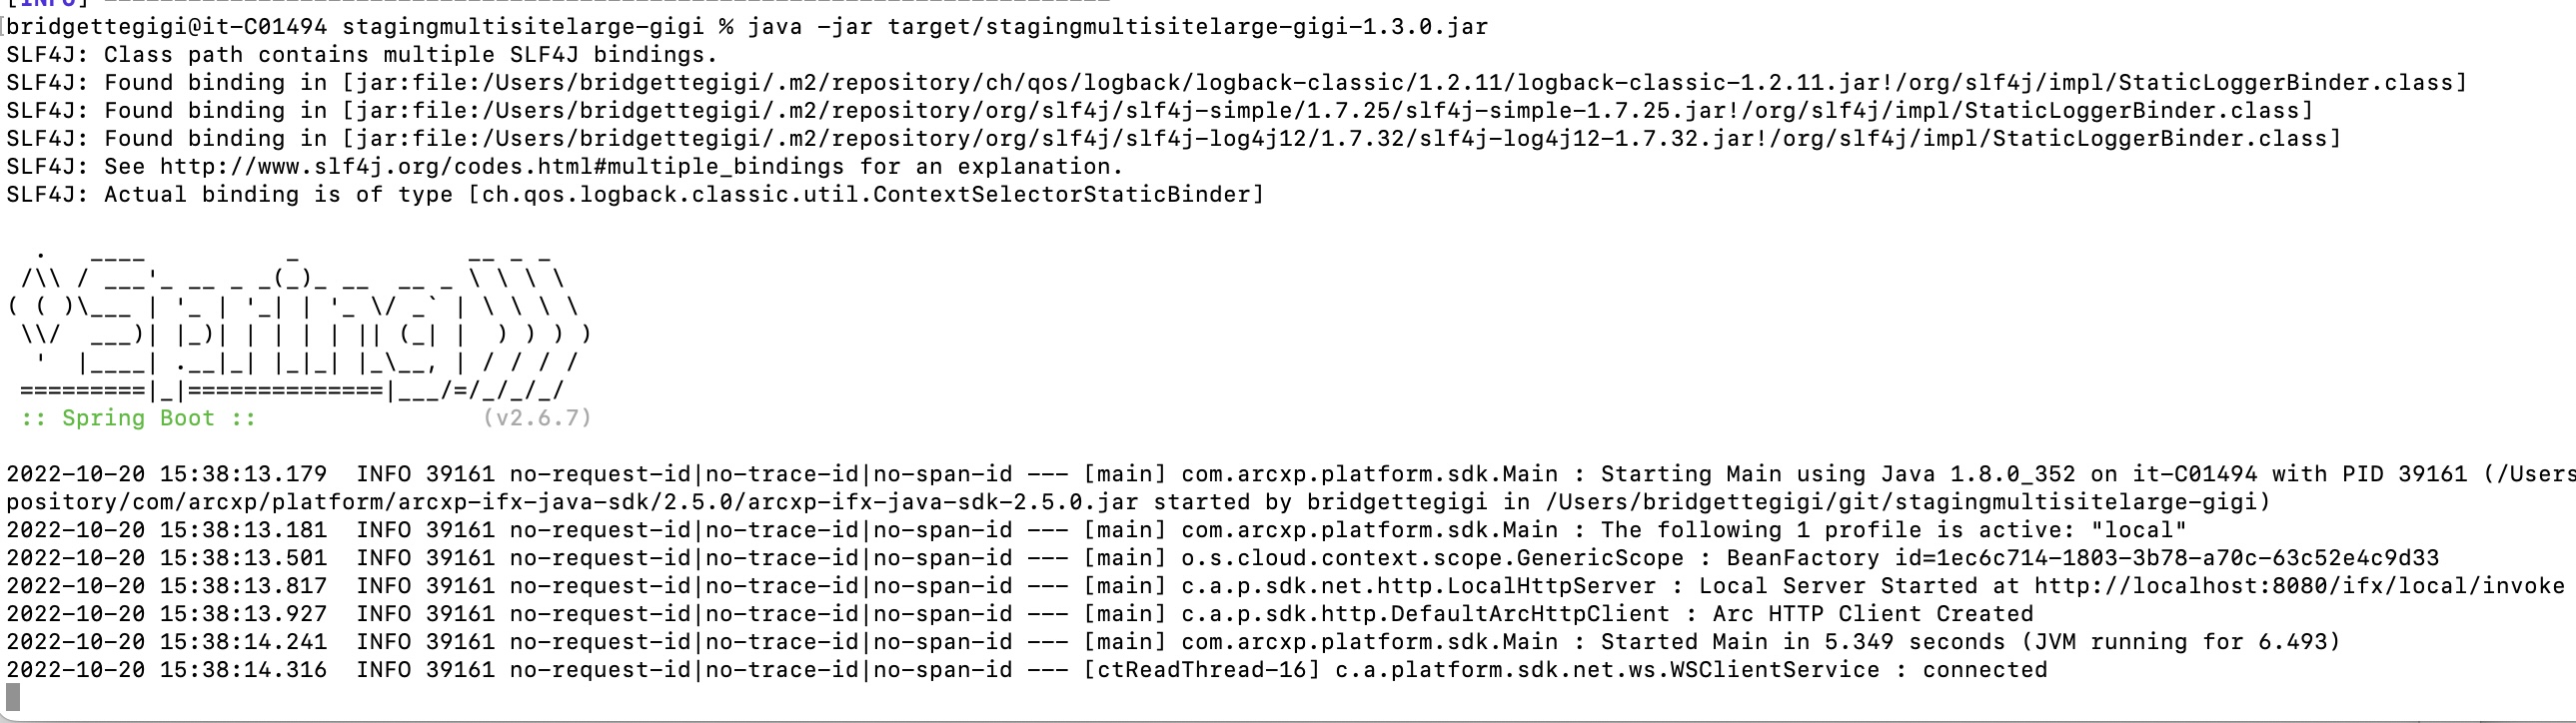
One important thing to notice is the Arc HTTP Client Created message. This is what we will need to simulate http requests!
Simulate an http request
Rather than triggering events from Sandbox, you can simulate an http request. Here’s the full guide, but I’ll go through it here too.
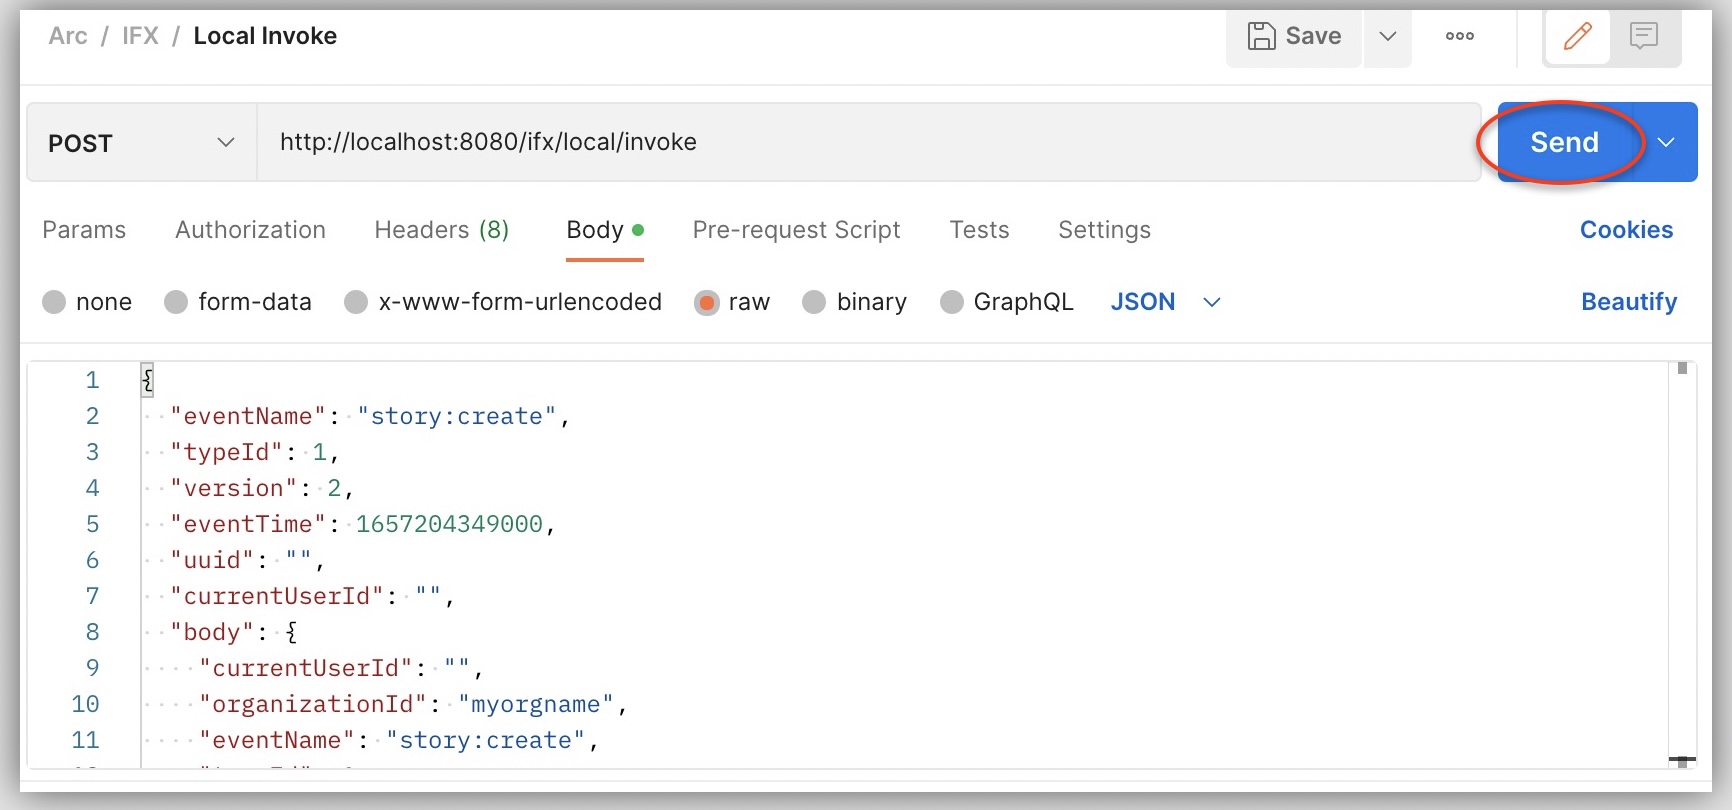
I will POST a request (using Postman) to my localhost http://localhost:8080/ifx/local/invoke using this payload:
{ "eventName": "story:create", "typeId": 1, "version": 2, "eventTime": 1657204349000, "uuid": "", "currentUserId": "", "body": { "currentUserId": "", "organizationId": "myorgname", "eventName": "story:create", "typeId": 1, "version": 2, "uuid": "", "body": { "id": "AEK4LJYXBFGO3K7ADNBZZZZYZQ", "date": "2022-07-07T22:09:32.896Z", "source": { "system": "composer", "name": "myorgname", "source_type": "staff" }, "distributor": { "name": "myorgname", "category": "staff", "subcategory": "" }, "canonical_website": "sample", "revision": { "user_id": "someone@test.com", "branch": "default", "revision_id": "CYXYWTQHVNGGLAKGT4G72CVH74" }, "headlines": { "tablet": "", "print": "", "meta_title": "", "native": "", "web": "", "mobile": "", "basic": "My Headline", "table": "" }, "created_date": "2022-07-07T22:09:32.880Z", "last_updated_date": "2022-07-07T22:09:32.880Z" } }}Once I POST this to the local URL I can see the message in my terminal!
What’s next?
Have a beer and cheers! You ran your first IFX integration.
Now you can start writing your custom code. Decide what events you want to listen to and create handlers to receive those events.
Be sure to thoroughly test your code before deploying to production, and remember to never commit secrets into Git!
Once you are satisfied with your integration’s code…
Build it locally, upload and deploy it to Sandbox.
Stop a running integration
In Terminal, use the hotkey Ctrl + C to stop the process. Once you do this you will need to issue the run command again. If you make code changes be sure to re-build and run the integration again.
Troubleshooting
I don’t see any dependencies showing.
Check your pom.xml file. It should be over 100 lines long. If it’s not, do a hard reset to get back to the initial commit: git reset --hard. You should now see the correct pom.xml.
The integration started but you see a message like c.a.platform.sdk.net.ws.WSClientService : disconnected with exit code 1002 additional info: Invalid status code received: 401 Status line: HTTP/1.1 401 Unauthorized.
This is OK and the integration can still simulate http requests but will not be able to connect to other Arc services.
If you need to connect to Arc services, check if the personal.access.token (1.0) or PERSONAL_ACCESS_TOKEN (2.0) is set properly in the secret-local.properties to make sure the token is still valid.
The integration can’t start and there is a message in the log like disconnected with exit code 1002 additional info: Invalid status code received: 404 Status line: HTTP/1.1 404 Not Found
Check if the app is set to identity, pim, or sales in the application-local.properties.
The changes you made aren’t reflected locally
Check if you have rebuilt your integration after your latest change. If not, stop your integration using CTRL + C then follow the instruction again under the Build and Run Your Integration section.
The Maven plugins can’t be found in POM
If you are using Eclipse and having this issue: Please navigate to your local maven repository .m2/repository/ and delete the plugin directory that reports a not found error, and then reload the Maven project. Please refer to this document to check if there are any solutions that can help you solve your issues.
You see a missing artifact in your pom.xml

Copy the settings.xml from your project into ~/.m2/ directory: cp ~/git/stagingmultisitelarge-gigi/.mvn/wrapper/settings.xml ~/.m2/
Next, Update the project in Eclipse — right click on the project → Maven → Update Project… Then click OK.
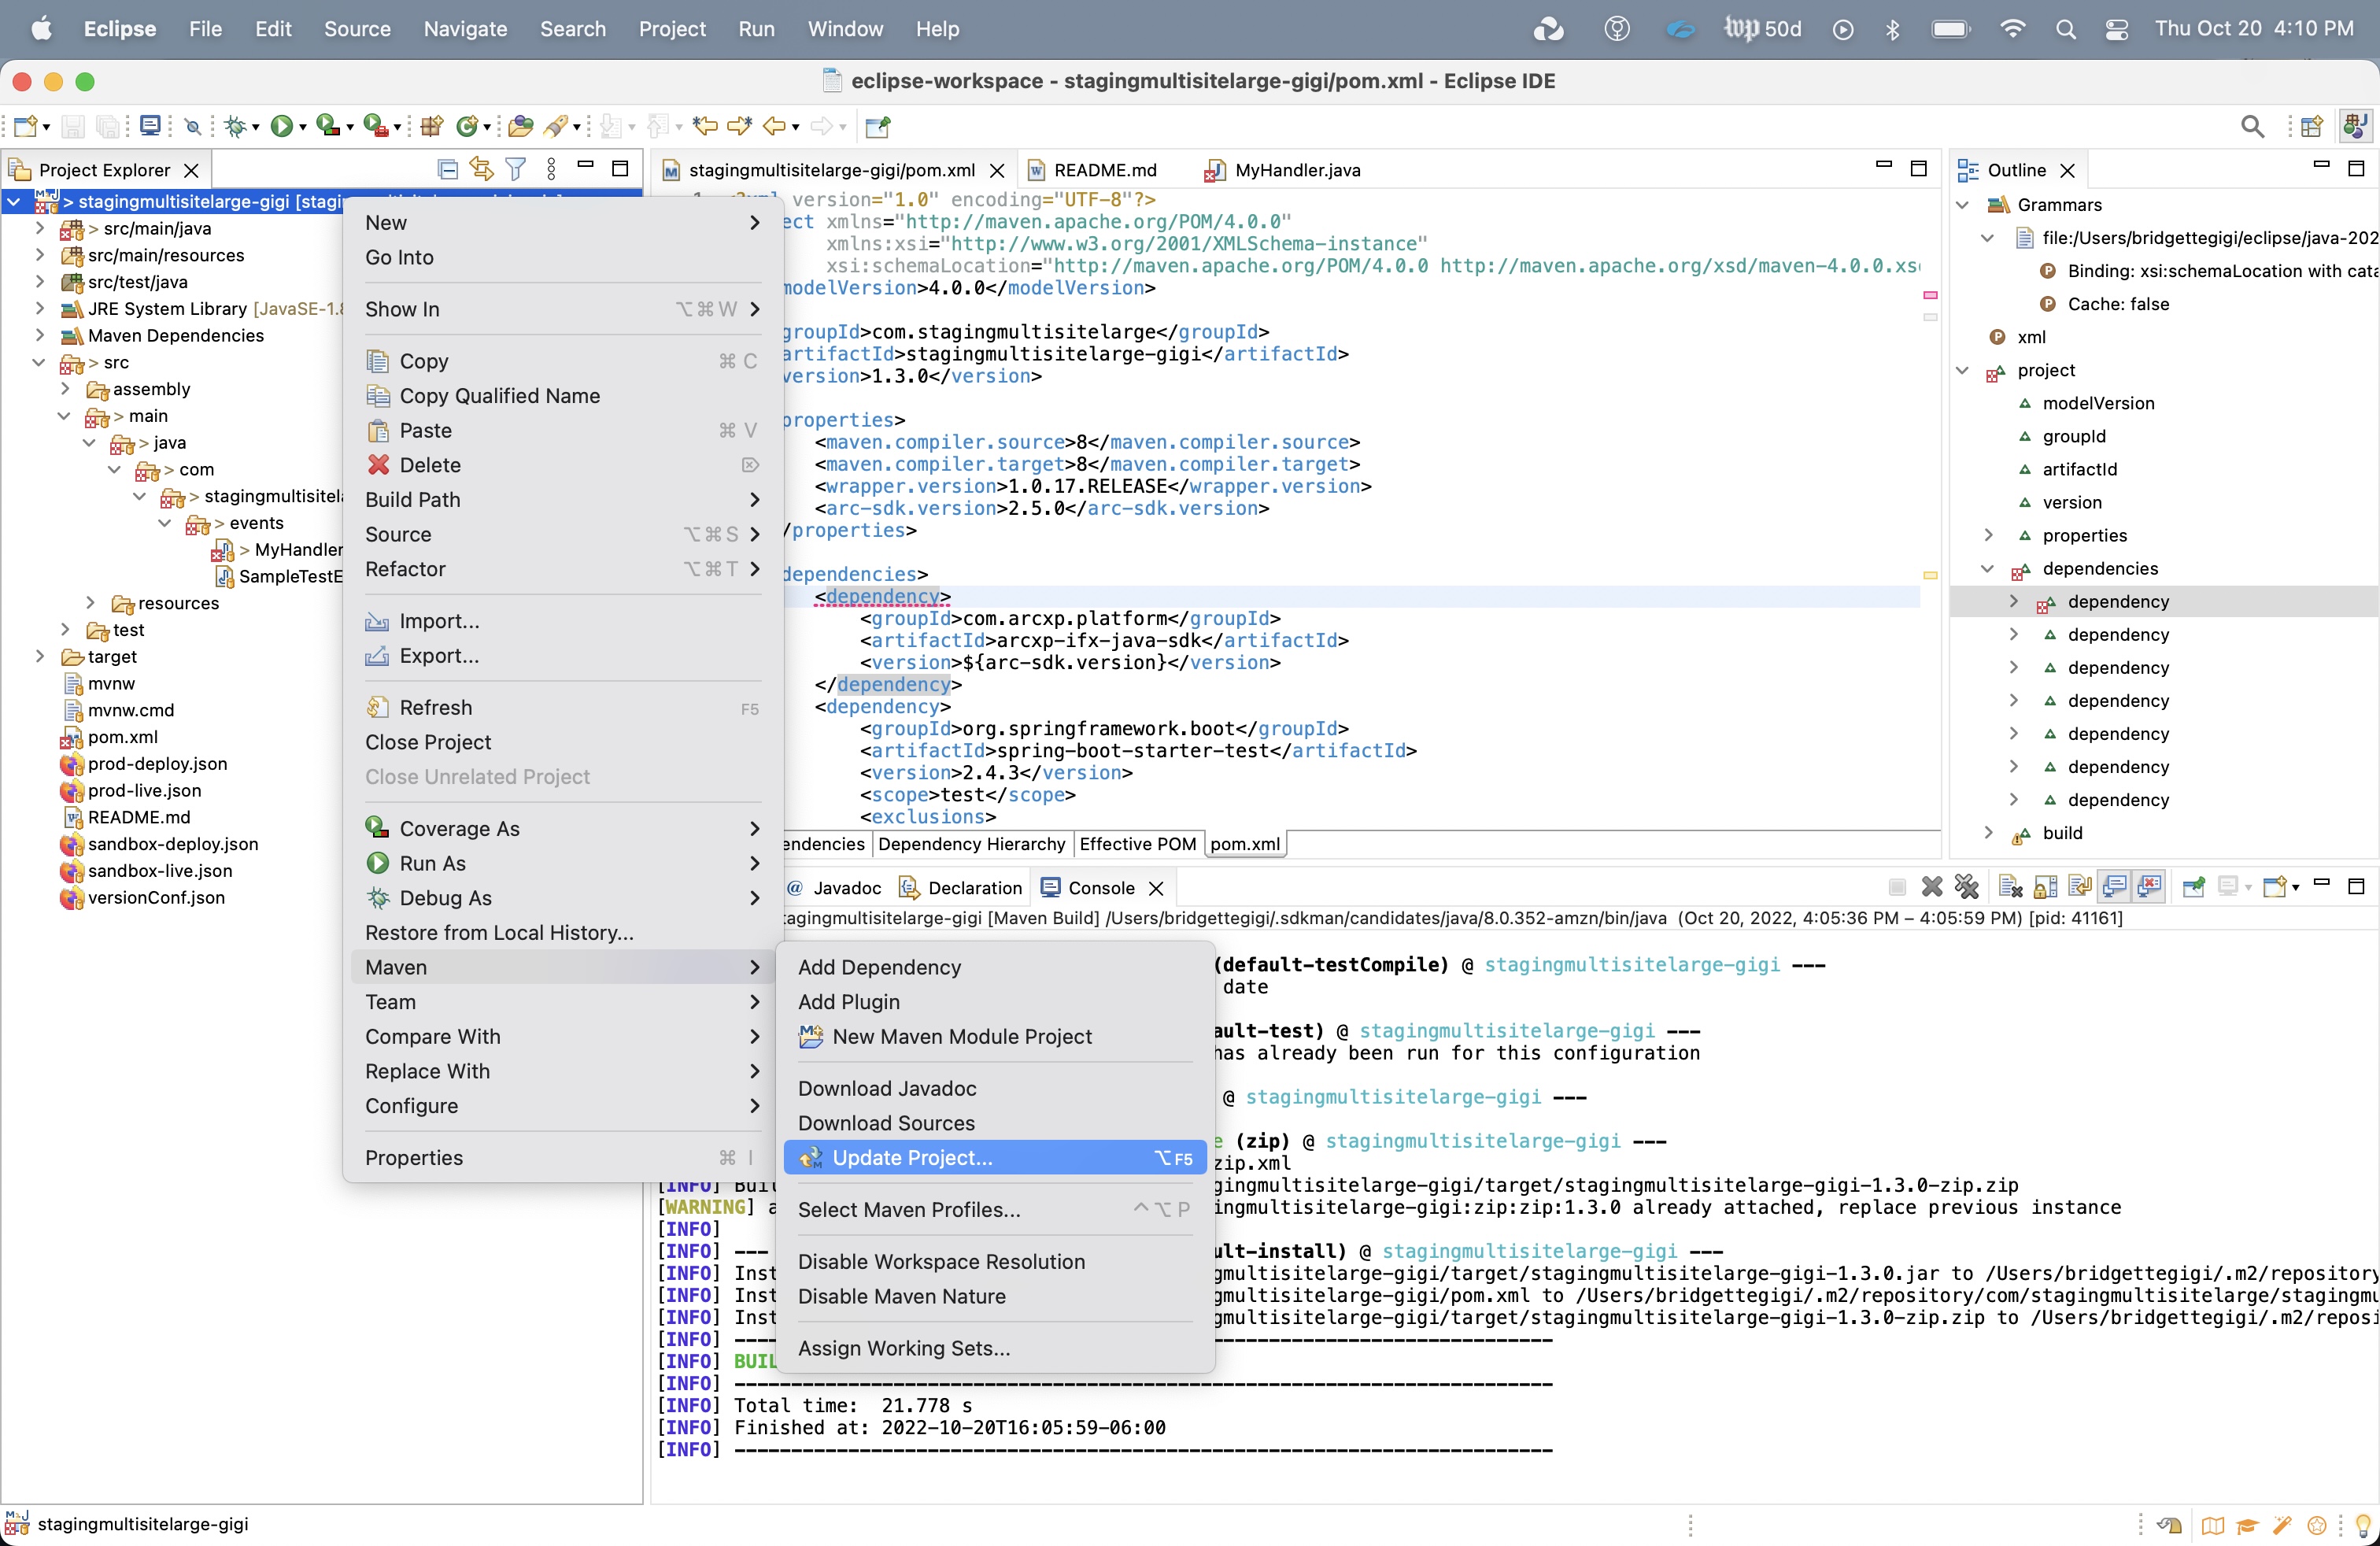
I can see now that my artifact is able to be found, and now I can build/run my project.